Hi Everyone! I hope that those of you that celebrate Thanksgiving had a great one, and that you are all having a good weekend so far! We had a wonderful Thanksgiving in New Jersey, which started off with the first snowfall of the season on Wednesday afternoon. The snow didn’t stick, but it was so beautiful as it started falling, and it was the perfect way to kick off the festive season! Since December is almost here, I wanted to share a fun DIY Advent Calendar idea with you, that you could easily whip up before December 1st! Getting an Advent calendar was always one of my favorite things about Christmas and I remember one year my parents brought me the most spectacular one from Austria; it wasn’t filled with chocolates, but with little toys, and it was pretty much the most exciting thing I had ever seen! This DIY calendar is so easy to make, and would make for a great gift for someone. You could stuff the little bags with candy and chocolate, gift cards, little accessories or anything else you can think of! I went for a black and red theme to embellish the kraft paper bags I made and I placed them all in a big basket that I added a big red bow to, but you could completely customize yours and decorate the bags however you like!
.

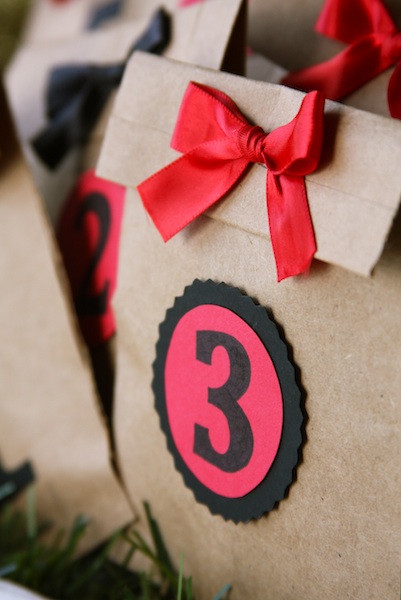
DIY ADVENT CALENDAR
.
YOU WILL NEED
Kraft paper (or kraft paper bags)
Pencil, ruler & Scissors
Glue stick or hot glue gun
Ribbon
Hole punch
Colored cardstock
Tissue paper, faux greenery or paper crinkle to fill basket
Little gifts to fill your bags with!
.

.
DIRECTIONS
First, find a big basket or decorative box that you can fill with your kraft paper bags. I added a big red bow to it (I attached it with hot glue) for a festive touch. Next, make your kraft paper bags (you can of course use ready made bags if you want to save time). To do this, you will need two kraft paper rectangles for each bag, one 4×5 inches big, and one 4×6 inches big. Place the smaller rectangle on top of the bigger rectangle, then attach them by glueing the two sides and bottom of the two. Fold over the flap on the top for your opening. Using a hole punch, make two holes at the top of the bag to loop your ribbon through, and make a small bow (after you’ve filled the bag with a gift!) Attach a number to the bag (I used a stencil to draw all the numbers on black and red cardstock) using a glue stick or hot glue. Place some tissue paper, paper crinkle or faux greenery inside the basket, then arrange the bags inside!
.

.

.
.

.

Happy Crafting, Everyone!


A lovely tradition! Love the idea of bags and numbers.