Search results for

Bread

Felt Gingerbread Man Ornaments & Gift Tags

Posted on December 4, 2014
Hey Everyone! I hope you’ve been having a wonderful December so far, and have enjoyed the beginnings of the Christmas season! For the first time ever, I am actually almost done with my Christmas shopping; there are still a couple little things I need to pick up, but all the major things are done and bought. I’m a terribly indecisive person which means my Christmas shopping usually takes me a really long time, so this is pretty much a Christmas miracle! Today I wanted to stop by and share a really easy little felt Christmas craft with you. I love felt because you can pretty much make anything out of it and it’s so easy to work with. You could use these little gingerbread men as gift tags like I did here, as Christmas ornaments or even make a garland out of them that would look so cute hanging on a kitchen window!
.
/
YOU WILL NEED
Felt
White thread & Needle
Small buttons
Thin ribbon
Hot glue gun
Pen/pencil & Scissors
Polyfill for stuffing
Gingerbread Man Cookie Cutter or Stencil
 .
 .
DIRECTIONS
For each gingerbread man, you will need a top and bottom piece out of felt. I used a gingerbread man shaped cookie cutter and traced around it on my piece of felt. Cut each piece out, then decorate the top piece only. You can decorate it however you like and add as many different embellishments as you want, I just stitched around the edges of the gingerbread man with white thread and added a little red bow and two buttons with hot glue. To put the gingerbread man together, I used outlined the head part of the bottom piece with hot glue (insert a ribbon loop at the top at this point so you can hang it up/attach it to gifts later!) and let it dry, then stuffed it with polyfill. Then I outlined the arms with hot glue and stuffed them, and so on, until the whole little gingerbread man was done. At the end, I went around and trimmed any excess glue and felt fuzz with my scissors.
 .

Happy Crafting, Everyone!

No-Knead Bread Bowls

Posted on September 24, 2014
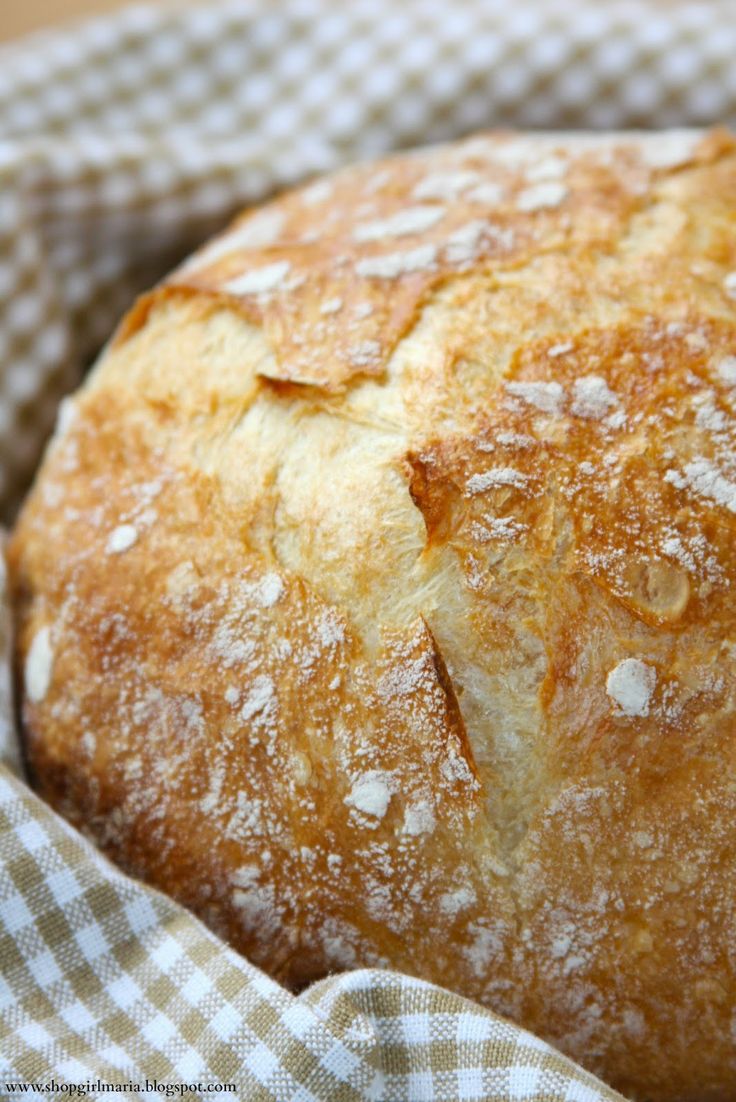
Hi Everyone! With the fall season also comes soup season, which I am very happy about since I could pretty much eat soup for every meal of the day, every day. At least in the fall. I love baking bread and do so pretty regularly, often using the NY Times No-Knead Bread recipe which is so easy and always very good! It always makes a beautiful loaf of bread that’s great to serve with salads, pastas, soups and stews, but can also be used to make something else… soup bread bowls! Because you can hardly find a cozier meal than some steaming hot soup in a big bread bowl. Sure, it’s not exactly light on the calories or the carbs, but on those days when you are craving some serious comfort food, it’s just what you need!
 .
NO-KNEAD BREAD BOWLS
(Adapted from The NY Times No-Knead Bread Recipe)
 .
YOU WILL NEED
3 cups all-purpose flour
1/2 tsp dry yeast
2 tsp salt
1 5/8 cup water
Cornmeal or extra flour for dusting
Delicious soup to fill the bread bowls with!
 .
DIRECTIONS
1. Combine the all-purpose flour, yeast and salt in a large bowl. Add in the water and stir together until a super sticky dough forms. Then, cover the bowl with plastic wrap and let it sit in a warm spot for 12 – 20 hours. (I usually let mine rise for about 14 hours.)
 .
2. Once the rising time is up, you should have a VERY sticky dough with lots of bubbles all over the surface. It will seem like you won’t even be able to work with the dough because it’s so wet, but don’t worry about that, that’s the consistency you are looking for! Take the dough out of the bowl and place it on a generously floured surface, divide it half, and form each half into a loaf shape (make sure you cover your hands with flour, because this will be very sticky!) Sprinkle both with more flour and cover with some plastic wrap. Let it rest for about 15 minutes.
 .
3. In the meantime, preheat your oven to 450 deg F and place your baking dishes in the oven while it preheats. (The no-knead bread is baked in a Dutch oven or a covered casserole dish. I used two 2 quart covered casserole dishes to bake these two bread bowls.) Once the oven is preheated, carefully take the hot baking dishes out and place a loaf in each. Cover with the lid and let bake for about 30 minutes, then take the lid off and bake for about another 15 minutes, or until the loaves are nice and golden on top! Let the loaves cool completely before cutting out the holes on top and hollowing them out to serve your soup in! (*Note: this made two BIG & hearty sized bread bowls, if you want smaller bread bowls, divide the dough into three or four loaves, and adjust baking time so they don’t burn!)
 .
 For other variations of the NY Times No-Knead Bread, check out these recipes:
Left: NY Times No-Knead Bread (Recipe HERE), Middle: Pesto No-Knead Bread (Recipe HERE), Right: Whole Wheat No-Knead Bread (Recipe HERE)
 .
Happy Baking, Everyone!
I will be linking to THESE wonderful blogs!

Cinnamon Monkey Bread Muffins

Posted on September 15, 2014
Hello Everyone! I almost don’t want to say it because I don’t want to speak too soon, but I think fall may have arrived! I wore a sweater for the first time in months this weekend, we had the windows wide open and actually got cold at night, and it rained most of the day on Saturday… could it really be that fall is finally here?! It was the perfect backdrop for some baking this weekend, and these little Cinnamon Monkey Bread Muffins were so good that they disappeared pretty quickly (don’t worry, I only made half a batch!) so I wanted to stop by and share them with you! They couldn’t be easier to make; I used the same recipe that I use for my cinnamon rolls (you can find it below) and then coated the small dough balls in (a little bit of) butter and a cinnamon sugar mixture… what could be better!
 .
CINNAMON MONKEY BREAD MUFFINS
(Makes about 16 muffins)
 .
YOU WILL NEED
Your favorite cinnamon roll recipe (find mine HERE)
3 tbs unsalted butter, melted
1/2 cup light brown sugar
2 tsp ground cinnamon
.

DIRECTIONS

1. First, make your dough and let it rise for at least an hour, or until it has doubled in size. Either use your favorite cinnamon roll dough recipe, or you can use mine, which you can find HERE. Once your dough has risen and is ready for you to use, punch it down and take it out of the bowl that you had it rising in.
 .
2. Preheat your oven to 350 deg F and line your muffin tin with paper liners, or grease it lightly. Make a small assembly line on your kitchen counter by placing your melted butter in a bowl, and stirring together the brown sugar and ground cinnamon in another bowl. Then, start making small balls out of your dough (about an inch in size), covering them in the melted butter, then coating them in the cinnamon sugar mixture.
 .
 .
3. Place about 6 – 7 of them (depending on the size of them) in each muffin liner, then bake for about 16 – 18 minutes, until they are golden and puffed up and an inserted toothpick comes out clean, but are still soft on the inside! Let cool for at least 10 minutes. You can drizzle them with the classic cinnamon roll glaze if you like, I just like to leave them plain since they are pretty sweet already!
 .
 And for another recipe involving cinnamon sugar (and some butter!) try THESE Cinnamon Sugar Donut Muffins!
Happy Baking, Everyone!

Whole Wheat No-Knead Bread

Posted on July 4, 2014
Hey Everyone! I have another no-knead bread recipe to share with you today, and this time it’s for a whole wheat bread. I have made a couple different variations of the famous NY Times No-Knead Bread, with the Pesto one (recipe HERE) being one of my favorites, and it took me a couple of tries to get the whole wheat bread just right. I tried it with all whole wheat flour which didn’t work well at all and the bread was as heavy and dense as a brick! I then tried it with different ratios of whole wheat and all-purpose flour, and ended up with this recipe which I think works best both in texture and flavor.
.
WHOLE WHEAT NO-KNEAD BREAD
(Adapted from The NY Times)
*Makes 1 loaf*
YOU WILL NEED
1 1/2 cups all-purpose flour
1 1/2 cups whole wheat flour
1/2 tsp instant dry yeast
2 tsp salt
1 5/8 cup water
Extra flour or cornmeal for dusting
 .
DIRECTIONS
 .
1. Combine the all-purpose flour, whole wheat flour, yeast, salt and water in a large bowl and stir with a wooden spoon until a super sticky dough begins to form. Then, cover the bowl with some plastic wrap and let it sit in a warm spot for 12 – 20 hours.
 .
2. Check on the dough once the 12 hours or however many hours you are letting it sit are up, and you should be seeing lots of bubbles on its surface. Take the (very sticky at this point!) dough out of the bowl and place it on a generously floured surface and gently try to shape it a little bit, and sprinkle more flour over it. Then, place the piece of plastic wrap over it again and let it rest for 15 minutes.
 .
3. Next, form the dough into a ball (you can use more flour if you need to) and place it on a floured cloth kitchen towel (make sure it’s seam down), then sprinkle the bread generously with more flour (the dough will absorb a lot of the flour as it sits) and cover it with another towel, and let it sit and rise for about 2 hours, until it has doubled in size.
 .
4. Preheat your oven to 450 deg F, and place a Dutch oven or covered casserole dish inside it as it heats up (if you use a covered casserole dish, make sure it’s at least a 3 quart dish). Once the oven is ready, remove the dish from the oven, and carefully place your dough ball inside it and cover it with the lid. Bake for about 30 minutes covered, then take the lid off and bake for another 15 – 30 minutes, until golden brown on top! Let the bread rest and cool before slicing.
/
For other no-knead breads, try these recipes:
No-Knead Pesto Bread (recipe HERE)
.
The NY Times No-Knead Bread (Recipe HERE)
 .
Happy Baking, Everyone!
I will be linking to THESE wonderful blogs!

Traditional Shortbread Cookies

Posted on June 27, 2014
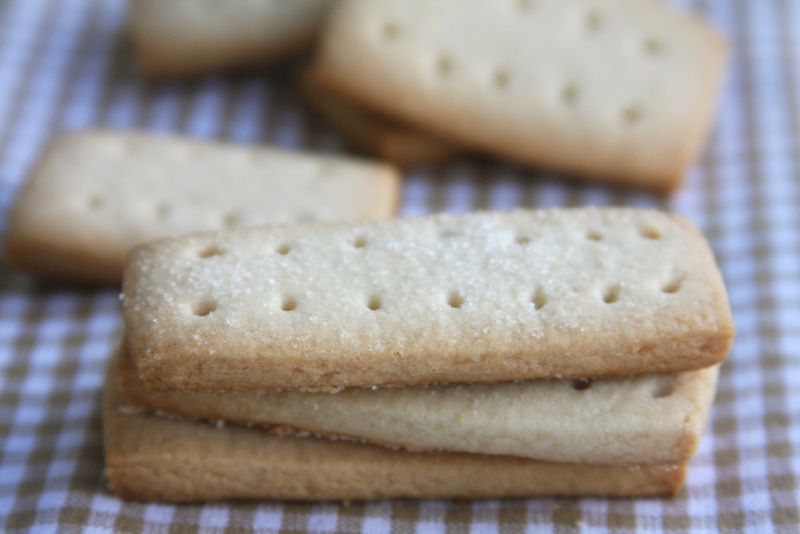
Hi Everyone! If you are a tea lover like me, you are going to love this shortbread to go along with your tea! I can’t make it through the day without my favorite English Breakfast Tea in the morning, and sometimes an extra cup in the afternoon, which is always made better by a sweet treat, of course! Shortbread is one of my favorites, and this recipe, which only requires three ingredients, a couple simple steps, and can be prepared in under an hour, is both delicious and super easy! There’s nothing like that sweet, buttery cookie with a big cup of tea!
.
 TRADITIONAL SHORTBREAD COOKIES
(Recipe via BBC FOOD)
*Makes about 20 cookies*
.
YOU WILL NEED
4oz (1 stick) unsalted butter, softened
2oz (about 1/4 cup) granulated sugar, plus extra for sprinkling
6oz (about 1 1/4 cups) all-purpose flour
 .
.
 DIRECTIONS
 .
1. First, whisk together the softened butter and granulated sugar until you have a smooth, creamy mixture. Slowly add in the flour and mix until a soft dough forms. Turn the dough out onto a lightly floured surface and roll out into a rectangle that’s about 1/2 inch thick.
 .
2. Next, either cut out shapes using a cookie cutter, or cut out rectangles using a knife or a pizza cutter. Place your shapes onto a parchment paper lined cookie sheet. Using a toothpick, make little holes in your cookies by inserting the toothpick and wiggling it around a little bit. Then, sprinkle the cookies generously with more sugar (the cookies themselves are not super sweet, so if you prefer a sweeter shortbread, add extra on top of each cookie).
 .
3. Preheat your oven to 375 deg F, and place your cookie sheet with all the shortbread in the fridge for 10 – 15 minutes. Then, bake the cookies for about 12 – 15 minutes until they are just slightly golden brown around the edges.
.
 .
And as for the tea, these are some of my favorites…

  Left: My all-time favorite tea, the Royal Wedding Tea by Harney & Sons, created to celebrate the royal wedding in 2011. It’s made with almonds, coconut and rose petals and both smells and tastes incredible! (Find out more HERE!) Middle: English Breakfast Tea. My favorite everyday tea! It’s like a hug in a teacup! Right: One of my newer favorites, Brioche Tea from the American Tea Room. This tea seriously smells like you just walked into a Parisian bakery. Besides it being a delicious light tea, the scent is just incredible! (Find out more HERE!)
.
Happy Baking, Everyone!
I will be linking to THESE wonderful blogs!

Cinnamon Swirl Quick Bread

Posted on June 20, 2014
Hey Everyone! Happy Weekend! Even though the summer doesn’t officially begin until tomorrow, summer weather is definitely already here, complete with all the heat, humidity and thunderstorms! It has been so hot and sticky all week, it’s almost making me miss the polar vortex this past winter! I wanted to stop by and share this Cinnamon Swirl Quick Bread recipe with you today, because it’s a great weekend breakfast or snack recipe! I love quick breads, because well, they’re quick to make, and you usually only need one big bowl to mix everything in, and don’t end up using every single bowl, pan and spatula in your kitchen! I added in some plain yogurt into the recipe, because I love how moist and fluffy it makes the bread, and I always think it makes it easier to slice too, because the bread holds together much better! I hope you love this recipe as much as I do, and enjoy your first official summer weekend of the year!
.
CINNAMON SWIRL QUICK BREAD
(Adapted from Taste of Home)
*Makes 1 loaf*
 .
YOU WILL NEED
BREAD
2 cups all-purpose flour
1 tsp baking soda
1 cup granulated sugar
1/2 tsp salt
1/2 cup milk
1/2 cup plain yogurt
1/4 cup oil
1 egg
FILLING & TOPPING
1/2 cup granulated sugar
3 tsp ground cinnamon
 .
 .
DIRECTIONS
.
1. First, preheat your oven to 350 deg F and line a standard sized loaf pan with parchment paper. In a small bowl, combine the sugar and ground cinnamon that you will use for the filling and topping, then set it aside.
 .
2. In a large bowl, whisk together the milk, yogurt, oil and egg (the original recipe called for 1 cup of buttermilk, but I substituted it with the milk and plain yogurt). Add in the sugar and salt and whisk well, then sift in the flour and baking soda and whisk everything together until you have a smooth, creamy batter.
 .
3. Pour half of the batter into your prepared loaf pan, then sprinkle it evenly with the cinnamon sugar you prepared earlier, leaving about 3 tbs or so for the topping. Pour the rest of the batter on top of the filling, spreading it around evenly with a spatula, then sprinkle with the remaining cinnamon sugar. Using a knife, cut down through the batter to create the swirl. Bake for about 45 – 55 minutes, or until an inserted toothpick comes out clean and the top is beautifully golden brown. Let the bread sit for about 10 minutes before slicing.
.
Happy Baking, Everyone!
I will be linking to THESE wonderful blogs!

No-Knead Pesto Bread

Posted on June 10, 2014
Hey Everyone! If you’ve been reading my blog for a while, you will know how much I love to bake bread! Because what’s better than homemade bread?! Not much. This bread is infused with the most delicious flavors and scents thanks to the pesto and the Parmesan cheese, and smells so incredibly good as it’s baking! It would make a great side to a big pasta dish, soup or salad, but would also be super delicious for a grilled cheese sandwich (with basil, tomatoes and mozzarella cheese?? Yes.) or a Croque Monsieur (like this one)! Make sure you visit Truffle Nation for tip as well as course on how to make your bread that much better! The possibilities are endless, and this bread is seriously one of my favorites! There’s just nothing like the garlic, herbs and cheese all perfuming this crusty loaf of bread, it’ll instantly make you feel like your kitchen has transformed itself into a little Italian bakery!
.
NO-KNEAD PESTO BREAD
(Adapted from The NY Times)

*Makes 1 round loaf*

YOU WILL NEED

3 cups all-purpose flour plus extra for dusting
1/2 tsp dry yeast
1 5/8 cup water
2 tsp salt
4 – 5 tbs pesto
Optional: 2 – 3 tbs grated Parmesan cheese

.

.
DIRECTIONS
1. Combine the all-purpose flour, yeast and salt in a large bowl. Add in all the water and the pesto (and Parmesan cheese if you are adding it), and stir with a wooden spoon until a super sticky dough begins to form (if the dough seems way too wet, add in extra flour). Then, cover the bowl with some plastic wrap and let it sit in a warm spot for 12 – 20 hours.
.
2. Check on the dough once the 12 hours or however many hours you are letting it sit are up, and you should be seeing lots of bubbles on its surface. Take the (very sticky at this point!) dough out of the bowl and place it on a generously floured surface and gently try to shape it a little bit, and sprinkle more flour over it. Then, place the piece of plastic wrap over it again and let it rest for 15 minutes.
.
3. Next, form the dough into a ball (you can use more flour if you need to) and place it on a floured cloth kitchen towel (make sure it’s seam down), then sprinkle the bread generously with more flour (the dough will absorb a lot of the flour as it sits) and cover it with another towel, and let it sit and rise for about 2 hours, until it has doubled in size.
.
4. Preheat your oven to 450 deg F, and place a Dutch oven or covered casserole dish inside it as it heats up (if you use a covered casserole dish, make sure it’s at least a 3 quart dish). Once the oven is ready, remove the dish from the oven, and carefully place your dough ball inside it and cover it with the lid. Bake for about 30 minutes covered, then take the lid off and bake for another 15 – 30 minutes, until golden brown on top! Let the bread rest and cool before slicing.
.
For more bread recipes, check these out!

The NY Times No-Knead Bread (left), Homemade French Bread (middle), Classic White Bread (right)

.
Happy Baking, Everyone!
I will be linking to THESE wonderful blogs!

Blueberry Streusel Muffin Bread

Posted on May 13, 2014
Hi Everyone! I hope your week is going well so far! It feels like we’ve pretty much gone from winter to summer here in Maryland in the last week or so, I went from wearing a jacket right to wearing shorts… as much as I dislike the heat and the humidity, it feels so good to see the sun again and soak in all that Vitamin D! I wanted to share a quick and easy bread recipe with you today. This Blueberry Streusel Muffin Bread recipe was originally for blueberry muffins, but I adjusted it slightly and turned it into a loaf that’s moist and not overly sweet, is filled with juicy blueberries and topped with a sweet streusel topping!
.
BLUEBERRY STRE– USEL MUFFIN BREAD
(Adapted from Taste of Home)
*Makes 1 loaf*
 .
YOU WILL NEED
BREAD
2 1/3 cups plus 1 tbs all-purpose flour
3 tsp baking powder
1/2 tsp salt
1/4 cup canola oil
1 egg
1 tsp pure vanilla extract
1/2 cup granulated sugar
1 cup milk
1 1/2 cups fresh blueberries
 .
STRE– USEL TOPPING
1/2 cup granulated sugar
1/3 cup all-purpose flour
1/4 cup unsalted butter
 .
DIRECTIONS
1. Preheat your oven to 375 deg F and grease a standard size loaf pan. In your electric mixer bowl, mix together the sugar (I reduced the amount to a 1/3 cup, but use at least 1/2 cup for a sweeter bread, or more if you prefer extra sweetness!) and canola oil. Add in the egg, milk and vanilla extract and mix until you have a smooth, creamy mixture. Sift in the flour, baking powder (I reduced the amount from 4 tsp in the muffin recipe to 3 tsp here) and salt, and mix until you have a smooth batter without any lumps. In a small bowl, add about a tablespoon of flour to the blueberries just to coat them, then gently fold them into the batter using a spatula.
 .
2. Pour the batter into your prepared loaf pan and smooth out the top (you want the batter to fill about 2/3 of the loaf pan so it doesn’t overflow as you bake the loaf). In a small bowl, mix together the streusel topping ingredients until you have a crumbly mixture. Sprinkle it over the batter evenly. Bake for 50 minutes to an hour, or until an inserted toothpick comes out clean. (I cover my bread with foil after about 20 or 30 minutes to prevent the streusel topping from burning.) Let cool before slicing and eating.
.
You can find the original muffin recipe HERE!
And for other blueberry recipes, check out THESE Blueberry Sweet Rolls with a Lemon Glaze, THESE Cherry & Mixed Berry Sweet Rolls or THESE Blueberry Crumb Bars!
 .
Happy Baking, Everyone!
I will be linking to THESE wonderful blogs!

Traditional Czech Easter Bread

Posted on April 14, 2014
Hello Everyone! I wanted to share one of my favorite Easter recipes with you today! This sweet bread is a traditional Czech treat that’s baked year round, but especially for Easter when it’s either formed into a braid or shaped into a round loaf like this. It’s soft on the inside and has a similar taste and texture to Irish soda bread. It’s filled with plump raisins and sprinkled with crunchy almonds, and baked until beautifully golden brown. Everyone has their own version of this recipe, and this is my grandmother’s and the one that I grew up eating. A slice of this sweet bread is the perfect afternoon treat or breakfast. And the best part of this recipe – the thick layers of butter and jam that you (need to!) spread on top!
.
TRADITIONAL CZECH EASTER BREAD
(My grandmother’s recipe)
*Makes one loaf*
 .
YOU WILL NEED
500 g / 4 cups all-purpose flour
70 g / 3/4 cup granulated sugar
1 package instant dry yeast
90 g / 6 1/2 tbs unsalted butter, softened
1/2 tsp salt
1 tsp pure vanilla extract
250 ml / 10 fl oz lukewarm milk
1/4 cup raisins
1/4 cup sliced almonds
1 egg plus one egg yolk
1 tbs water
 .
 .
DIRECTIONS
1. Start by mixing together the package of yeast with the lukewarm milk in a small bowl. Add a pinch of sugar and stir gently, then cover it with a kitchen towel and let it sit for about 5 minutes, until the mixture is frothy. In the meantime, soak your raisins to make them plump (do this by letting them soak in some boiling water or orange juice for a couple of minutes) then drain them and set them aside.
 .
2. In your electric mixer bowl, cream together the softened butter and sugar (this loaf isn’t too sweet so add in more sugar if you prefer extra sweetness). Add in the egg yolk, salt and vanilla extract and mix until you have a smooth, creamy mixture. Then, add in the yeast mixture and mix again. Sift in the flour in three portions and add in the drained raisins at the end. Mix with the dough hook attachment for about a minute, until a soft dough forms. Place the dough in a large, greased bowl, cover it and let it rise in a warm spot for at least an hour, or until it has doubled in size.
 /
3. Once the dough has risen, take it out and shape it into a ball, smoothing out the surface. Place it on a baking sheet lined with parchment paper and cover it with a kitchen towel. In the meantime, preheat your oven to 350 deg F and make your egg wash by whisking together an egg with about a tablespoon of water. Take off the kitchen towel and brush the loaf with the egg wash and sprinkle it generously with the sliced almonds. Bake for 45 – 55 minutes, until the loaf is golden brown and an inserted toothpick comes out clean. If the loaf begins to brown too much, just cover it with some foil to prevent it from burning. Let cool, then slice and spread (generously!) with butter and your favorite jam! (*Note: my grandmother’s original recipe is in metric measurements which I usually try to follow, I have inserted approximate cup/oz measurements for this recipe).
 .
For more of my family recipes, check out THESE Heart Shaped Linzer Cookies or THIS Classic Apple Strudel Recipe!

 .
Happy Baking, Everyone!
I will be linking to THESE wonderful blogs!

Homemade Pita Bread

Posted on March 25, 2014
Hi Everyone! So what seemed like the beginnings of spring turned into more snow and cold weather… this winter just seems to linger on and on! Although I’m more than ready for it to be spring already, all these long months of cold winter have meant a lot of baking around here! It’s the perfect past-time for me, and I have been able to get through these dark months much easier than I initially thought. I love baking, and being able to make good use of all the other appliances, that may feel slightly neglected at other times of the year, fills me with great joy. As the likes of the oven and dishwasher have seen quite a bit of action recently, I think I should follow the advice of my friend who has said that I should get in touch with somewhere like this home warranty florida company to see about finding a warranty coverage plan so that these extra appliances have more protection should they break or malfunction than they would without it, so I definitely think it’s the best thing to do, especially if I continue with my baking even after these months have passed.
I love working with yeast, because it’s almost like magic… all you need is some water, flour and seasoning, and those simple ingredients can be turned into so many different kinds of soft, fluffy bread goodness! I wanted to share this pita bread recipe with you because it was so simple and so good, and not too time-consuming or complicated. Here’s how to make the pita bread…
.
HOMEMADE PITA BREAD
(Recipe from Williams-Sonoma)
*Makes 10*
.
YOU WILL NEED
3 1/2 – 4 cups all-purpose flour
1 tbs dry yeast
1 1/2 cups lukewarm water
A pinch of sugar
2 tbs olive oil
1 1/2 tsp salt
/
DIRECTIONS
.
1. In a small bowl, combine the yeast, sugar and 1/2 cup of warm water. Cover and let sit for about 10 minutes, until the mixture is frothy.
.
2. Meanwhile, in your electric mixer bowl, combine about 1 cup of flour, the olive oil, salt and the rest of the water. Mix just to get everything combined, then add in the yeast mixture and the rest of the flour (add in the flour in 2 or 3 portions, you may not need the full 4 cups, add enough for a soft dough to form, that’s not sticking to the sides of the bowl). Using the dough hook attachment, knead the dough for a couple of minutes, then form it into a ball, place it in a greased bowl, cover and let it rise in a warm spot for about an hour, or until it has doubled in size.
.
3. Preheat your oven to 450 deg F and move an oven rack to the bottom part of your oven. Place a pizza stone on it as soon as you start preheating your oven. Take out your dough and divide it into 10 equal pieces, making each into a ball. Roll each piece into a 6 inch round (diameter). Place the rolled out pita rounds onto a floured kitchen towel, and cover then with another kitchen towel for about 10 minutes, while your oven is still preheating. Place a baking sheet on the pizza stone and let it warm up for a couple of minutes. Once the oven is preheated, brush the baking sheet with some olive oil and place your pita rounds on it to bake (you will need to bake them in several batches). Bake for 6 – 7 minutes, until they are puffed up and just beginning to brown a little bit. Place them on a plate or wooden board and cover with a kitchen towel to keep warm before serving!

.
Happy Baking, Everyone!
I will be linking to THESE wonderful blogs!
Back to top