Homemade French Bread

Posted on January 3, 2014
Hi Everybody! I hope your new year has been off to a good start! After all the holiday cooking, baking and eating these past couple of weeks, I am so ready for some simple and clean food this month. I always feel like January is when winter gets really dark and cold, and by February it feels like it has lasted forever. The other night, I wanted to make a quick, light but still comforting soup, so I made THIS Potato Leek soup (which was delicious!) and I baked this French bread to go along with it. The original recipe is for baguettes, but these loaves definitely have more of a French bread texture, they don’t have a hard crust, but are so incredibly soft and fluffy on the inside (they were still very soft the following day too)! I turned one of the loaves into croutons (just cube the loaf, dry out the cubed bread in the oven on low heat for ten minutes, then finish them off on the stove in a buttered pan until they are golden brown) to serve with the soup, and they turned out great!
.
HOMEMADE FRENCH BREAD
(Recipe from The Cooking Channel)
*Makes 2 Loaves*
 .
YOU WILL NEED
1/2 cup warm water
2 tbs honey
2 packages instant dry yeast
3 1/2 – 4 cups all-purpose flour
2 tsp salt
Additional 1/2 cup – 1 cup warm water
Cornmeal for dusting
 .
DIRECTIONS
 .
1. In a small bowl, combine 1/2 cup of warm water, the honey and all the yeast and quickly stir to get the honey mixed in, then cover the bowl and let it stand for about 5 minutes, until the mixture is frothy.

.

2. Next, in your electric mixer bowl, combine about 3 1/2 cups of flour with all the salt. Pour in the yeast mixture and mix using the dough hook attachment on your mixer. Measure out 1 cup of warm water and begin pouring some in with the mixer running. Add enough water for a soft dough to form (I added just under 3/4 cup). If the dough is too sticky, just add in some more flour. Knead in your mixer for 6 minutes. Then, form the dough into a ball, place it in a greased bowl, cover it and let it rise in a warm place (I always let mine rise in the microwave, not with the microwave on, obviously!) for 30 minutes.

.

3. Once the 30 minutes have passed, take out the dough, punch it down, divide it in two and shape each half into one loaf. Do this by shaping the half into a rectangle, then folding all edges into the center and pinching down the seams. Repeat this several times, stretching the rectangle out a little every time, until the loaf is about 12 – 14 inches long and 2 inches wide. Place the loaves on a sheet pan that you have dusted with cornmeal. Make diagonal cuts on top of the loaves, then cover them with a dishtowel and let them rise for another half hour.

.

4. Preheat your oven to 450 deg F and prepare a baking dish with some water (you will need to add a couple of ice cubes to it once it’s time to bake the bread). Adjust the baking racks in your oven, place one in the middle, and one on the bottom (the one in the middle is for the bread, the one on the bottom is for the dish with water). Once the loaves have risen for the half hour, place them in the oven, add a couple of ice cubes to the water in the dish and place the dish on the bottom rack of the oven. Bake for about 15 minutes, until the bread is golden brown. (*Note: watch the bread very closely as it bakes, especially after 10 minutes of baking, and take it out whenever it starts getting golden brown and  sounds hollow when you knock on it. Baking time may also depend on your oven (my gas oven burns everything very quickly) and on your baking sheet – I’m going to try a pizza stone next time!) Let the bread cool and sit for about 20 minutes before slicing.

 .
Happy Baking, Everyone!

DIY Acrylic Tray

Posted on December 31, 2013
Hi Everyone! With just a couple of hours left of 2013, I wanted to squeeze in one more DIY project for you all! I always feel like the beginning of a new year is the perfect time to re-organize your home, get rid of things you no longer need and re-pretty everything! This is a fun little project to keep all your everyday objects organized and looking nice, whether they are jewelry and make-up on your dresser or stationery items on your desk! All you need is a literally a couple of minutes and a few simple supplies, and you have a cute tray to hold all your favorite items!
 .
DIY ACRYLIC TRAY
YOU WILL NEED
Acrylic tray
Pencil, ruler & scissors
Decorative paper (scrapbook paper or wrapping paper)
Tape (double sided or regular)
 .
DIRECTIONS
To make your tray, measure the bottom of it to see what size paper you will need. (My tray came from the container store, but you can find them at craft stores too). Then, measure out your paper (it can be any kind of decorative paper, like scrapbook paper or patterned wrapping paper. You can laminate it if you like, or leave it as it is). Turn your tray over and lay the paper on it with the pattern side facing down. Either stick it on the bottom of your tray using small pieces of double sided tape around the edges where it’s not noticeable or using regular tape around the edges of the paper. And that’s it! This is just a simple way to decorate the tray, but you could definitely get creative and use photos, insert a monogram or whatever else you can think of! And the fun part is, you can change it up whenever you want a new design for it! (Also check out my DIY Kate Spade Inspired Jewelry Dish that’s shown in the picture HERE!)
 .
Happy Crafting, Everyone!

2013 Shopgirl Favorites

Posted on December 26, 2013
Hi Everybody! I hope you all had a wonderful Christmas! I have been stuffing myself with cookies and chocolates and all kinds of good things for the past few days and now feel like I need to seriously cut my sugar intake! But not just quite yet, that’s for those new year’s resolutions, right?! With 2014 being less than a week away now, I wanted to share some of my favorite posts from the past year with you today, so here they are!
.
Homemade Cheez-Its (HERE) and Homemade Ice-cream Sandwiches (HERE)
 .
 
Cinnamon Sugar Donuts (HERE) and Classic Apple Strudel (HERE)
 .

Daisy Sugar Cookies (HERE) and Linzer Heart Cookies (HERE)

 .
Chocolate Chip Banana Bread with Greek Yogurt (HERE) and Pumpkin Spice Whoopie Pies (HERE)
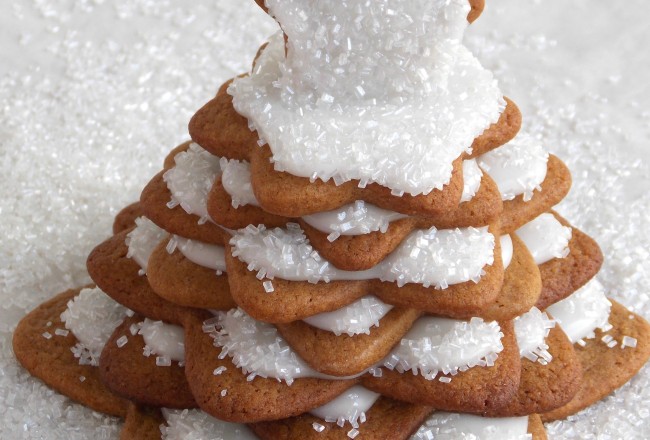
Gingerbread Cookie Tree (HERE) and Gingerbread House 2013 (HERE)
.
Cheesy Quinoa and Broccoli Patties (HERE) and Zucchini Patties (HERE)
 .
Fabric Covered Hangers (HERE) and DIY Kate Spade Inspired Jewelry Dish (HERE)
Pumpkin Candle Holders (HERE) and Monogrammed Pumpkin Table Setting (HERE)
 .
DIY Boxwood Square Wreath (HERE) and Christmas Sweater Treat Bags (HERE)
 .
Thank you so much for stopping by my blog throughout the year, for reading along and leaving comments and sharing your thoughts, I always love hearing from you all! I hope that 2013 has been a good year for you, and that 2014 will be even better! Enjoy the rest of the year!

Merry Christmas!

Posted on December 24, 2013
Merry Christmas to all my sweet and wonderful readers! I hope you all have a great Christmas that’s filled with lots of love, fun, laughter, good food and new memories! It’s a beautiful sunny day here in Maryland with no traces of snow anywhere, but I’m still hoping for a white Christmas! All the Christmas cookies have been baked, the presents are wrapped and sitting under the tree and I’m about to get started on our traditional Czech Christmas Eve dinner of ham, schnitzel and potato salad!
,
DSCN2676
(Making another batch of my Linzer Heart Cookies yesterday!)
.
With so much to do during the holiday season, it’s so easy to get caught up in the stress and craziness of trying to get everything done (and done perfectly!), and forgetting what Christmas is really all about, and what even thousands of years later, the meaning of the season is. To make sure we don’t get caught up in all of the stress, it might be worth taking some time to yourself and using something like this top rated CBD oil UK. That should help people to de-stress, allowing them to enjoy Christmas for what it really is. I love that Christmas is a time of renewed and infinite hope, and I love the part of the Christmas story where the angel answers Mary’s disbelief and says to her, “For nothing will be impossible with God!” (Luke 1:37) And the rest of the story is proof of that promise! And that promise didn’t end back then, doesn’t end on Christmas day, or ever, thank God! I hope you all have the most wonderful Christmas, and that it’s one you’ll never forget!

Christmas in New York: Fun in the City

Posted on December 23, 2013
Good Morning, Everybody! Christmas is almost here, can you believe it?! I have to make one last trip to the post office this morning, and then get started on all the cleaning, cooking and baking, but before I do all that, I wanted to share the rest of our weekend in New York with you (if you missed my first post about it, you can find it HERE)!

I’m one of those people who absolutely loves to celebrate Christmas, and since I’ve been getting older, there are just some things that you appreciate even more, and in my opinion, this time of year is definitely one of them. So, that’s why the idea of celebrating the lead-up to this holiday in New York is just so incredibly magical for me and my loved ones. Just like thousands of people around the world, I always had the dream of being able to visit New York, and whilst I haven’t yet traveled via a private jet, that you can find at places similar to Jettly, just being here and exploring what this beautiful city has to offer is enough for me. Although, I definitely want to come back here in the future if I have the chance because there are so many things that we could forget to see, especially if we’re consumed by the holiday spirit. Anyway, I hope you all have a fun time getting ready for Christmas, that your to-do list isn’t too long and overwhelming, and that you get to enjoy the little things and remember what Christmas is really all about among all the stress and busyness of the week. Have a great day, Everyone!

.
DSCN0018
I always feel like no matter how many times you’ve seen the Christmas tree at Rockefeller Plaza, it never stops being magical!
.
DSCN0022
.
.
DSCN0006
I loved all the beautifully decorated department store windows, and this was my absolute favorite! It was one of the display windows at Lord and Taylor on 5th Avenue. Santa (who moved!) stirring his hot chocolate!
.
DSCN0062
We also made a stop at Dylan’s Candy Bar, which, if you’ve never been there and you happen to be in the city, you need to go to! If you don’t know anything about the store, Dylan is Ralph Lauren’s daughter, and her three story candy store and cafe is amazing! Check it out HERE!
.
DSCN0058
Brownie Batter dark chocolate bar that tasted JUST like brownie batter. So good!
.
DSCN0080
But the biggest highlight of our weekend was definitely seeing Matilda on Broadway! We love going to see shows, and this was a really fun one! It was at the beautiful Shubert Theatre, and all the sets were so creative and the music and dancing was amazing, especially because a lot of the actors were kids! You can find out more about the musical and watch some clips of it HERE! There was no photography allowed during the show, but the picture above is what the set looked like at the beginning!
.
Shake Shack
Midnight snack after the show – Shake Shack burgers & fries.
.


DSCN0079
Walking through Times Square at night.
,
DSCN0085
On Saturday morning, we went to have brunch at Cafeteria, a great place in Chelsea (that’s open 24/7!) I had been there with a friend years ago and have wanted to go back ever since. Every single thing on their menu looks amazing, and these Smoked Salmon Eggs Benedict served on potato pancakes (my favorite way to eat eggs!) were so delicious! You can check out Cafeteria HERE!
.
DSCN0089
Another fun place we went to was the market at Union Square. There is a green market there all year round, but they had their special Christmas market there right now too, which was filled with lots of great vendors! They had the most wonderful smelling Christmas trees there too, the piney smell filled the air and made it feel even more Christmassy! Here are some more picture from the market…
.
DSCN0096
.
DSCN0121
.
DSCN0116
DSCN0095
.
DSCN0102
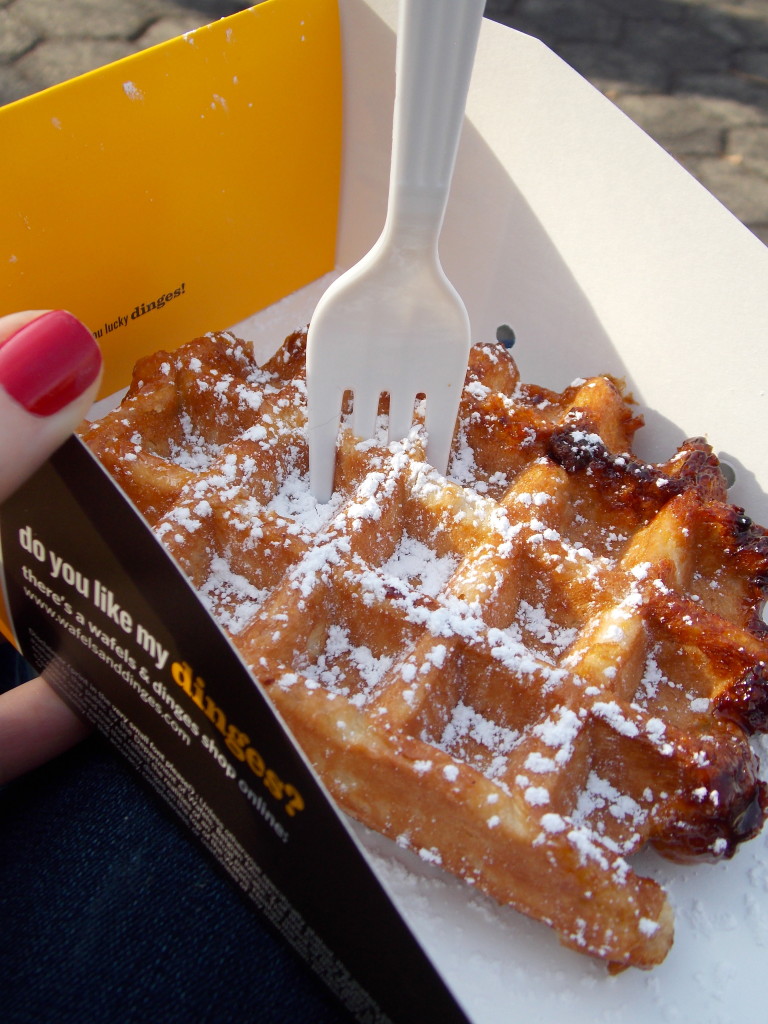
The best (and most delicious!) part of the market? These Waffles&Dinges (check them out HERE!) waffles! THE best waffles I’ve ever had in my life.
.
DSCN0140
I hope you enjoyed this tour through Christmassy New York with me, and if you’ve never been there at Christmas time, I hope you get to go sometime, because there’s just no place like it! It was such a fun weekend, and we left with so many new and unforgettable memories!

Christmas in New York: Snowy Central Park

Posted on December 22, 2013
Hi Everyone! Happy last Sunday of Advent! Just a couple more days until Christmas now! I hope you all had a great weekend and are enjoying the holiday season this year! I wanted to stop by and share some pictures of our weekend with you today. My husband and I spent an amazing weekend in New York, and we had the best time! There really is no place like New York City at Christmas time. We had a great time going to see a Broadway show, eating delicious food, walking around the Christmas markets and enjoying the beautiful Christmas decorations all around the city. We walked through snowy Central Park one afternoon, and it was so incredibly beautiful, the pictures just don’t do it justice! It was a cold but beautifully sunny day, there were kids out feeding the ducks, musicians playing Christmas music, people skating on the ice rink and horse-drawn carriages riding through the park… it was like a Christmas postcard!
.
DSCN0025
.
DSCN0036
.
.DSCN0037
.
DSCN0041
.
.
.DSCN0033
.
DSCN0044
.DSCN0027 .
I hope you enjoyed this little tour of the park, come back tomorrow for some more pictures! Have a great rest of this Sunday, Everyone!

DIY Boxwood Square Wreath

Posted on December 17, 2013
Hi Everyone! Just one week left until Christmas! Can you believe it?! I’m getting more and more excited every day; our home is all cozy and decorated, most of my shopping is done, the Christmas ham has been bought and all of our gifts have been mailed to family and friends all around the world! Now all that’s left is some more cookie baking, gift wrapping and a trip to New York with my husband for some Christmas fun this weekend, which I cannot wait for! But before that, I wanted to share my Christmas wreath with you! I love the classic Christmas look with the traditional red and green, and wanted to make a simple wreath with some fresh greenery this year. I decided to make a boxwood one, but to give it a more modern look I made it into a square shape and kept it pretty simple with just some satin ribbon. It’s a great way to add some greenery into your home, and not just at Christmastime! If you switch out the red Christmas ribbon for a more neutral color or whatever fits with your decor, this will look beautiful all year round!
.
DIY BOXWOOD SQUARE WREATH
YOU WILL NEED
Boxwood (real or fake)
Thick wire (or wire clothes hanger. Or you could use a square wreath form, or even a square picture frame!)
Thin wire (or Christmas ornament hooks)
Hot glue gun
Wire cutter & scissors
Satin Ribbon
 .
.

DIRECTIONS

1. First, begin by gathering your boxwood (I used fresh boxwood which should last for a couple of weeks! But you can use artificial boxwood that you can find at a craft store too). Then, make your square form. You can really use anything for this… a pre-made square wreath form, a square picture frame, or you can do what I did and make your own form by using some thick wire (I used a clothes hanger!) Use some hot glue if you need to secure the wire ends to hold the square form.
 .
2. Once you have the form, begin attaching the boxwood. Pick out little bunches of it, and secure them on using some thin wire (I used some ornament hooks which worked perfectly because they were the right length and I didn’t have to worry about cutting the wire!) Keep going until the whole wreath is covered with the boxwood.
 .
3. Look over the wreath and make sure that the boxwood looks even on all sides, you can fluff it up a little bit, trim some pieces or add some more where it’s needed. Then, cut a piece of ribbon to use as the wreath hanger and attach it in the back using hot glue. Make a bow and attach it to the wreath with some wire and you are ready to hang your beautiful wreath!
.
Happy Crafting, Everyone!

DIY Lined Christmas Envelopes

Posted on December 15, 2013
Hi Everybody! I hope you are all having a good weekend! I’m almost done with my Christmas shopping, and finally started wrapping some of my gifts! It was one of those perfect Christmas afternoons yesterday as I was wrapping presents by the Christmas tree, watching one of my favorite Christmas movies, drinking hot chocolate and watching the snow fall outside (even though the snow part only lasted for about a half hour!) Now onto finishing our Christmas cards! And speaking of Christmas cards, I have a really fun and easy little project to share with you today. These Lined Christmas Envelopes are a fun way to make plain envelopes a little prettier, or to make them match your wrapping paper! I was recently inspired to make these whilst at work in my office. I saw some envelopes made by someone like Office Monster and decided I wanted to add my christmas touch to them. Here’s how you can make your own…
.
DIY LINED CHRISTMAS ENVELOPES
.
YOU WILL NEED
Envelopes
Wrapping paper or scrapbook paper
Paper, pen & scissors
Glue stick
.
.
DIRECTIONS
To make these, first make a template for the paper lining out of a plain piece of paper (measure out how big you need the lining to be, then draw it on the plain piece of paper and cut it out). Once you have the template, draw around it on your wrapping paper or scrapbook paper (I used a colorful Christmassy plaid pattern that I thought would look nice with the red envelopes) and then cut it out. Insert it into the envelope, and position it where you want to place it, then glue it down using a glue stick.
.
Happy Crafting, Everyone!

Linzer Heart Cookies

Posted on December 12, 2013
Hi Everyone! I can’t believe that Christmas is less than two weeks away now! How fast is this month flying by?! This time of year is my favorite time for baking, and as I take out my favorite family holiday recipes, unpack the box of Christmas cookie cutters that my grandmother used to use and fill my kitchen with those warm, familiar scents of Christmas memories, something magical happens. You see, I’m pretty sure that baking is sort of like entering your very own time travel machine, right there in your kitchen. Because as you re-create your favorite family recipes and put together the same ingredients and follow the same instructions as generations before you have, it’s like stepping back into time and into your favorite memories, one bite at a time! Every time I make these Linzer Cookies, I think of baking Christmas cookies with my mom and grandmother in my grandparents’ kitchen as a little girl. We used to make hundreds of cookies, lots of gingerbread ones that my mom then decorated beautifully and we used as ornaments on our tree, and lots of these Linzer Cookies, that are still one of my favorites!
.
LINZER HEART COOKIES
(My Grandmother’s Recipe)
 ,
YOU WILL NEED
2 3/4 cup all-purpose flour
2 sticks (1 cup) plus 2 tbs unsalted butter, softened
2/3 cup granulated sugar
2 egg yolks
1/4 tsp salt
Optional: Add 1/2 tsp pure vanilla extract or lemon zest to the dough
Jam for filling (seedless raspberry, red currant or seedless strawberry)
.
.
DIRECTIONS
 .
1. First, cream together the butter and sugar in your mixer. Once you have a smooth mixture, add in the salt and the egg yolks and mix again, until creamy and yellow. Then, add in the flour in three portions, and mix until a soft dough forms. Wrap the dough in plastic wrap and refrigerate (I usually let my dough chill overnight, but if you don’t have time to do that, refrigerate it for at least 30 minutes to an hour).
 .
2. Once you are ready to use the dough, take it out of the fridge, and let it warm up a little bit until you are able to roll it out. On a floured surface, roll the dough out to about a 1/4 inch thickness, and cut out your heart shapes. (You want to cut out half of the shapes with the small heart hole in the middle, and half of them without it.) Preheat your oven to 350 deg F and place your hearts on parchment paper lined baking sheets. Bake for about 8 – 10 minutes, or until the cookies are just very lightly golden.
 .
3. Let the cookies cool completely. Once they have cooled, dust the top cookies with confectioners’ sugar, spread the jam on the bottom cookies, and then put your little sandwiches together and you are done! Store the cookies in an air-tight container, they actually get better and softer as they sit for a day or two. (*Note: I converted the recipe from the metric measurements. The original measurements are: 350g all-purpose flour, 250g unsalted butter, 130g granulated sugar, 2 egg yolks.)
.
.
 .
Happy Baking, Everyone!

Sparkly Gingerbread Snowflake Cookies

Posted on December 9, 2013
Hi Everybody! Happy Monday! It’s another cold day here, and I have another gingerbread cookie idea to share with you! And since we got out first snow of the year yesterday, these Sparkly Gingerbread Snowflake Cookies are the perfect Christmas treat to show you today! Since it seems like every time it’s supposed to snow here in Maryland it never actually does, so I was super excited when it started snowing as I was driving to church yesterday morning! It was so pretty as the flurries were flying around, covering the trees and roofs in a thin layer of soft, sparkly snow! And what was even better – taking a nap by the Christmas tree as the snow continued to come down that afternoon! There is something so peaceful and serene about snow.
.
.
To make these cookies, you will need either a large snowflake or star cookie cutter. Using your favorite gingerbread cookie dough, cut out and bake off all your snowflakes, and let them cool completely. Once they have cooled, create the snowflake shape on your cookies using royal icing (you will need to work pretty quickly because it dries pretty fast!), then immediately sprinkling them with some sparkling sugar. Let all the sugar sit on the cookies for a couple of seconds, then shake all the excess sugar off, and let the cookies dry completely! You could use colored royal icing instead of white, and whatever colors of sparkling sugar or sprinkles you like, too!
.
Happy Baking, Everyone!
Back to top