Christmas Wreath with dried oranges

Posted on December 19, 2020

Isn’t a festive wreath on your front door the best “Welcome home”? Not that we leave the house that often these days, but it always makes me happy to come home and be greeted by this sight. I wanted to create a really classic look for my wreath this year, and this is what I came up with…. fresh greenery, pine cones, dried orange slices and thin, copper colored velvet ribbon. Scroll down to see how to make one!

HOW TO MAKE A CHRISTMAS WREATH WITH DRIED ORANGES

  1. To make the dried oranges, thinly slice a couple of oranges and place the slices on parchment paper lined baking sheets. Bake at 200 deg F for anywhere from 2 to 5 hours (mine took closer to 5 hours), flipping them every hour. Let cool completely.
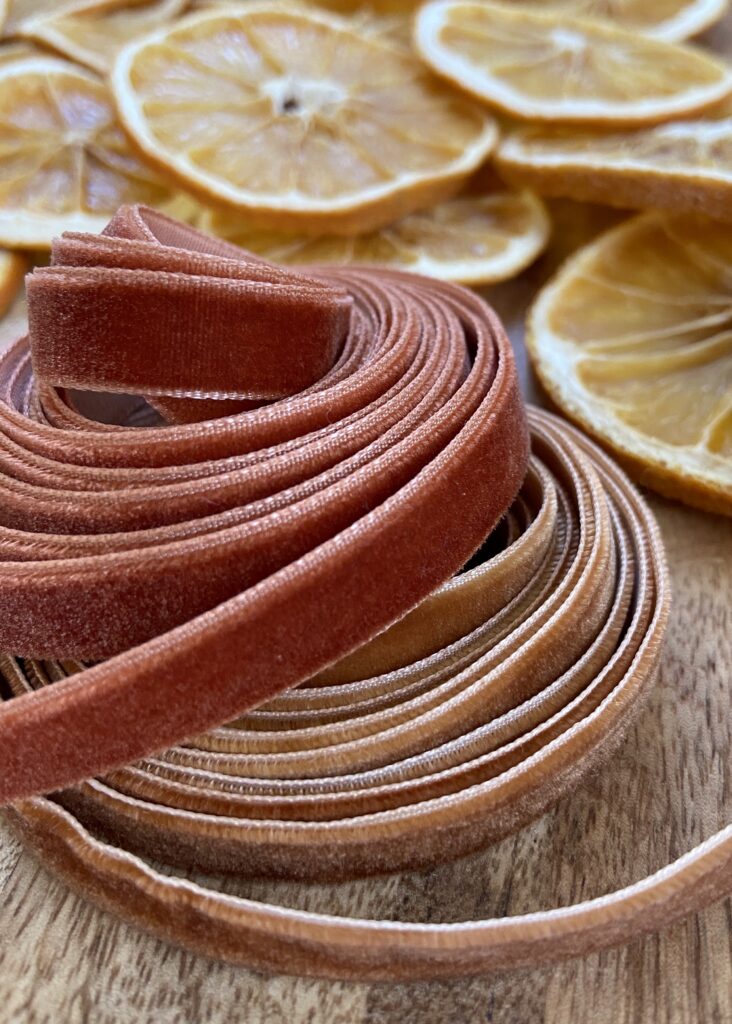
  2. Make small bunches of two or three orange slices, and join them together at the top with some floral wire, then attach the floral wire onto the wreath, hiding it behind some of the greenery. Continue doing this until you’re happy with the look. (My wreath already had pine cones on it, but if yours doesn’t and you want to use some, use floral wire to attach those too.)
  3. Pick out your ribbon – I used this beautiful copper, rusty colored thin velvet ribbon from this amazing Etsy shop. Make your bow, then loop some floral wire through the back of it and attach it to the top of your wreath!

How to make a homemade gingerbread house from scratch

Posted on December 3, 2020

If you have ever made a gingerbread house from scratch, you know that it’s a labor of love. Between making the dough and the icing, cutting out each piece using a stencil, and then baking, decorating and glueing it all together, it takes a little bit of time to make, but it is so worth it in the end! It’s one of my favorite Christmas traditions and if you’ve never made a gingerbread house before, you should give it a try this Christmas! To me, there isn’t a more festive or Christmassy scent than gingerbread; that sweet and spiced aroma takes me right back to my grandparents’ kitchen table, baking gingerbread cookies, and impatiently waiting for the timer to ring so that I could see the little beauties I had created come out of the oven. As soon as they were done, they were quickly whisked away on a large wooden board to cool and then beautifully decorated. Don’t you wish you could bottle up that Christmas magic? There are a couple of tips and tricks that I’ve learned while making gingerbread houses over the last few years, and I would love to know any that you may have!

HOW TO MAKE A HOMEMADE GINGERBREAD HOUSE FROM SCRATCH

HOW TO MAKE GINGERBREAD COOKIE DOUGH
Since we never actually eat the gingerbread house, I don’t really care about the taste of it as much. I have used a store-bought gingerbread cookie mix in the past to speed things up and it worked just fine! This time, I used this recipe and it was great – I made it the night before, wrapped it in plastic wrap and chilled it in the fridge overnight, then let it come to room temperature before rolling it out.

HOW TO MAKE GINGERBREAD HOUSE STENCILS / TEMPLATES
I made my own stencils for this and all my gingerbread houses, but you can find plenty of templates online. Roll out your dough to about a 1/4″ to 1/8″ thickness (avoid using too much flour while rolling out the dough or brush it off the top of the cookies so your cookie can brown nicely while baking – if it comes out with flour residue after baking, simply brush it off with a soft pastry brush or paper towel). Cut out your shapes using a knife, and bake similar sized shapes together to ensure an even bake. Let cool on cooling racks COMPLETELY before icing.

GINGERBREAD HOUSE ICING / HOW TO DECORATE YOUR HOUSE
I have tried so many different icing recipes in the past, and this one works really well. You may need to add a little more confectioners’ sugar to give you the consistency you’re looking for – you want the icing to be thick enough to hold it’s shape on the cookies, but not too thick where you can’t pipe it. My #1 tip is to decorate each side of your gingerbread house BEFORE you glue it together, it is so much easier! I always decorate each “wall”, let it dry completely before glueing the house together, and then use more icing to pipe on the “snow” and “icicles” hanging off the roof. I have also made my icing in advance in the past, and let it sit in the fridge overnight (in a ziplock bag or airtight container) and it was fine. The icing is actually easier to work with when it’s a little colder.

HOW TO GLUE YOUR GINGERBREAD HOUSE TOGETHER
This is the stressful part!!! There are a couple different ways that you can do this, but most importantly, make sure that the icing on your gingerbread has completely dried before you start putting your house together. This year, I used this caramel syrup for the first time, and it was the best kind of “glue” I’ve used. (*Note – I used the full amount of sugar but only about 1 TBS of water. I burned my first batch of the caramel syrup and fully felt like I was on The Great British Bake Off as I quickly made another batch! The caramel goes from silky smooth to BURNT very quickly, so watch it carefully!) You have to work VERY QUICKLY once you have your caramel, because it hardens so fast!
I have also used the icing itself as glue in the past and it worked fine, but it can be messy and it takes a while to dry. (I have also used a hot glue gun in the past to do this – obviously don’t do this if you’re going to eat the gingerbread! It worked ok, but the grease in the cookies can make it hard for the glue to stay on.)

For some of my gingerbread houses from the past, check out THIS (still my favorite to date!) and THIS post!

I hope you have a wonderful December… it may be a different holiday season this year, but I hope that you find little things that bring you joy and brighten up the end of this often miserable and difficult year! Thanks for stopping by today!

Pumpkin Bread

Posted on September 16, 2020

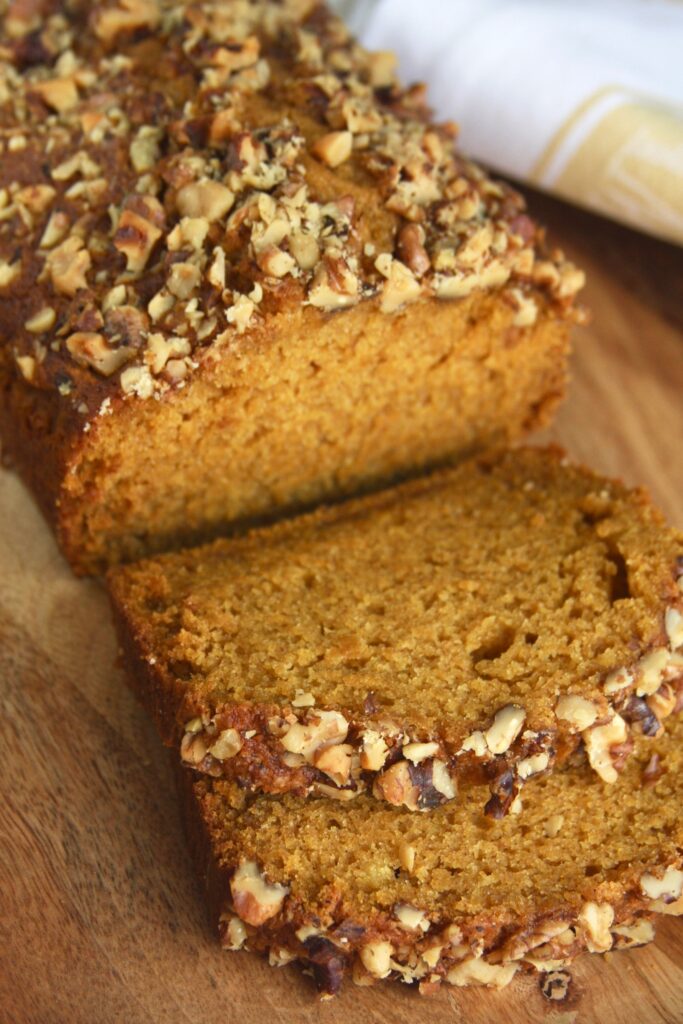
After a very long, hot summer, this week finally brought those crisp September mornings I’ve been waiting for, and today was the perfect day for the first pumpkin recipe of the season! This has been a strange year to say the least, and having spent the majority of spring and summer in quarantine, it’s hard to believe that fall is almost here. If you’re looking for a pumpkin recipe to try out this season, this Pumpkin Bread has been one of my go to’s for a couple years now, and I hope you love it as much as I do; it’s sweet with a hint of warming spices, and with a cup of hot apple cider, it screams fall!

PUMPKIN BREAD
*Makes 1 loaf*
(Recipe adapted from Taste of Home)

YOU WILL NEED:
1 2/3 cup all-purpose flour
1 1/2 cups granulated sugar
1 tsp baking soda
1/2 tsp baking powder
1/2 tsp salt
1 tsp ground cinnamon
1/2 cup canola oil
1/2 cup water
1 cup pumpkin puree
2 eggs
1/2 cup chopped walnuts
1/4 tsp ground nutmeg
1/4 tsp ground cloves
Optional: 1/2 cup raisins

DIRECTIONS
1. Preheat your oven to 350 deg F and prepare your loaf pan (either grease it or line it with parchment paper.

2. In a large bowl, whisk together the eggs, oil, water and granulated sugar. Add pumpkin puree. Next, sift in all the dry ingredients and fold together gently until a smooth batter forms. (If you’re adding raisins fold them into the batter as well.)

3. Pour the batter into your prepared baking pan, and evenly sprinkle the chopped walnuts on top (*Note: you can also simply fold them into the batter instead of just sprinkling them on the top). Bake for 60 – 75 minutes, or until an inserted toothpick/cake tester comes out clean. (If the loaf starts getting too dark on top, loosely cover it with foil.) Let cool before slicing.


HAPPY BAKING!

Carrot Cake Roll

Posted on April 14, 2020

How is everybody doing? I hope you’re all hanging in there! We are on week five of the quarantine here in north Jersey, and at this point it feels like time is standing still. We can see the city from here and every time I see the lights sparkle in the distance now, it feels like it’s a world away even though it’s just a couple of miles from us. It’s a bizarre time, but I’ve been trying to make the most of these days at home, making my kitchen mixer work harder than ever; because we all need a little extra sweetness in life right now, don’t you think? One of my favorite things to bake in the fall is a pumpkin roll, and this carrot cake roll is like its spring cousin. Filled with carrots and spices and rolled up with a layer of sweet, tangy cream cheese, it was just the dose of sugar I needed this week!

CARROT CAKE ROLL
(Adapted from this recipe and this recipe)
*Makes one roll*

INGREDIENTS

CAKE ROLL
3/4 cup all-purpose flour
1 tsp baking powder
1/2 cup granulated sugar
1 tsp cinnamon
1/2 tsp allspice (add more if you like more spice)
1/2 tsp salt
3 eggs
2 TBS oil
1 tsp vanilla extract
2 cups shredded carrots

CREAM CHEESE FILLING
8oz cream cheese, softened
2 TBS unsalted butter, softened
1/4 tsp vanilla extract
1 cup confectioners’ sugar (plus extra for dusting)

DIRECTIONS

1. First, preheat your oven to 375 deg F and line a 10″x15″ baking sheet with parchment paper (I lightly spray the parchment with cooking spray).

2. In your mixing bowl, whisk together the eggs and granulated sugar. Add in the vanilla extract, oil and shredded carrots and mix to combine. Next, sift in the dry ingredients, mix and pour into your prepared baking sheet, spreading it out evenly. Bake for about 10 – 15 minutes, until the top springs back when you gently press it. Very carefully lift the cake (with the parchment paper) out of the baking sheet and let it cool for a minute or so, until you can handle the cake with your hands. It’s really important not to let it cool too much because you won’t be able to roll it and it will begin to crack! (Have you seen the Great British Bake Off??)

3. Place the cake on a clean cotton kitchen towel (peel off the parchment paper). Roll up the cake (going from one short end to the other short end) with the tea towel, and place it seam side down on a cooling rack. Let cool completely (otherwise your filling will melt!)

4. In the meantime, prepare your cream cheese filling by whisking together the softened cream cheese, butter, vanilla extract and confectioners’ sugar until smooth. (It’s important that the cream cheese and butter are softened so the filling isn’t lumpy!) Once the cake is completely cool, carefully unroll it (and remove the kitchen towel) and spread the cream cheese filling on evenly. Roll it back up tightly, short end to short end again, placing it seam side down. I usually let it set in the fridge for at least 30 minutes before serving, then dust it with confectioners’ sugar.

For a similar recipe, check out these Carrot Cake Cupcakes here.

Stay safe and healthy, everyone! Thanks for stopping by today, let me know if you try this carrot cake roll!

Lemon Curd Linzer Cookie Eggs

Posted on April 7, 2020
Lemon Curd Linzer Cookie Eggs

Linzer cookies are my all time favorite cookies. I may be in the minority here, but to me there’s nothing better than two perfectly softened sweet, buttery cookies sandwiched together with sharp, tart jam. They’re also the cookies of my childhood because they remind me of Christmas baking in my grandparents’ kitchen, which turned into a magical cookie making workshop every December. My grandmother’s Linzers are hard to match; hers were paper thin and meticulously uniform, but I’d like to think that every batch gets me closer to her level. I make these cookies all year round, and substituting the jam with lemon curd is a great way to add spring flavor to them – the fresh lemon flavor paired with the sweet cookie is perfection! And since it’s almost Easter, why not make them egg-shaped…

Lemon Curd Linzer Cookie Eggs

LEMON CURD LINZER COOKIE EGGS

INGREDIENTS

2 3/4 cup all-purpose flour
1 cup (2 sticks) and 2 TBS unsalted butter, softened
2/3 cup granulated sugar
2 egg yolks
1 tsp vanilla extract
Lemon curd for filling (I used store-bought)
Powdered sugar for dusting

DIRECTIONS

1. Cream together the butter and granulated sugar (make sure your butter is softened). Once you have a smooth mixture, add the egg yolks and vanilla extract and mix until everything is a creamy yellow color. Add flour and mix until a dough forms. (At this point I wrap the dough in plastic wrap and let it rest in the fridge overnight, but you can let it sit in the fridge for 30 minutes to an hour if you don’t have more time.)

2. Once you are ready to use the dough, take it out of the fridge and let it soften so that you can roll it out. (I cut it into three portions and roll those out one by one, just so the dough is more manageable. I also roll it between two sheets of plastic wrap because that means no clean up! You can of course roll it out on a floured surface instead.) Roll the dough pretty thin and cut out your shapes, then place them on a parchment paper lined baking sheet.

3. Preheat your oven to 350 deg F and bake the cookies for about 7 – 10 minutes until they are just very lightly golden brown. Make sure to watch your oven carefully because when these are close to being done they turn brown very quickly! Let the cookies cool completely, then dust the top cookies with confectioners’ sugar, spread the lemon curd on the bottom cookies and gently sandwich them together. Store in an air-tight container. The cookies are best the next day once they’ve had a chance to soften!

*Note: I converted my recipe from metric measurements. The original measurements are: 350g all-purpose flour, 250g unsalted butter, 130g granulated sugar, 2 egg yolks.

Lemon Curd Linzer Cookie Eggs

Most of the time I make the cookies with jam (see picture below) – seedless raspberry or strawberry works best!

Linzer Cookies

I hope you love these cookies as much as I do if you try them! Thanks for stopping by today!

Naturally Dyed Easter Eggs

Posted on April 4, 2020

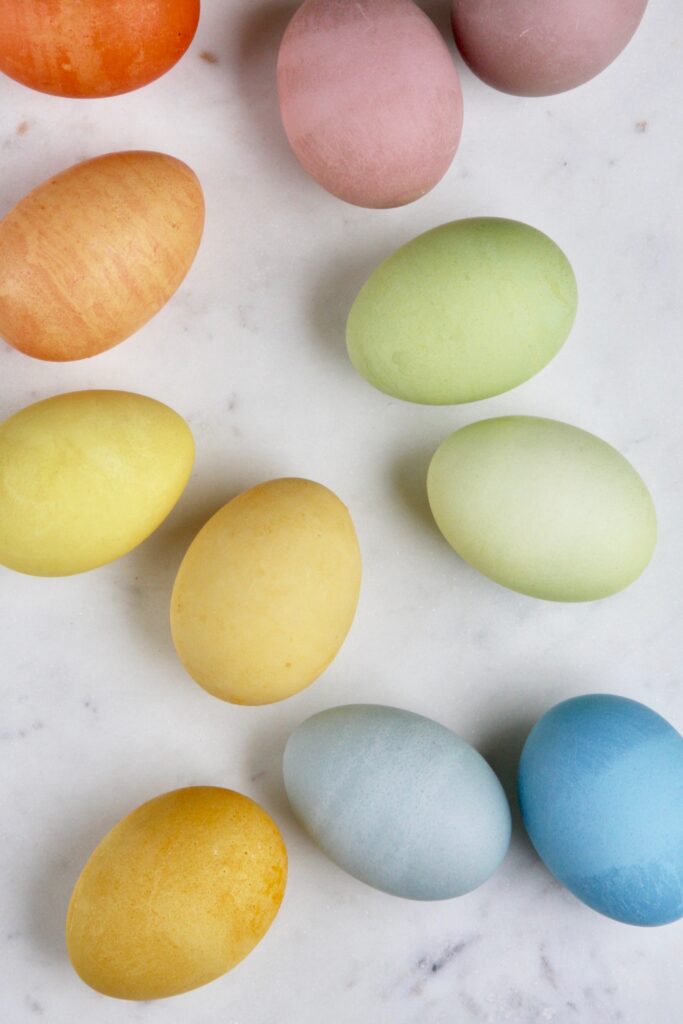
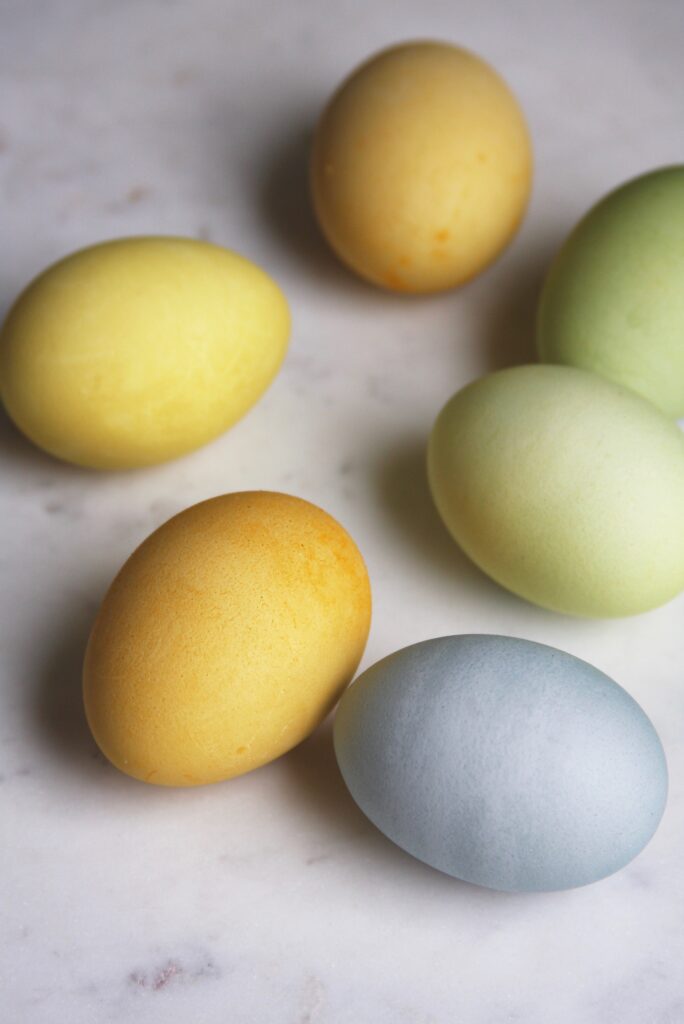
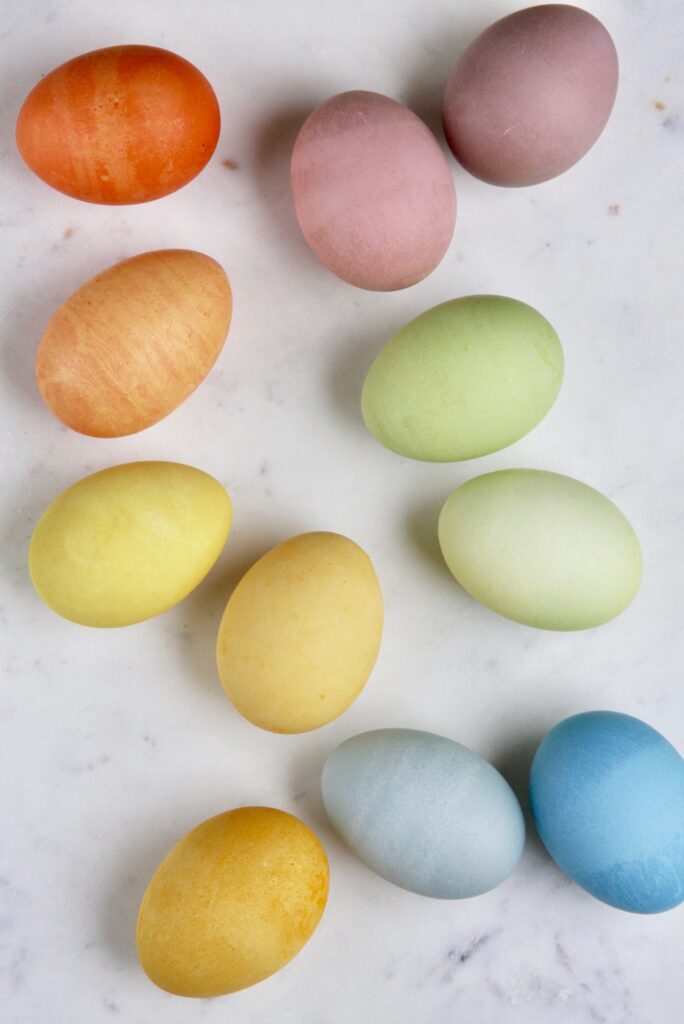
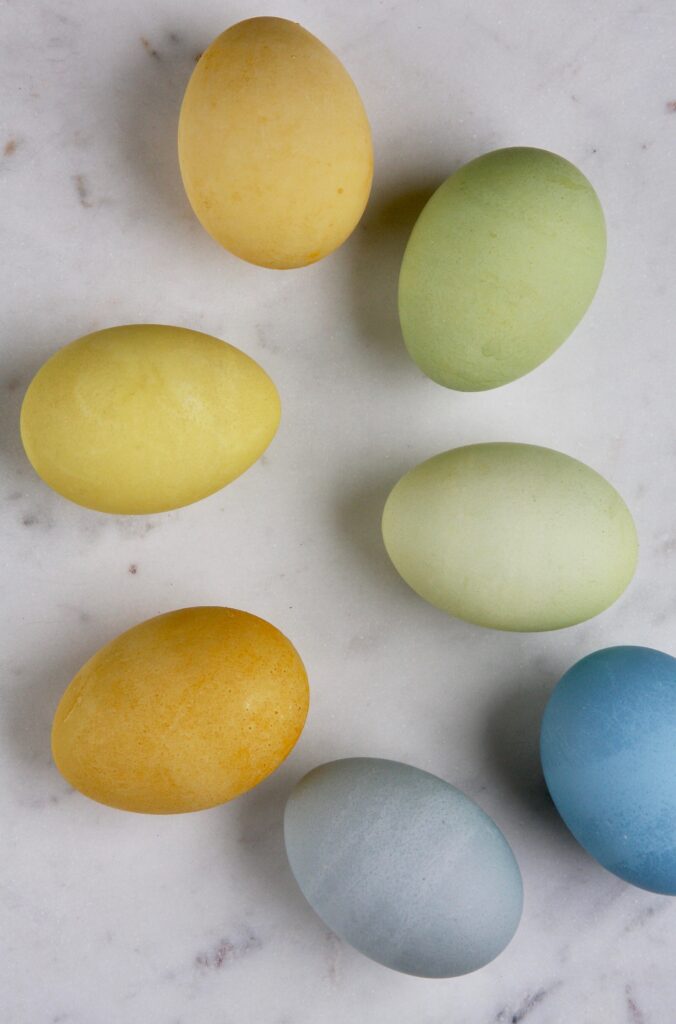
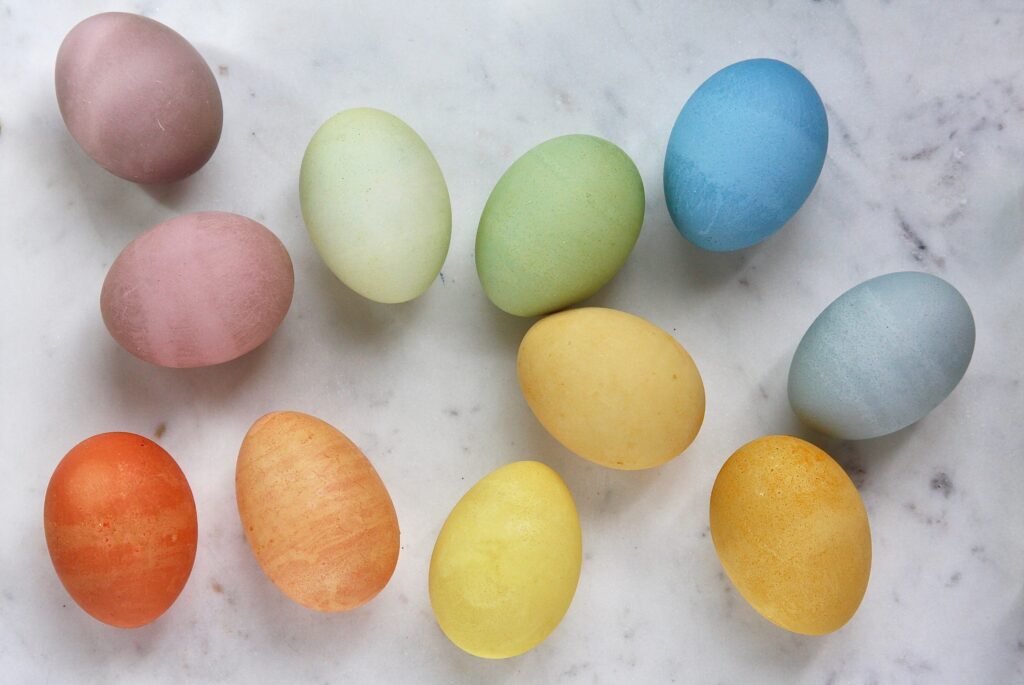
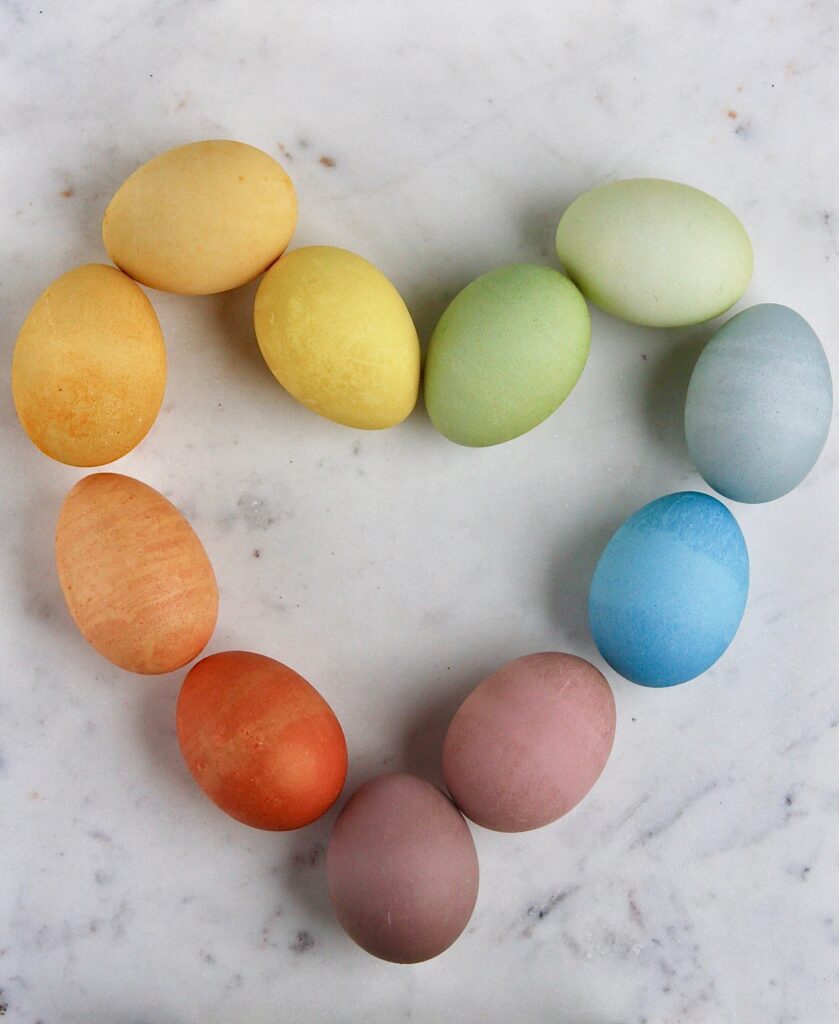
It’s hard to believe that Easter is just a couple of days away, mainly because I barely know what day or month it is at this point of the quarantine. Since I have a lot more time on my hands right now, I turned my kitchen into what looked like a chemistry lab and made these naturally dyed eggs for Easter. You can get such pretty colors with these natural dyes, I love the soft toned pastel colors you can make using things you may already have in your fridge or pantry – who knew red cabbage would dye your eggs blue, or that you can use onion peels to make orange eggs! It’s so fun to see the dye start working as the eggs start turning all different colors. Even though Easter may look a little different this year, this is a fun little project to add some spring prettiness to your home!

YELLOW
2 TBS turmeric
1 cup boiling water
2 tsp vinegar
*Mix the three ingredients, let come to room temperature. I let the eggs sit in the mixture for about two hours, stirring them gently every 30 minutes or so because the turmeric tends to settle on the bottom.

LIGHT YELLOW
4 green tea teabags
1 cup boiling water
*Steep tea for 5 minutes and let it cool. I let the eggs sit in the tea for an hour to get a light yellow color.

ORANGE
Skins of 6 yellow onions
2 cup boiling water
3 tsp vinegar
*In a small pot, simmer the onion skins in water for 15 minutes. Transfer to your container, add vinegar and let cool. For a light orange color, I let the eggs sit for just under an hour, for darker orange eggs, let them sit in the mixture for longer.

BLUE
1 head red cabbage, chopped
4 cups boiling water
2 TBS vinegar
*Mix all ingredients together in a bowl and let cool. Once cooled, pour into your container through a strainer to get rid of the cabbage. Let eggs sit in liquid for several hours/overnight. (This color took the longest to show up on the eggs for me.)

GREEN
*Soak the eggs in the Yellow (turmeric) mixture for an hour or so, then transfer it to the Blue mixture for a couple of hours until the eggs turn green.

PINK
1 cup beet juice
1 TBS vinegar
*Mix the beet juice and vinegar, let eggs sit in the mixture for several hours.

BROWN
Skins 4 red onions
2 cups water
3 tsp vinegar
*Simmer the onion skins in water for 15 minutes, move to your container and add vinegar. Let cool, then let eggs sit in the mixture for an hour or so. (I’ve read that some people get green eggs with red onion, but mine turn brown.)

*Notes:
– The longer you let the eggs soak in the liquid, the darker they will be.
– Some colors take much longer to show up on the eggs than others do – for example, it took all day for the eggs to turn blue, while the yellow started to show up very quickly.
– When the directions call for boiling water, let the mixture come to room temperature before putting the eggs in.
– Use white eggs for best effect.
– I got some of the color recipes from this BHG article, you can always experiment with mixing some of the colors together to get new colors!

Entryway Makeover

Posted on March 26, 2020

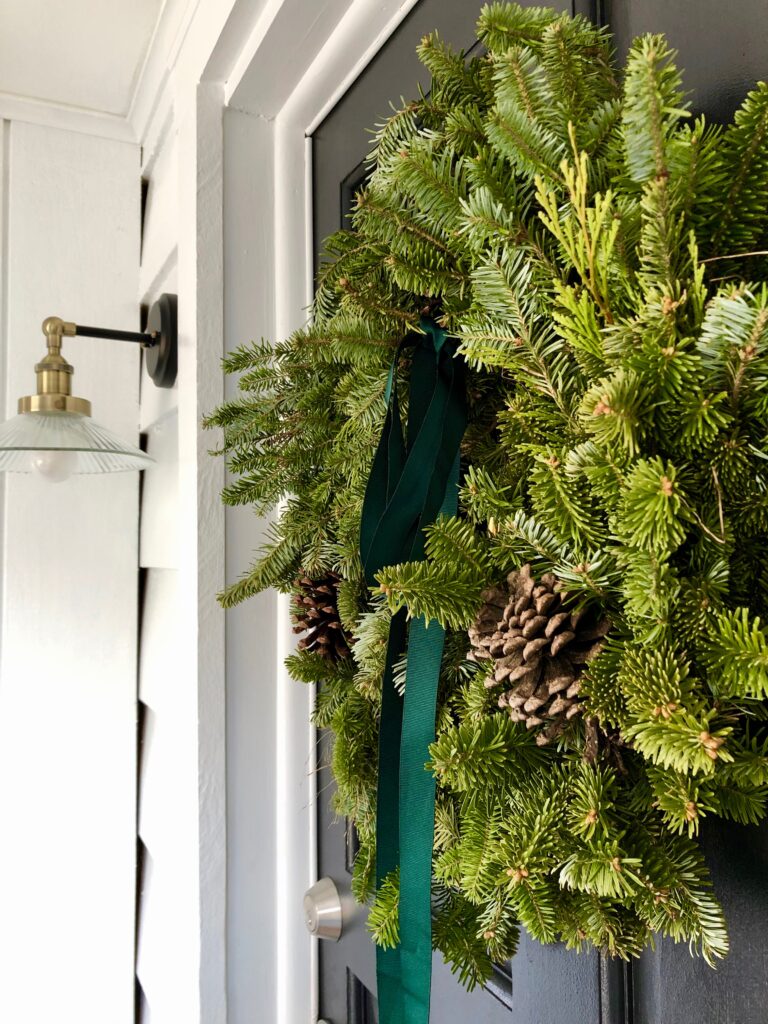
Hey Everyone! I hope you are all staying safe and healthy (and sane!) wherever you are. We have a full week of staying at home and social distancing behind us, and besides doing all the baking in the world these days (because we eat like four desserts a day now…), this has been a good time to get caught up on all those lingering house projects that I never have time for. We actually did this little entryway makeover a couple of months ago and these pictures are from Christmastime (hence the pine wreath on the door) so this post is long overdue!

Last fall, we bought a 1920’s colonial in the New Jersey suburbs outside of New York City and little by little we’ve been updating it and making it our own. Ever since we moved in, it has felt like we have been living in someone else’s dream home, so now that we are finally adding our design tastes to the house makes it super exciting for me. We’ve started with the little things, like incorporating cadet heaters to make sure we have some warm heat should we need it, as well as replacing old furniture with new pieces. Now that has been done, we are slowly starting to make changes to some of the main features of the home. We were thinking about changing the door handles throughout and checked out Pluginhandle by FSB to see how they would fit in, we are just going over our options at the moment as there is a lot to consider. So, as you can probably tell, there is nothing I love more than a good house project, and this place has definitely provided a lot of them.

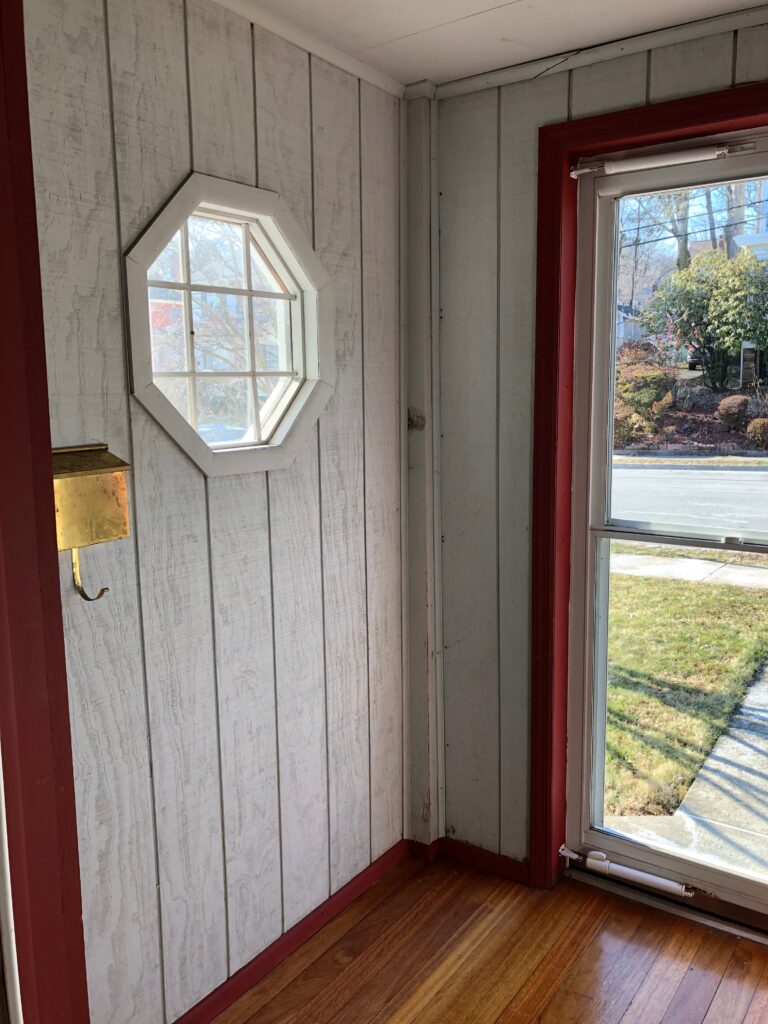
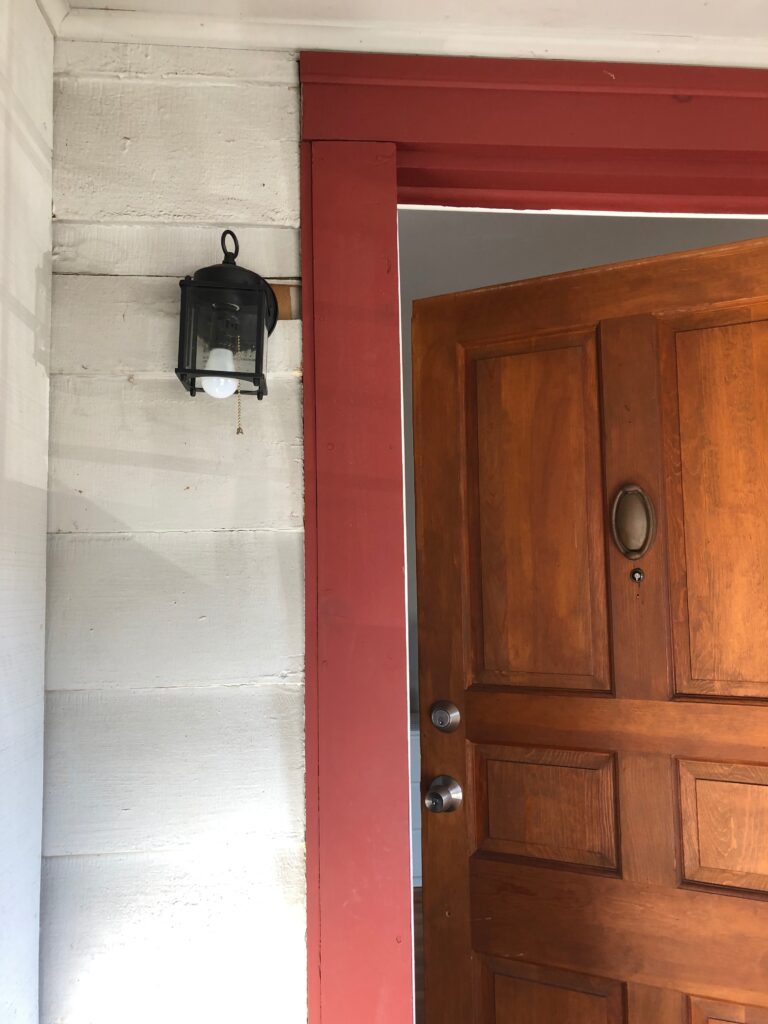
I thought I would share this entryway makeover with you first, because it’s one of those projects that’s pretty quick and easy as well as budget-friendly, while still creating a big impact since this is the first space you see when you enter the house! Before, the space felt like a dark box- there was dark red trim around everything, the wood-paneled walls were painted gray and the dark oak door was so overpowering. You could also see how the wood was starting to have a bit of a crumble due to its age, we were lucky that there weren’t termites in there otherwise we would have had to have called termite control experts to have it treated before we did the removal and placement of the new wood. Not only can termites damage the house, but mold can grow in it as well. It is common for mold growth to occur inside an indoor environment after exposure to water or moisture and can occur when flooring materials (such as concrete) are not entirely dried off. My search for a local service provider using keywords such as “Mold Removal Company Temecula” in the future might lead me to search for someone in my area experienced with removing mold. That being said, my vision was to make the whole area light, bright, functional, and welcoming, and I think we did just that! It will never cease to amaze me what a can of paint can do to completely transform a space – if you’re ever looking for a quick and inexpensive way to update something – paint it! On a side note, what do you call a space like this – a mudroom? Entryway? Vestibule? I’ve heard it called so many different things, let me know what you call it!

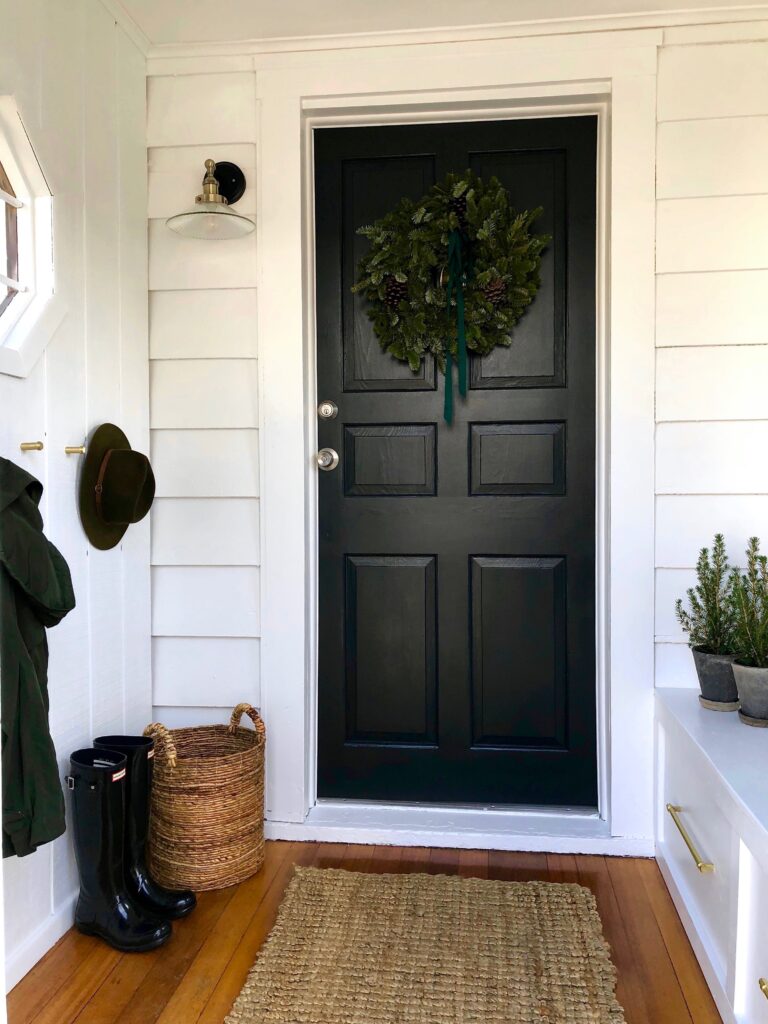
The first step was coming up with an overall look. I knew I wanted to create some sort of built-in bench and to really brighten the space up. Deciding on a color palette wasn’t too hard because as I mentioned, our home is a 1926 colonial that’s pretty classic in style, so I wanted to go with a classic black and white look in here. Because the entryway felt so dark before, I went with a super bright white paint color (Extra White by Sherwin Williams) in a semi-gloss finish for all the walls, trim and the built-in bench, and the difference that made was unbelievable! Instantly lighter, brighter and cleaner! The black door (Black by Benjamin Moore) really elevated and updated the little space – again, such a difference.

As for the built-in bench, I drew a little sketch of what I wanted it to look like and my husband brought my vision to life, as he always does. And then we said those famous last words… “This shouldn’t take long!” If you’ve ever lived in or owned an old home, you will know that nothing is ever standard size, no measurement is ever what you need it to be and there will almost always be a floor that’s not level or a wall that’s not quite straight, making every project just a tad more complicated than you had expected it to be. Endearingly, we call these things “old house charm” HA! Because some of these things were an issue in this entryway, I don’t have a tutorial with exact measurements here, as there was a lot of improvisation (and caulk!) and a lot of having to make up for some of the odd measurements in the room, but you can get the gist from the progress photos below.

The last part was adding the finishing touches – I added brass drawer pulls to the bench to create a faux drawer look, mainly because the whole wall with the bench was too white and it needed some sort of visual detail to break all that up. We added brass coat hooks to the opposite wall, a vintage looking brass and black sconce next to the door and used a jute runner for some warmth and texture.

SOURCES
White paint for trim, walls and built-in bench: Extra White by Sherwin Williams
Black paint for door: Black by Benjamin Moore
Black & Brass Wall Sconce
Brass drawer pulls
Brass coat hooks
Jute runner (2’6″ x 4′ size)
Materials for bench: 2’x4′ wood planks & piece of plywood: both from Home Depot

No-Knead Cranberry Walnut Bread

Posted on March 21, 2020
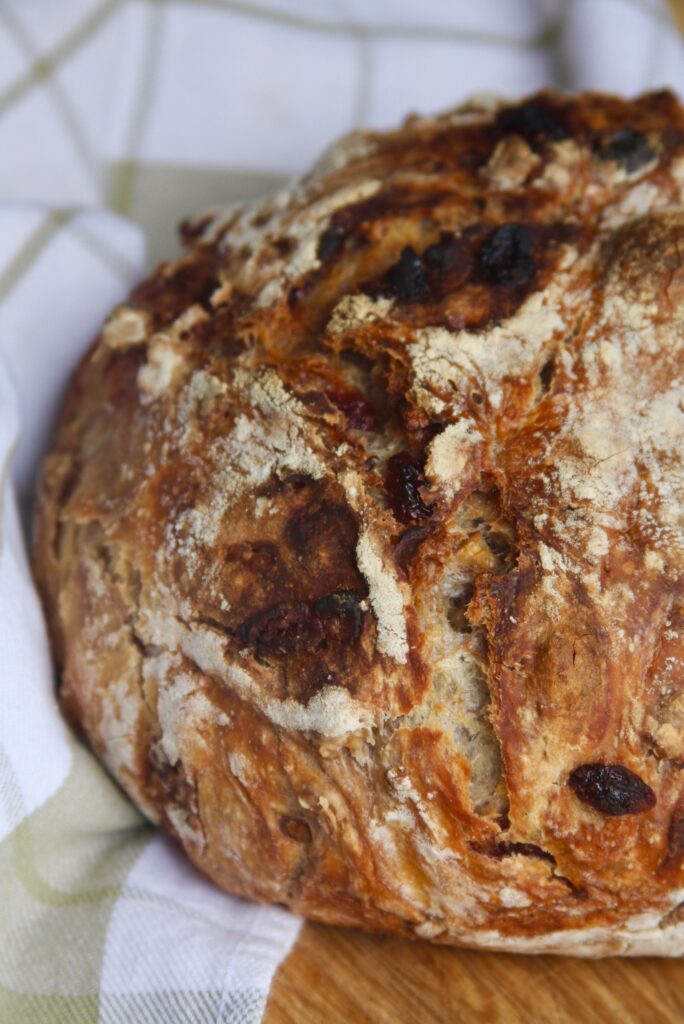
No-Knead Cranberry Walnut Bread

It has been a strange week to say the least. Here in the New York metro area (northern NJ) we went from work as usual last week to finding empty shelves in grocery stores and everything around us rapidly shutting down this week. The eery uncertainty that’s in the air is unsettling, and I hope you are well wherever in the world you find yourself. With all this extra time at home over the last few days (and likely in the next coming weeks…) I turned to a couple of simple ingredients in my pantry in search of comfort. And they delivered, as they always do. This cranberry walnut bread is simply a variation of the very popular New York Time No-Knead Bread recipe. If you’ve never tried that recipe, it is the easiest thing in the world to make, and chances are you already have all the ingredients on hand, which is a major plus right now!

NO-KNEAD CRANBERRY WALNUT BREAD
(Recipe adapted from The New York Times No-Knead Bread recipe)
Makes 1 loaf

INGREDIENTS

3 cups all-purpose flour (plus extra for dusting)
1/2 tsp dry yeast
2 tsp salt
1 5/8 cup lukewarm water
1/2 cup to 3/4 cup coarsely chopped walnuts (depending on preference)
1/4 cup to 1/2 cup dried cranberries (depending on preference)
Optional: orange zest, tablespoon of honey, other nuts such as pecans

DIRECTIONS

1. Combine all the ingredients other than water in a large bowl and stir to combine. Add water and stir everything together until a sticky dough forms. Cover with plastic wrap and let rise in a warm spot for 12 – 20 hours.

2. At the end of the rising time, you should be seeing lots of bubbles on the surface of the very wet dough. Take the dough out of the bowl and form it into a rough round loaf on a generously floured surface. Sprinkle with more flour, cover with a kitchen towel, and let rise for another 2 hours. (I let mine rise on a large wooden board.)

3. Preheat your oven to 450 deg F (232 deg C), placing your baking dish (either a Dutch oven with a lid or a casserole dish with a lid) inside the oven while it preheats. Once the oven hits the right temperature, carefully remove the baking dish and place the dough inside (sometimes I use parchment paper on the bottom, sometimes I don’t) and bake with the lid on for 30 minutes, then remove the lid and bake for another 15 – 30 minutes, until the top has a nice color and sounds hollow when you tap it. Let the bread rest and cool for at least 10 minutes before slicing. It is best fresh, but is still good for the next couple of days, especially toasted, with some butter and jam!

(New York Times No-Knead Bread recipe)

I hope you are safe and healthy wherever you are, thanks for stopping by today! Happy Baking!

Almond Apple Cake

Posted on June 9, 2019
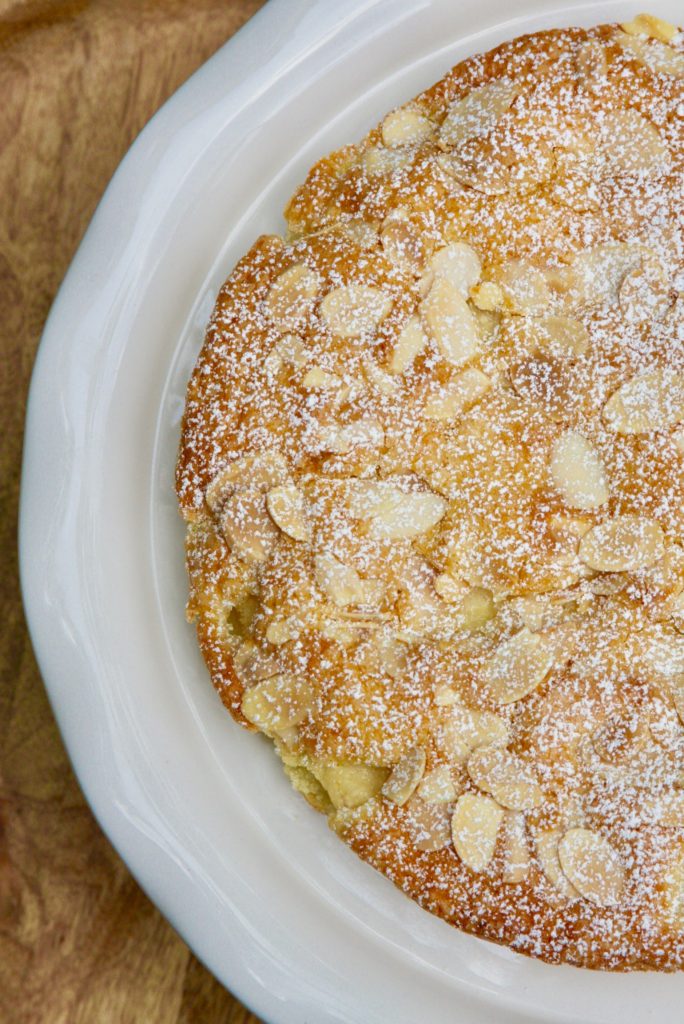
Almond Apple Cake

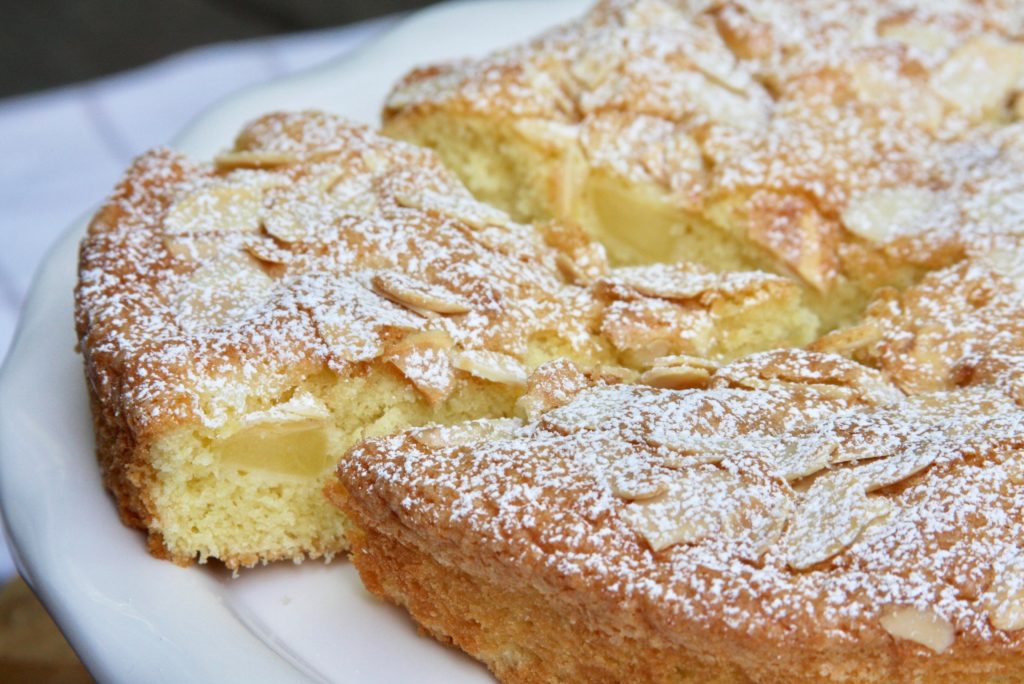
Hey everyone! So it has been a little while (almost two years, to be exact!) since I last posted, so let me catch you up a little bit on what’s been happening around here… let’s see. We left Maryland after five years of living there, moved to the metro NYC area (northern New Jersey), sold our first home, bought a new one, started renovating the new house (more on that to come!), and about a million other things in between… it’s wild to think how much can happen in just two years! The blog took a little bit of a backseat during all that, but this weekend I thought it was about time to bring it back! Also, I made this cake (again) and thought it was too good not to share. So, about the cake… This recipe literally takes max an hour to make from start to finish and calls for ingredients that you probably already have at home (does everyone else also always seem to have a random bowl of apples in the kitchen that looked really good at the store and then nobody eats?!). This is such a quick bake, making it the perfect cake to make when you have last minute guests or are just craving something sweet! It’s so light and fluffy, every bite filled with juicy tart apples and sweet crunch from the almond topping… perfection. It’s great on it’s own, but you could definitely serve it with whipped cream, creme anglaise or vanilla ice-cream!

ALMOND APPLE CAKE
(Recipe adapted from Once Upon a Chef)

INGREDIENTS
1/2 cup (1 stick) unsalted butter, softened
2/3 cup granulated sugar (plus extra for sprinkling on top of batter)
2 eggs
1/4 tsp salt
1 cup all-purpose flour, sifted
1 tsp baking powder
2 apples, peeled & diced into small chunks (1/2 inch or so in size)
Handful of slivered almonds
Confectioners’ sugar (for dusting baked cake)

DIRECTIONS
1. Cream together softened butter and granulated sugar. Whisk in two eggs, add salt and mix until smooth.
2. Sift in flour and baking powder and mix until a smooth batter forms. Gently fold in peeled apple chunks.
3. Preheat oven to 350 deg F, and line the bottom of a 9-inch round baking pan with parchment paper. Pour batter into prepared pan (it will be a pretty thick batter), smooth the top with a spatula and sprinkle generously with slivered almonds and granulated sugar. Bake for 30 – 40 minutes, until an inserted knife comes out clean and the top is lightly browned.
4. Let cool completely, then dust with confectioners’ sugar.

So if you’re looking for something quick, easy and DELICIOUS to make this week, try this! Thanks for stopping by today, have a great week!

Cupcakes with Fresh Strawberry Frosting

Posted on July 10, 2017

Hey Everyone! I hope you’ve all been having a good summer! It’s been a good one here so far, one with the most beautiful sunsets I’ve ever seen! I love summer sunsets, when the sky turns candy colored shades of pink and fiery reds and golds all within minutes, until the sun suddenly disappears like the curtain dropping on a dramatic performance. The other night, my husband and I took a little drive down some country roads (which there are not many of here in the DC area) and somehow wound up in a little town down by the Chesapeake Bay. Everybody seemed to be walking to a small park by the water, so we got out of our car and followed them, as you do when you see a random crowd of people forming! It turns out that everyone was going out to see the 4th of July fireworks, so we got out of the car, sat in the grass by the water, and waited. During this holiday, you see so much patriotism, from commercial flagpoles outside stores flying the flag, to small flags outside the home, everyone comes together to celebrate our independence. All of a sudden the sun started setting and the sky turned the sweetest shades of pink, getting more saturated by the second, its bright colors reflecting in the water. It was the most beautiful sunset (scroll down to see a picture!) and the cheesy metaphor is that sometimes in life, without even planning it, and while driving around seemingly aimlessly, you stumble upon the best, most beautiful surprises. I hope your summer is filled with these moments, with beautiful sunsets, and, with delicious summer desserts obviously, which is what I wanted to tell you about today – these cupcakes!

Cupcakes with Fresh Strawberry Cream Cheese FrostingCUPCAKES WITH FRESH STRAWBERRY CREAM CHEESE FROSTING

Vanilla Cupcakes
I used Ina Garten’s “Flower Cupcakes” recipe (I halved her recipe and got 18 cupcakes). This is a great recipe – the cupcakes are a little more dense and are not overly sweet, but still very rich in flavor! The recipe is very similar to Ina’s basic sheet cake recipe she uses for her Flag Cake, and I’m pretty sure it’s all the butter, eggs and sour cream that make these cupcakes so rich and delicious!

Fresh Strawberry Cream Cheese Frosting
(Recipe adapted from Country Living)

YOU WILL NEED
12oz cream cheese, softened
1/2 cup unsalted butter, softened
3 – 4 cups confectioners’ sugar, sifted
1/2 tsp pure vanilla extract
About 1 cup of fresh strawberries plus extra for decorating cupcakes

Cupcakes with Fresh Strawberry Cream Cheese Frosting
DIRECTIONS

  1. Once your cupcakes are baked and cooled (make sure they are completely cool before you put the frosting on), prepare your frosting. (I loosely followed this recipe from Country Living, but made several adjustments.) First make your fresh strawberry puree. To do that, puree about a cup of strawberries in a blender, then pour the pureed strawberries through a sieve to get rid of the seeds (otherwise you’ll end up with seeds in your frosting), then set aside.
  2. Next, in your electric mixer bowl, cream together the softened cream cheese and softened butter until blended and soft and fluffy. Then, begin adding in your confectioners’ sugar, about a cup at a time (the recipe called for 4 cups of sugar, I used about 3 cups in total) until the frosting is thick enough to pipe onto your cupcakes.
  3. When you have your desired frosting thickness, add in the vanilla extract and about 4 – 5 tbs of the strawberry puree you made earlier (add in more/less depending on your taste). Mix until the frosting is smooth and turns pale pink, if it feels too thin add in a little more confectioners’ sugar to thicken it up. I refrigerated mine for about 30 minutes (in an airtight bag) because it’s easier to work with when it’s chilled.
  4. Now comes the fun part… decorating the cupcakes! Cut some additional smaller strawberries in half to decorate the tops of your cupcakes and set them aside. Then, fill a piping bag (that has a large tip attached to it) with the frosting, and pipe it onto the tops. The frosting should be thick enough to hold its shape and hold the strawberry in the middle!

Cupcakes with Fresh Strawberry Cream Cheese Frosting

These cupcakes are such a quick and easy summer dessert! If you’re in a hurry you could of course just use a box mix to make the cupcakes, but the frosting is definitely worth making with the fresh strawberries… it doesn’t have that artificial taste and color, and is so simple & quick to make!

Summer sunset

The sunset I was talking about (above)! I hope you all have a great week, happy summer and happy baking! Thanks so much for stopping by today!

Back to top