Hi, Everyone! I’m here to share another delicious comfort food recipe with you today! At the beginning of the week, I told you about one of my favorite comfort foods, a great Bacon, Onion and Mushroom Pasta dish, and today I wanted to share another favorite dish with you – Chicken Enchiladas! I adapted this recipe from Ree Drummond, The Pioneer Woman… need I say more! Filled with all kinds of yummy ingredients, soft on the inside and crispy on the outside, slathered in a wonderful sauce and topped with gooey melted cheese and fresh herbs, this is definitely a comforting and satisfying dinner!
,
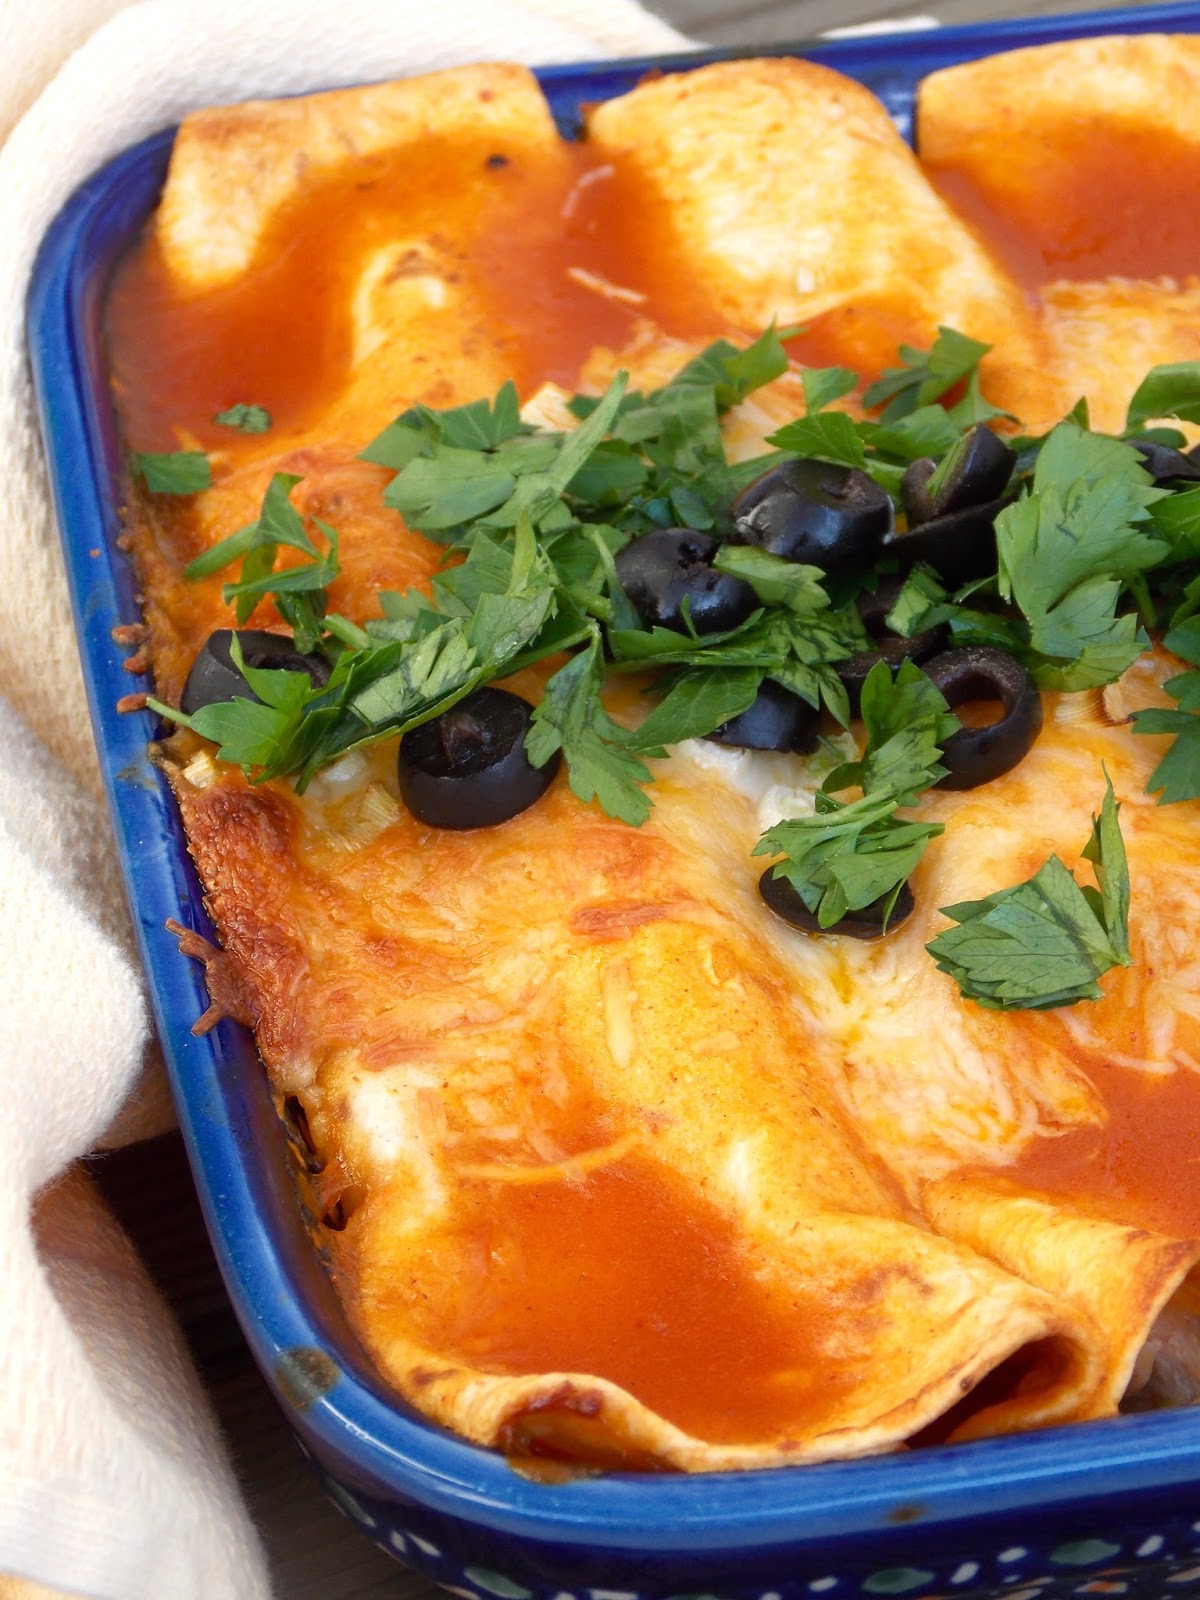
CHICKEN ENCHILADAS
(Recipe adapted from The Pioneer Woman)
*Serves 4*
.
YOU WILL NEED
2 tbs canola oil
2 tbs all-purpose flour
28oz can Enchilada sauce
2 cups chicken broth
1/2 tsp salt
1/2 tsp pepper
1 1/2 lbs cooked, shredded chicken
10 large tortillas
1/2 cup chopped green onions
1/2 cup sliced black olives
3 cups shredded cheese (I used a blend of Mexican cheeses)
Cilantro or flat leaf parsley for garnish
.

.
DIRECTIONS
1. First, prepare your sauce by whisking together the canola oil and flour in a large pot. Let the mixture start bubbling a little bit, and whisk for about a minute. Then, add in the enchilada sauce, the chicken broth, and season with salt and pepper. Stir and bring to a boil, then reduce heat, and let it simmer on the stove, uncovered, until you need it.
.
2. Next, prepare your fillings: shred your cooked chicken (great way to use left over chicken!), slice the olives and green onions and shred the cheese. Preheat your oven to 350 deg F, and get out a 9×13 inch baking pan.
.
3. Spread about 1/2 cup of the sauce over the bottom of the baking dish. Then, begin making your enchiladas. Dip a tortilla in the sauce, then place it on a board or plate and add some chicken, green onions, black olives and cheese down the center of the tortilla. Roll it up and place it seam side down inside your baking dish. Repeat with the rest of the tortillas. Once you’ve filled the pan with the enchiladas, pour more sauce on top, sprinkle with shredded cheese and bake for 20 – 30 minutes, until the cheese has melted and the edges are slightly crispy. Let sit for a couple of minutes, then sprinkle with fresh cilantro or parsley, more black olives and green onions, and serve with some sour cream!
.

Happy Cooking, Everyone! Have a great rest of your week!