Cinnamon Swirl Quick Bread

Posted on June 20, 2014
Hey Everyone! Happy Weekend! Even though the summer doesn’t officially begin until tomorrow, summer weather is definitely already here, complete with all the heat, humidity and thunderstorms! It has been so hot and sticky all week, it’s almost making me miss the polar vortex this past winter! I wanted to stop by and share this Cinnamon Swirl Quick Bread recipe with you today, because it’s a great weekend breakfast or snack recipe! I love quick breads, because well, they’re quick to make, and you usually only need one big bowl to mix everything in, and don’t end up using every single bowl, pan and spatula in your kitchen! I added in some plain yogurt into the recipe, because I love how moist and fluffy it makes the bread, and I always think it makes it easier to slice too, because the bread holds together much better! I hope you love this recipe as much as I do, and enjoy your first official summer weekend of the year!
.
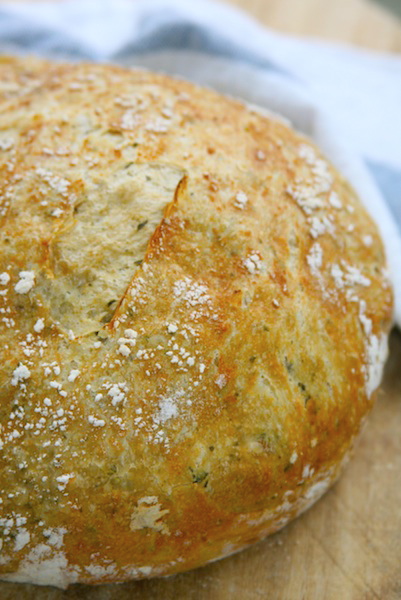
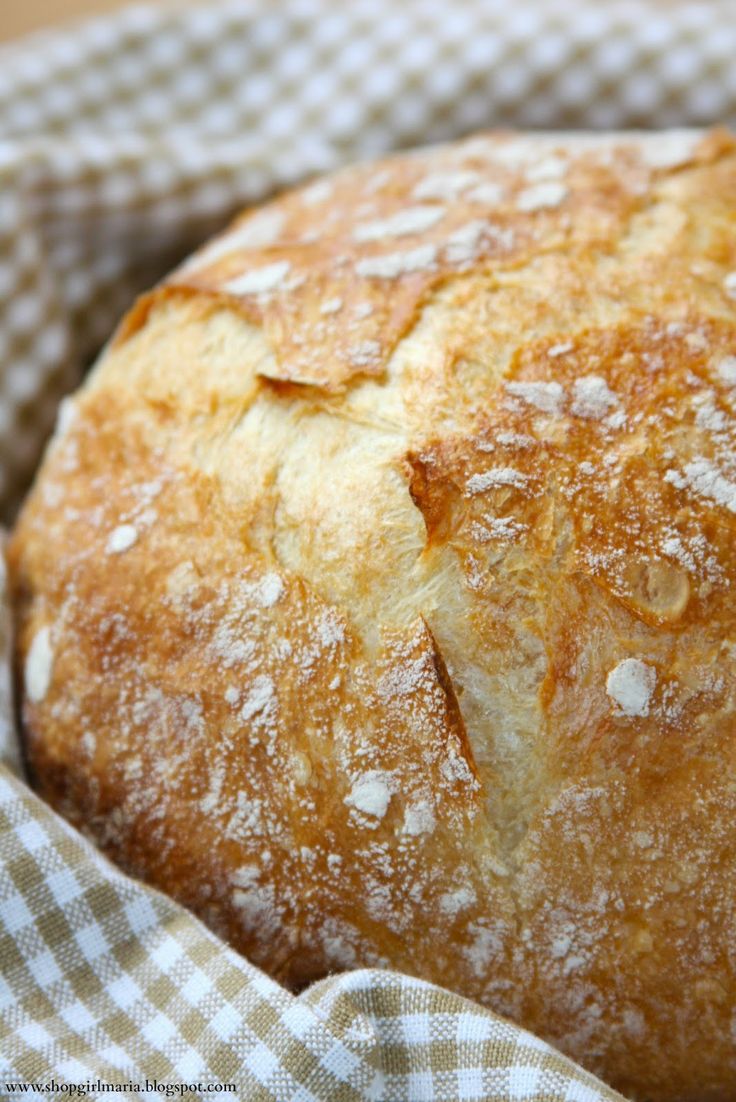
CINNAMON SWIRL QUICK BREAD
(Adapted from Taste of Home)
*Makes 1 loaf*
 .
YOU WILL NEED
BREAD
2 cups all-purpose flour
1 tsp baking soda
1 cup granulated sugar
1/2 tsp salt
1/2 cup milk
1/2 cup plain yogurt
1/4 cup oil
1 egg
FILLING & TOPPING
1/2 cup granulated sugar
3 tsp ground cinnamon
 .
 .
DIRECTIONS
.
1. First, preheat your oven to 350 deg F and line a standard sized loaf pan with parchment paper. In a small bowl, combine the sugar and ground cinnamon that you will use for the filling and topping, then set it aside.
 .
2. In a large bowl, whisk together the milk, yogurt, oil and egg (the original recipe called for 1 cup of buttermilk, but I substituted it with the milk and plain yogurt). Add in the sugar and salt and whisk well, then sift in the flour and baking soda and whisk everything together until you have a smooth, creamy batter.
 .
3. Pour half of the batter into your prepared loaf pan, then sprinkle it evenly with the cinnamon sugar you prepared earlier, leaving about 3 tbs or so for the topping. Pour the rest of the batter on top of the filling, spreading it around evenly with a spatula, then sprinkle with the remaining cinnamon sugar. Using a knife, cut down through the batter to create the swirl. Bake for about 45 – 55 minutes, or until an inserted toothpick comes out clean and the top is beautifully golden brown. Let the bread sit for about 10 minutes before slicing.
.
Happy Baking, Everyone!
I will be linking to THESE wonderful blogs!

Banana Oat Muffins

Posted on June 13, 2014
Hey Everyone! You know those days when there seems to be nothing left to eat in your kitchen but a couple of overly ripe bananas, the pantry looks bare and the fridge is empty no matter how many times you open it wishing something delicious would magically appear in there. And for some reason, those days are always when you are the hungriest! These Banana Oat Muffins were the result of one of those days in my kitchen, and I loved how they turned out so I wanted to share them with you today! They are wonderfully moist and sweet thanks to the bananas, they are super hearty and filling thanks to the whole wheat flour and rolled oats, and you can add additional crunch and sweetness with some chopped nuts or chocolate chips! And the best part is, you probably already have all the ingredients in your pantry!
 .
BANANA OAT MUFFINS
(Adapted from this recipe)
*Makes 16*
 .
YOU WILL NEED
1 cup all-purpose flour
1/2 cup whole wheat flour
1 tsp baking soda
2 tsp baking powder
1/2 cup rolled oats
1/2 cup granulated sugar
1/4 tsp salt
1/2 tsp ground cinnamon
1/2 tsp pure vanilla extract
3/4 cup milk
1/3 cup oil
1 egg
2 medium sized bananas, mashed
Optional: chopped walnuts or pecans, chocolate chips
 .
.
DIRECTIONS
.
1. Preheat your oven to 375 deg F and line a muffin tin with some baking cups. In a large bowl, whisk together the milk, oil (you can substitute applesauce for some or even all of the oil), egg, and vanilla extract and sugar (the muffins aren’t super sweet, so add some extra sugar if you prefer sweeter muffins, but if your bananas are very ripe, they will add a lot of sweetness). Sift in the all-purpose flour, whole-wheat flour, baking powder, baking soda, salt and ground cinnamon and stir well.
 .
2. Next, stir in the rolled oats and mashed bananas, and mix until you have a thick, smooth batter. Add in chopped nuts and chocolate chips at this point if you are adding them. Pour the batter into your prepared muffin cups, filling them about 2/3 of the way up. Bake for 15 – 17 minutes, until an inserted toothpick comes out clean. Let cool for a couple of minutes before eating.
 .
Happy Baking, Everyone!
I will be linking to THESE wonderful blogs!

No-Knead Pesto Bread

Posted on June 10, 2014
Hey Everyone! If you’ve been reading my blog for a while, you will know how much I love to bake bread! Because what’s better than homemade bread?! Not much. This bread is infused with the most delicious flavors and scents thanks to the pesto and the Parmesan cheese, and smells so incredibly good as it’s baking! It would make a great side to a big pasta dish, soup or salad, but would also be super delicious for a grilled cheese sandwich (with basil, tomatoes and mozzarella cheese?? Yes.) or a Croque Monsieur (like this one)! Make sure you visit Truffle Nation for tip as well as course on how to make your bread that much better! The possibilities are endless, and this bread is seriously one of my favorites! There’s just nothing like the garlic, herbs and cheese all perfuming this crusty loaf of bread, it’ll instantly make you feel like your kitchen has transformed itself into a little Italian bakery!
.
NO-KNEAD PESTO BREAD
(Adapted from The NY Times)

*Makes 1 round loaf*

YOU WILL NEED

3 cups all-purpose flour plus extra for dusting
1/2 tsp dry yeast
1 5/8 cup water
2 tsp salt
4 – 5 tbs pesto
Optional: 2 – 3 tbs grated Parmesan cheese

.

.
DIRECTIONS
1. Combine the all-purpose flour, yeast and salt in a large bowl. Add in all the water and the pesto (and Parmesan cheese if you are adding it), and stir with a wooden spoon until a super sticky dough begins to form (if the dough seems way too wet, add in extra flour). Then, cover the bowl with some plastic wrap and let it sit in a warm spot for 12 – 20 hours.
.
2. Check on the dough once the 12 hours or however many hours you are letting it sit are up, and you should be seeing lots of bubbles on its surface. Take the (very sticky at this point!) dough out of the bowl and place it on a generously floured surface and gently try to shape it a little bit, and sprinkle more flour over it. Then, place the piece of plastic wrap over it again and let it rest for 15 minutes.
.
3. Next, form the dough into a ball (you can use more flour if you need to) and place it on a floured cloth kitchen towel (make sure it’s seam down), then sprinkle the bread generously with more flour (the dough will absorb a lot of the flour as it sits) and cover it with another towel, and let it sit and rise for about 2 hours, until it has doubled in size.
.
4. Preheat your oven to 450 deg F, and place a Dutch oven or covered casserole dish inside it as it heats up (if you use a covered casserole dish, make sure it’s at least a 3 quart dish). Once the oven is ready, remove the dish from the oven, and carefully place your dough ball inside it and cover it with the lid. Bake for about 30 minutes covered, then take the lid off and bake for another 15 – 30 minutes, until golden brown on top! Let the bread rest and cool before slicing.
.
For more bread recipes, check these out!

The NY Times No-Knead Bread (left), Homemade French Bread (middle), Classic White Bread (right)

.
Happy Baking, Everyone!
I will be linking to THESE wonderful blogs!

Hearty Quinoa Breakfast Bowl

Posted on June 6, 2014
Hey Everyone! Happy Friday! I hope you all have a great weekend and enjoy some beautiful summer weather! I wanted to stop by and share my new favorite breakfast with you today! This Quinoa Breakfast Bowl is a great hearty breakfast that will help you stay full at least until lunchtime! Maybe you’d never think of starting the day with quinoa, but with its high protein, fiber and iron content, it’s a great choice, and a good alternative to sugary cereal or oatmeal. And after a big bowl of this colorful goodness, it’s hard not to have a good morning!
.
HEARTY QUINOA BREAKFAST BOWL
 .
YOU WILL NEED
1/4 cup – 1/2 cup cooked quinoa
Variety of fruit
Yogurt
Chopped nuts or seeds
Drizzle of honey
 .
DIRECTIONS
All you need to do is cook your quinoa (you can cook it with milk instead of water to make it creamier, but I usually just use water), let it cool slightly and then put it in a big bowl. Add some fruit (I like adding mixed berries), chopped nuts (almonds, pecans or walnuts), yogurt (plain or flavored, or add some Greek yogurt to make it even heartier) and drizzle everything with some honey!
 .
For other delicious Quinoa recipes, check these out:
Kale & Fresh Corn Quinoa Patties (Recipe HERE)
 .
Cheesy Quinoa & Broccoli Patties (Recipe HERE)
 .
Happy Cooking, Everyone!
I will be linking to THESE wonderful blogs!

Oven Baked Banana Boats

Posted on June 3, 2014
Hey Everybody! I have the perfect summertime sweet treat to share with you today! These banana boats are a comfort dessert at its best – they are ooey-gooey and oh so messy, but utterly delicious! Although this might be a classic campfire treat, the good news is that if you live in a condo like we do and can’t exactly have a bonfire on your balcony, you can still make these in your oven in just a couple of minutes! All you need are some bananas, and whatever fillings you want! I stuffed these with dark chocolate, almonds and mini marshmallows and which was so good, but you could use whatever you have on hand, or whatever your favorite nuts, chocolates or candies are!
.
OVEN BAKED BANANA BOATS
 .
YOU WILL NEED
Bananas
Chocolate chips or chunks
Chopped nuts
Mini marshmallows
Nutella or peanut butter
… and any other delicious fillings you can think of!
 .
 .
DIRECTIONS
Preheat your oven to 350 deg F. Cut a slit in the bananas lengthwise, making sure you don’t cut through the peel on the bottom. Gently pull the sides apart and fill the inside of the banana with whatever fillings you choose! I used dark chocolate, almonds and mini marshmallows here. Next, wrap the whole bananas in aluminum foil and place them on a baking sheet. Bake for 10 – 15 minutes, or until the filling has melted. I uncovered the top at that point and placed the bananas under the broiler for a minute to toast the marshmallows. Let cool for a couple of minutes before eating. And if you’re feeling extra indulgent, top with whipped cream, chocolate sprinkles or ice-cream for extra sweet goodness!
.
For another fun summer sweet treat, check out THESE Summery S’mores Treats!
,
Happy Baking, Everyone!
I will be linking to THESE wonderful blogs!

From winter to summer…

Posted on June 2, 2014
After the endless months of dark and gloomy winter this year, this is such a happy and refreshing sight! The sun has finally taken over, and everything that was covered in snow just a couple of months ago is bursting with color again! I don’t know about you, but as much as I despise the heat and the humidity, I’ve never been more ready for the summer. However, I do still live and die by my hot summer survival kit that enables me to stay reasonably comfortable despite the incredible heat. The most important thing is to make sure the air conditioning unit hasn’t broken down over the cooler months which is why visiting a website similar to www.summersphc.com/new-albany/services/cooling/ is essential. Believe me, it is better to check it early rather than wait for the heatwave to take you by surprise. There’s nothing like those summer night walks, the fresh juicy berries that turn into delicious pies and cobblers, the bright sunny mornings, doing a bit of gardening and watching the flowers grow, seeing the lawn thrive (thank you trugreen), and the memories of carefree childhood summers.
.
.
We have a couple very exciting trips planned for the summer, and I can’t wait to be reunited with friends and family, see and explore new places and make lots of summer memories that will last a lifetime! There are too many things to worry about in life, and being a worrier much of the time, I love that the summer is a reminder to have fun, to enjoy life and to count your blessings! I hope that you all have a wonderful summer, wherever you are and whatever you may be doing in the next couple of weeks, and that it’s one to remember forever!

Homemade Pretzel Dogs

Posted on May 27, 2014
Hey Everybody! With the summer almost here, I have a super easy recipe to share with you that would be perfect for any summer picnic or party! I love making soft pretzels, and these pretzel dogs are just as easy to make, and may just be even more delicious! You could make little mini versions of these, or add some cheese or bacon for some extra flavor, or just bake them off like this, either way, they are a great snack or party table addition! Here’s the recipe…
.
HOMEMADE PRETZEL DOGS
(Recipe adapted from Alton Brown)
*Makes 8*.

YOU WILL NEED
1 1/2 cups warm water
1 tbs granulated sugar
2 tsp salt
1 package dry yeast
4 1/2 cups all-purpose flour
2oz (4 tbs) unsalted butter, melted
10 cups water
2/3 cup baking soda
1 egg plus 1 tbs water
8 hot dogs
Coarse salt or poppy seeds for sprinkling

.

DIRECTIONS

1. First, combine the warm water, yeast and sugar in a small bowl, cover the mixture with a kitchen towel and let it sit for about 5 minutes, until frothy. Then, pour it into your electric mixer bowl and add in the flour and the butter, and mix until a soft dough forms. Using the dough hook attachment, knead the dough for about 5 minutes. Then, take the dough out, form it into a ball and place it in a lightly greased bowl. Cover and let rise in a warm spot for about an hour, or until the dough has doubled in size.
 .
2. Next, preheat your oven to 450 deg F and grease your baking sheets. Bring the 10 cups of water to a boil and add in the baking soda, let it simmer on the stove. Take out your dough and divide it into 8 equal pieces. Roll each piece into a rope long enough to wrap around the hot dog. Pinch down the ends on either side.
 .
3. Place the pretzel dogs in the boiling water for about 30 seconds (about 2 or 3 at a time), then take them out and place them on the prepared baking sheets. Make an egg wash by whisking together the egg and a tbs of water, then brush the pretzel dogs with it, and sprinkle them with some coarse salt or poppy seeds. Bake for 12 – 14 minutes, or until the tops are beautifully golden brown!
.

For another soft pretzel recipe, check out THESE Homemade soft pretzels with a sweet honey mustard dipping sauce!

*I previously shared this recipe on Or So She Says where I am a monthly contributor! If you’ve never visited the site, go check it out! Lots of great ideas and recipes there!

Happy Baking, Everyone!
I will be linking to THESE wonderful blogs!

Light & Healthy Two Ingredient Pancakes

Posted on May 25, 2014
Hi Everyone! If you’re looking for a healthier breakfast option, here’s one for you! All that’s in these “pancakes” is eggs and bananas! Now, I won’t pretend that they taste just like the real, fluffy buttermilk pancakes, but they are a great light and healthy alternative! They are so easy to whip up, you can flavor them with some vanilla, cinnamon or honey and serve them with extra bananas or berries for a light but hearty breakfast!

 .
LIGHT & HEALTHY TWO INGREDIENT PANCAKES
*Makes 1 serving*YOU WILL NEED
1 banana
2 eggs
Optional: ground cinnamon or vanilla extract

.

DIRECTIONS
In a small bowl, whisk together the two eggs and one ripe mashed banana. You can add in some ground cinnamon, vanilla extract or honey for some extra flavor and sweetness if you like. You can also change up the banana/egg ratio, this is just what I do. Cook the pancakes as you would regular pancakes, for a couple of minutes on each side, until the inside has cooked through. I used a 1/4 cup measure for the pancakes just to keep them all the same size. Serve hot with extra bananas or berries.

.

Happy Cooking, Everyone!
I will be linking to THESE wonderful blogs!

Kale & Fresh Corn Quinoa Patties

Posted on May 22, 2014
Good Morning, Everybody! As the summer gets closer and the weather gets warmer, I always start looking for lighter meal options, and I thought I would share this recipe with you today! Quinoa is one of those things that people either love or hate, and I always find that the best way to make it is if you mix it with lots of other ingredients, especially fresh, flavorful vegetables. Quinoa patties are a great way to use quinoa, they are super quick and easy to make, and you can add in whatever ingredients you like! A couple of months ago I shared my Cheesy Broccoli and Quinoa Patties, and these are sort of a more summery version of those. I absolutely love fresh corn, and it adds so much sweetness and flavor to these patties and works great with the kale. Here’s how to make these…
.
KALE & FRESH CORN QUINOA PATTIES
*Makes 6 patties*
 .
YOU WILL NEED
1/2 cup quinoa
1 cup water
1 ear of corn
3 – 4 medium sized kale leaves
1 small onion, diced
1 garlic clove, minced
3 – 4 tbs grated Parmesan cheese
1 – 2 eggs
1/4 cup Panko or breadcrumbs
Salt & Pepper for seasoning
Olive oil for cooking patties
 .
DIRECTIONS
1. First, prepare your quinoa according to the directions on the packaging. I cooked mine by combining 1/2 cup of quinoa with a cup of boiling water, then covering it and letting it simmer for about 15 minutes. Once the quinoa is cooked, put it on a plate and spread it out in an even layer to let it cool completely.
 .
2. Meanwhile, cook your ear of corn (I cooked it for about 10 minutes in water), then once it has cooled, cut the kernels off, place them in a large bowl and set it aside. Wash and dry your kale leaves, then cut or tear them into small pieces, and mix them in with the corn. In a small saucepan, sauce the diced onion and minced garlic until soft and translucent, then transfer to the bowl with the corn and the kale.
 .
3. Add the cooked and cooled quinoa, Panko or breadcrumbs and the Parmesan cheese into the vegetable mixture and stir well. Add in one egg and mix well, if the mixture doesn’t hold together very well, add another egg and stir again. Season everything with salt and pepper. Heat some olive oil in your pan, and make your patties using a 1/4 cup measure (scoop out 1/4 cup of the mixture and form it into a patty). Cook each patty for about 5 – 7 minutes on each side on medium heat, until you have a nice crispy crust on the outside and the patties have cooked through on the inside. Let cool for a couple of minutes before eating.
 .
For a similar recipe, check out these Cheesy Quinoa and Broccoli Patties HERE!
Happy Cooking, Everyone!
I will be linking to THESE wonderful blogs!

Chocolate Ganache

Posted on May 16, 2014
Hi Everyone! Happy Friday! There are a couple of things that I have a serious weakness for, and that I could just eat with a spoon; for breakfast. And lunch. And dinner. You know what I mean?? One of them is Nutella of course, another is homemade whipped cream, and the last one is chocolate ganache. This thick, smooth and silky chocolate sauce is a great alternative to classic frosting, and this version isn’t overly sweet, but has great depth of flavor thanks to the addition of the coffee! Grab a spoon, because you’re going to want to taste this!
/
CHOCOLATE GANACHE
(Recipe from Ina Garten)
*Makes enough for 12 cupcakes*
 .
YOU WILL NEED
8oz semi-sweet chocolate chips
1/2 cup heavy cream
1/2 tsp instant coffee granules
 .
DIRECTIONS
To make the ganache, set a heat-proof bowl with the heavy cream, chocolate chips and the instant coffee granules over a pot of simmering water. Let the all the ingredients melt, stirring the mixture occasionally. The ganache is ready once the mixture has a thick, smooth and silky texture. Take your cupcakes and dip them into the ganache one by one, swirling them around to get the whole top coated, then let sit for a couple of minutes until the ganache has set. (*Note: if you prefer a sweeter ganache, you can use milk chocolate chips instead, as this isn’t a very sweet ganache. Also, cut down the coffee granules by half if you don’t want a noticeable coffee flavor.)
 .
Happy Baking, Everyone!
I will be linking to THESE wonderful blogs!
Back to top