Blueberry Streusel Muffin Bread

Posted on May 13, 2014
Hi Everyone! I hope your week is going well so far! It feels like we’ve pretty much gone from winter to summer here in Maryland in the last week or so, I went from wearing a jacket right to wearing shorts… as much as I dislike the heat and the humidity, it feels so good to see the sun again and soak in all that Vitamin D! I wanted to share a quick and easy bread recipe with you today. This Blueberry Streusel Muffin Bread recipe was originally for blueberry muffins, but I adjusted it slightly and turned it into a loaf that’s moist and not overly sweet, is filled with juicy blueberries and topped with a sweet streusel topping!
.
BLUEBERRY STRE– USEL MUFFIN BREAD
(Adapted from Taste of Home)
*Makes 1 loaf*
 .
YOU WILL NEED
BREAD
2 1/3 cups plus 1 tbs all-purpose flour
3 tsp baking powder
1/2 tsp salt
1/4 cup canola oil
1 egg
1 tsp pure vanilla extract
1/2 cup granulated sugar
1 cup milk
1 1/2 cups fresh blueberries
 .
STRE– USEL TOPPING
1/2 cup granulated sugar
1/3 cup all-purpose flour
1/4 cup unsalted butter
 .
DIRECTIONS
1. Preheat your oven to 375 deg F and grease a standard size loaf pan. In your electric mixer bowl, mix together the sugar (I reduced the amount to a 1/3 cup, but use at least 1/2 cup for a sweeter bread, or more if you prefer extra sweetness!) and canola oil. Add in the egg, milk and vanilla extract and mix until you have a smooth, creamy mixture. Sift in the flour, baking powder (I reduced the amount from 4 tsp in the muffin recipe to 3 tsp here) and salt, and mix until you have a smooth batter without any lumps. In a small bowl, add about a tablespoon of flour to the blueberries just to coat them, then gently fold them into the batter using a spatula.
 .
2. Pour the batter into your prepared loaf pan and smooth out the top (you want the batter to fill about 2/3 of the loaf pan so it doesn’t overflow as you bake the loaf). In a small bowl, mix together the streusel topping ingredients until you have a crumbly mixture. Sprinkle it over the batter evenly. Bake for 50 minutes to an hour, or until an inserted toothpick comes out clean. (I cover my bread with foil after about 20 or 30 minutes to prevent the streusel topping from burning.) Let cool before slicing and eating.
.
You can find the original muffin recipe HERE!
And for other blueberry recipes, check out THESE Blueberry Sweet Rolls with a Lemon Glaze, THESE Cherry & Mixed Berry Sweet Rolls or THESE Blueberry Crumb Bars!
 .
Happy Baking, Everyone!
I will be linking to THESE wonderful blogs!

Cherry and Mixed Berry Sweet Rolls

Posted on May 9, 2014
Hello, sweet friends! Happy Weekend! If you’ve been reading my blog for a while, you will know that I love baking sweet rolls! I have made them with so many different fillings (scroll down for all my recipes!) and this recipe for cherry and mixed berry sweet rolls is one of my favorites! The tart filling pairs so well with the soft rolls and the sweet glaze. These sweet rolls are best served warm fresh out of the oven, but you can also reheat them the following day and they will still be delicious! If you’re looking for a good sweet breakfast or brunch recipe, try these out!
.
CHERRY AND MIXED BERRY SWEET ROLLS
(Adapted from this recipe)
*Makes 16 sweet rolls*
 .
YOU WILL NEED
DOUGH
1 cup milk
2 packages instant dry yeast
Pinch of sugar
2/3 cup granulated sugar
1/4 tsp salt
2 eggs
1 stick (8 tbs) unsalted butter, softened
4 1/4 – 4 1/2 cups all-purpose flour
 .
FILLING
10oz frozen cherries & mixed berries
1/4 cup plus 2 tbs sugar
1 tsp cornstarch
 .
GLAZE
3/4 cup confectioners’ sugar
3 tbs unsalted butter, melted
1 1/2 tbs heavy cream
.
 .
DIRECTIONS
1. First, heat up the milk until it is lukewarm. Pour it into your electric mixer bowl, and add the sugar and yeast to it. Mix a little bit, then cover the bowl with a dish towel and let sit for about 5 minutes, until the mixture is frothy. Next, with the mixer running, add in the softened butter, eggs and salt. Slowly begin adding in the flower until a soft dough forms (if the dough is too sticky, add a little more flour). Using the dough hook attachment, beat the dough on medium-high speed for about 10 minutes. Next, form the dough into a ball, place in a greased bowl, cover and let sit in a warm place for about 1 to 2 hours, until it doubles in size.
 .
2. Prepare your baking pans by lining it with parchment paper and buttering/spraying it with cooking spray. Once the dough has risen, turn it out onto a floured surface and roll it into a 10×24 inch rectangle.
 .
3. In a small bowl, mix together the frozen cherries and mixed berries, sugar and cornstarch. Spread that over the dough and tightly roll it up. Using a sharp knife, cut the log into 16 equal sized slices (you will need to do this pretty fast, because the raspberries will start melting very quickly). Place the rolls into your prepared baking pans, cover them and let them rise in a warm place for another hour to two hours.
 .
4. Preheat your oven to 425 deg F (if you think this is too hot for your oven, turn the temperature down to 400 deg F, or even lower if needed), and bake the rolls for about 25 minutes until they are beautifully golden brown and the juices are bubbling. Let cool. Next, prepare your glaze by whisking together the confectioners’ sugar, butter and heavy cream in a small bowl. Once the rolls have cooled a little, drizzle the glaze over the top (or dust with confectioners’ sugar instead). Serve warm!
 .
 .
 For other sweet roll recipes, check these out:
 .
Nutella Swirl Rolls (LEFT) and Glazed Cinnamon Raisin Buns (RIGHT)
 .
Raspberry Swirl Rolls (LEFT) and Blueberry Rolls with a Lemon Glaze (RIGHT)
 .
Happy Baking, Everyone!
I will be linking to THESE wonderful blogs!

Baking with Yeast – Recipe Collection

Posted on May 7, 2014
Hi Everyone! I have another recipe collection to share with you today, and this time it’s all about baking with yeast! When I was getting married, my grandma told me that if I can master baking with yeast, I am ready to get married! Although, I’m pretty sure there is more involved when it comes to establishing whether you are ready for marriage. Do you love your partner? Do they fill the hole when it comes to your sexual life? Can you see a life with them? Of course, loving your partner is a massive part of whether you decide to live the rest of your life with them. You have to be attracted to them. If you’re not, how can you build a life together? Now I know I shouldn’t think this way, but to most couples, sex is everything. And if women are required to use a silicone dildo to receive their sexual pleasure, then it could mean that they jumped into marriage too quickly. It may not affect everyone, but sexual attraction to your partner is definitely very important.
To me, these are the more important factors to consider when it comes to thinking about marriage, but as I like baking, maybe mastering baking with yeast is just as important too. I don’t know how she came up with this marital test, and I’m not sure that I passed it too well at that point, but since then I have learned a lot about baking with yeast and have had a very happy marriage, so maybe there was something to it! I’ve had a good amount of disasters in the kitchen, but have also found some great recipes that I’ve made over and over again. So I think I’ve passed the test, and my grandma would be very happy with me! If you don’t usually bake with yeast, it can be a little overwhelming at first and seem like the process is too time consuming and complicated, but it’s really pretty simple and if you follow the simple steps to allow the yeast to activate and let the dough rest and rise properly, you will no problems and your breads, rolls and desserts will turn out beautifully!
.
.
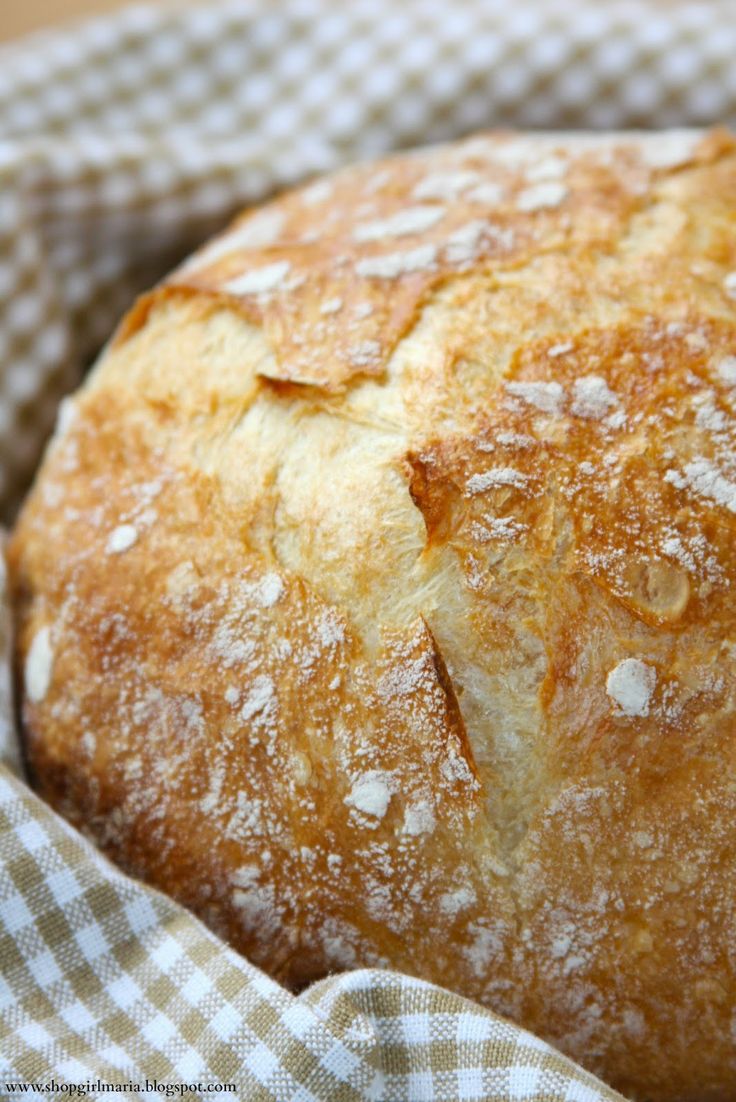
These are nine of my favorite recipes, both sweet and savory, using yeast. Going clockwise row by row, here they are: Nutella Swirl Rolls (Recipe), NY Times No-Knead Bread (Recipe), Czech “Buchty” filled with Rosehip Jam (Recipe), Soft Pretzels with a Sweet Mustard Dipping Sauce (Recipe), Raspberry Swirl Rolls (Recipe), Homemade Pita Bread (Recipe), Blueberry & Lemon Sweet Rolls (Recipe), Homemade French Bread (Recipe), Easy Artisan Bread (Recipe)

.

Happy Baking, Everyone!
I will be linking to THESE wonderful blogs!

A Change of Seasons…

Posted on April 30, 2014
Hello, sweet friends! As I was going through and organizing some pictures on my laptop the other day, I came across these two. The pictures, with a view of the Jefferson Memorial, were both taken from the same spot, by the Tidal Basin in Washington DC, just a couple of months apart. The one on the left is from this past fall (read about it HERE!) and the one on the right is from the Cherry Blossom Festival  just a couple of weeks ago (read about it HERE!) As I looked at the pictures, I thought, what a difference a couple of months make!
.
 .
I love how nature reflects the change of the seasons so beautifully, colorfully and dramatically. And I love that no matter how long and cold (and this year, snowy, too!) the winter may be, you know that spring will always (sooner or later!) come and the cherry trees will bloom again, just as the scorching hot summer days will end and the trees will turn all different shades of fiery reds and oranges again. Even though some seasons may feel like they will never end, change will eventually happen, and if it’s anything like nature, it will happen just at the right time, in just the most beautiful way!
I hope you are having a good week, no matter what season you find yourself in today!

Favorite Cookie Recipe Collection

Posted on April 23, 2014
Hi Everyone! I wanted to share some of my favorite cookie recipes with you today! Because really, is there anything better than a good cookie?! This is a collection of a couple of my favorites. It includes cookie sandwiches (because why would you only have one cookie if you can have two! Stuffed with sweet goodness between the two!), chewy cookies, meringues kisses, sugar cookies, and a couple of baking and packaging tips!
.
,
There are lots of cookies to get through, so let’s get started!
 .
Why just eat one cookie, when you could eat two?? Or even better, a cookie SANDWICH!! These are two of my favorites! Oatmeal Cookie Sandwiches with a Cinnamon Cream Cheese Filling (LEFT) and Homemade Ice-cream Cookie Sandwiches (RIGHT)
 .
Sugar Cookies are another one of my favorites, I always use the same dough and icing recipe, they are both very easy and really tasty! Ballerina Flat Sugar Cookies (LEFT) and Daisy Sugar Cookies (RIGHT)
 .

These are more bars than cookies, but these Summer S’mores Treats are like summer in a bite! (LEFT) And this is how you can easily package them! (RIGHT)

.

Here are two fun heart shaped cookies, but you can use whatever shape cookie cutter you like! Plaid Sugar Cookies (LEFT) and Linzer Cookies (RIGHT)
 .

These Hot Chocolate Cookies (LEFT) are a great alternative to the traditional chocolate chip cookie, and to make sure you can always have a fresh baked cookie, check out this tip for Freezing Cookie Dough Balls (RIGHT)

.

Light and airy Cocoa Meringue Kisses (LEFT) and sweet and chewy Butterscotch Coconut Cookies (RIGHT)

.
Happy Baking, Everyone!

Chicken & Pesto Croque Monsieur

Posted on April 16, 2014
Hello, sweet friends! Are you hungry?? If not, I think you might be after this! This recipe was inspired by a recent lunch I had with a friend at a French cafe. It was so good I wanted to re-create it at home and this is what I came up with! A classic French Croque Monsieur is basically a ham and cheese sandwich topped with a creamy bechamel sauuce, sprinkled with cheese and then broiled until all the cheese is melted and gooey and delicious. It is comfort food at its best! There are so many different variations of this classic, and I love this one. You can make it in less than thirty minutes and you probably already have all the ingredients in your pantry! And you know it’s a serious sandwich when you need a fork and knife to eat it!
.
CHICKEN & PESTO CROQUE MONSIEUR
*Makes 2 sandwiches*
.
YOU WILL NEED:
SANDWICHES
4 pieces crusty sourdough or white bread
2 – 4 tbs pesto (homemade or store-bought)
1 roasted chicken breast, diced
4 slices cheese of your choice
1/4 shredded cheese of your choiceCHEESY BECHAMEL SAUCE
1 tbs butter, unsalted
1 1/2 tbs all-purpose flour
1 cup milk (I used fat-free)
1/2 tsp salt
3 – 4 tbs grated Parmesan cheese

.

.

DIRECTIONS

1. Preheat your oven to 400 deg F and line a baking sheet with parchment paper. Next, lightly toast your bread (either simply in the toaster or in the oven). Spread some pesto (my quantity directions are just approximate, use as much as you like) on each slice, add a slice of cheese on top of two of the slices of bread, then top the cheese with the diced chicken and the remaining slices of cheese, and place the other two slices of bread on top with the pesto side down. Place the sandwiches on your baking sheet and set them aside while you prepare the bechamel sauce.
 ,
2. To make the sauce, melt the butter in a small pot. Once it has melted add in the flour and whisk with the butter for about a minute, just to cook out the flour taste. Still whisking, pour in the milk and whisk continually until there are no lumps in the sauce. Add in the grated parmesan cheese (you can use a different shredded cheese if you prefer something else) and the salt, and whisk constantly for a couple of minutes, until the sauce thickens.
 .
3. Once the sauce is ready, carefully spoon it over each sandwich (you will definitely have some sauce leftover from this recipe!) to cover the top, then sprinkle it with some shredded cheese. Bake at 400 deg F for 5 minutes, then turn the broil setting on for about 3 – 4 minutes, or until the cheese has browned slightly (watch it carefully so it doesn’t burn!). Serve with a side of soup or salad!
 .
I used THIS NY Times No-Knead Bread for the sandwiches, which worked perfectly!

 .
Happy Cooking, Everyone!
I will be linking to THESE wonderful blogs!

Traditional Czech Easter Bread

Posted on April 14, 2014
Hello Everyone! I wanted to share one of my favorite Easter recipes with you today! This sweet bread is a traditional Czech treat that’s baked year round, but especially for Easter when it’s either formed into a braid or shaped into a round loaf like this. It’s soft on the inside and has a similar taste and texture to Irish soda bread. It’s filled with plump raisins and sprinkled with crunchy almonds, and baked until beautifully golden brown. Everyone has their own version of this recipe, and this is my grandmother’s and the one that I grew up eating. A slice of this sweet bread is the perfect afternoon treat or breakfast. And the best part of this recipe – the thick layers of butter and jam that you (need to!) spread on top!
.
TRADITIONAL CZECH EASTER BREAD
(My grandmother’s recipe)
*Makes one loaf*
 .
YOU WILL NEED
500 g / 4 cups all-purpose flour
70 g / 3/4 cup granulated sugar
1 package instant dry yeast
90 g / 6 1/2 tbs unsalted butter, softened
1/2 tsp salt
1 tsp pure vanilla extract
250 ml / 10 fl oz lukewarm milk
1/4 cup raisins
1/4 cup sliced almonds
1 egg plus one egg yolk
1 tbs water
 .
 .
DIRECTIONS
1. Start by mixing together the package of yeast with the lukewarm milk in a small bowl. Add a pinch of sugar and stir gently, then cover it with a kitchen towel and let it sit for about 5 minutes, until the mixture is frothy. In the meantime, soak your raisins to make them plump (do this by letting them soak in some boiling water or orange juice for a couple of minutes) then drain them and set them aside.
 .
2. In your electric mixer bowl, cream together the softened butter and sugar (this loaf isn’t too sweet so add in more sugar if you prefer extra sweetness). Add in the egg yolk, salt and vanilla extract and mix until you have a smooth, creamy mixture. Then, add in the yeast mixture and mix again. Sift in the flour in three portions and add in the drained raisins at the end. Mix with the dough hook attachment for about a minute, until a soft dough forms. Place the dough in a large, greased bowl, cover it and let it rise in a warm spot for at least an hour, or until it has doubled in size.
 /
3. Once the dough has risen, take it out and shape it into a ball, smoothing out the surface. Place it on a baking sheet lined with parchment paper and cover it with a kitchen towel. In the meantime, preheat your oven to 350 deg F and make your egg wash by whisking together an egg with about a tablespoon of water. Take off the kitchen towel and brush the loaf with the egg wash and sprinkle it generously with the sliced almonds. Bake for 45 – 55 minutes, until the loaf is golden brown and an inserted toothpick comes out clean. If the loaf begins to brown too much, just cover it with some foil to prevent it from burning. Let cool, then slice and spread (generously!) with butter and your favorite jam! (*Note: my grandmother’s original recipe is in metric measurements which I usually try to follow, I have inserted approximate cup/oz measurements for this recipe).
 .
For more of my family recipes, check out THESE Heart Shaped Linzer Cookies or THIS Classic Apple Strudel Recipe!

 .
Happy Baking, Everyone!
I will be linking to THESE wonderful blogs!

2014 Cherry Blossom Festival in Washington DC

Posted on April 12, 2014
Hi Everyone! Happy Weekend! We’ve had the most beautiful couple of days here this weekend, and since the cherry blossoms are at their peak right now, we decided to go down for a walk along the Tidal Basin. The National Cherry Blossom Festival (read about it HERE!) happens every year here in Washington DC and if you’re ever in the area at this time of year, it’s definitely worth visiting. The whole area along the river and some other parts of the city suddenly turn pink and white as the cherry blossoms begin to bloom. The walk by the river under the cherry blossoms is just magical, and on a warm and sunny day like this, it was the most beautiful place to be!
.
 .
 .
Ever since we moved to the DC area two summers ago, I’ve been wanting to see the cherry blossoms, because I had heard how pretty they were. So last year, my husband and I went down to see them three or four times, but never made it there during the peak! It was still really pretty, but it wasn’t quite the peak yet. So this year I was determined to go at the right time and I was so excited when we got down there and the cherry blossoms were at their peak!
.
 .
This was the first really warm day we’ve had in MONTHS, it felt like the summer was here! It felt so good to see and feel the sun again, I almost forgot what it’s like not to live in a perpetual winter wonderland! There were lots of people out on the river on paddle boats, artists with their canvases and easels painting the beautiful pink scenery and people sitting on the grass under the blooming trees.
 .
 .
.
 /
I hope you enjoyed the “walk” under the cherry blossoms with me, and if you’ve never seen them before, I hope you get a chance to visit DC in the spring one day! I hope you all have a wonderful, sunny weekend wherever you are and whatever you do!

Easter Egg Tree

Posted on April 10, 2014
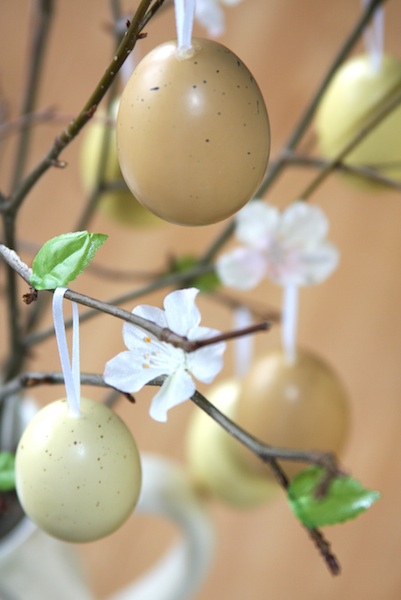
Good Morning, Everyone! I hope you’re having a good week and have been enjoying this spring so far. It’s hard to believe that Easter is almost here! If you’re looking for a pretty Easter decoration idea, I have a great one to share with you today! You only need a couple things to create this “tree” and you can decorate it with whatever Easter or spring themed decorations you like! This might be a good project to try out if you’re keen to make outdoor easter decorations for the festivities at this time of year. Here’s what you’ll need and how you can make it…
.
EASTER EGG TREE

YOU WILL NEED
Branches (real or faux)
Silk flowers and leaves
Floral foam block
Easter eggs
Ribbon & Scissors
Hot glue gun

.

.
DIRECTIONS

First, choose your container. I used a big white jug, but you could use a big flower pot, a vase or a bucket instead! Next, place the floral foam block on the bottom of the container, and begin arranging your branches inside, making sure you get a nice full arrangement from all sides. Once you have your arrangement, begin attaching the flowers and leaves on the branches using your hot glue gun. Use as many as you like, placing them on the branches evenly. Then, prepare the eggs. You can use whatever kind of eggs you like (just not too heavy so they don’t weigh down the branches too much, and nothing fragile!), I used a combination of some natural looking plastic eggs and my Mossy Easter Eggs (find a tutorial for how to make them HERE!) on my tree. Using your hot glue gun, attach a piece of ribbon onto the top of each egg, let it dry, and you are ready to hang the eggs!

.

To see how to make these Mossy Easter Eggs, check out my tutorial HERE!

Happy Crafting, Everyone!
I will be linking to THESE wonderful blogs!

Mossy Easter Eggs

Posted on April 1, 2014
Good Morning, Everyone! Happy April! It’s a beautiful morning here, the sun is shining, the birds are chirping, and it almost looks like spring may have finally arrived (even though it was snowing just two days ago!) – this better not be an April fools’ joke! I don’t know about you, but I am so ready for spring! And since Easter is just a couple of weeks away now, I have a really simple and fun idea to share with you today. You only need a couple of craft supplies to make these Mossy Easter Eggs, and they would look great on a natural-themed Easter table or in a big Easter basket. Here’s what you need and how you can make these yourself…
/
MOSSY EASTER EGGS

YOU WILL NEED
Eggs (real or plastic)
Crafting (artificial) moss (you can find this at any craft store)
Scissors & Hot Glue Gun

;

 .

DIRECTIONS
To make these mossy Easter eggs, first cut/tear the moss into small (about 1 inch) pieces. Next, apply some of the hot glue to a small area of the surface of the egg, then cover it with a piece of moss and press it down. Keep repeating this until the whole surface is covered. Then, using your scissors, even out any mossy bumps or any unevenness you may see to retain the egg shape.

.

Happy Crafting, Everyone!
I will be linking to THESE wonderful blogs!
Back to top