Sour Cream Pancakes with Blueberries

Posted on July 15, 2013
Hi, Everyone! I hope you’ve all had a great weekend and are having a good Monday so far! I’ve finally recovered from our amazing trip to Ecuador (read about it HERE and HERE!) and have my voice back again! I lost my voice towards the end of the trip and just couldn’t seem to get it back, I’ve never been so frustrated! But this week has been off to a good start and I have a great breakfast recipe to share with you today! These Sour Cream Pancakes with Blueberries make for a great weekend breakfast, and are so fluffy and delicious! The sour cream gives the pancakes great flavor and makes them so hearty and filling! Along with some fresh blueberries and (lots of) maple syrup, these are the perfect thing to wake up to on a lazy morning!
.
SOUR CREAM PANCAKES WITH BLUEBERRIES
(Recipe from The Pioneer Woman)
*Makes 2 hearty portions*
 /
YOU WILL NEED
1 cup sour cream
7 tbs all-purpose flour
2 tbs granulated sugar (add an extra tbs if you like sweeter pancakes)
1 tsp baking soda
2 eggs
1/4 tsp salt
1/2 tsp pure vanilla extract
1/2 cup fresh blueberries
Butter/oil for cooking
Syrup for serving
.
 .
DIRECTIONS
1. In a medium sized bowl, whisk together the flour, sugar, baking soda and salt. Add in the sour cream and stir gently. Then, add in the eggs and vanilla extract, and mix just until all the ingredients have combined. (Don’t worry if there are some lumps left in the batter.) Gently stir in the blueberries.
 .
2. Add some butter or oil (whatever you prefer using) to your griddle or pan, and make your pancakes, portioning the batter using a 1/4 cup measure. Cook until the edges begin to brown a little and bubbles begin to pop up on the pancakes, then flip them over and cook until the pancakes are done!
 .
Have a great week, Everyone!
Our Trip to Ecuador – Part 2: The Landscapes

Posted on July 13, 2013
Hi, Everybody! As promised I’m sharing a little more about our trip to Ecuador with you today! If you missed the first post about our trip which was all about Ecuadorian food, you can find it HERE! Today I want to show you a little more of the landscapes of Ecuador; the beautiful nature and the busy cities. Traveling is one of my favorite things to do, I love going to new places, seeing new things and experiencing new cultures, and this was such a great first trip to South America. You never return the same from a journey that takes you to new places, I love the way that it opens your eyes to the world around you, and helps you see your own home through different eyes too. So let me show you a little more of Ecuador…
.
1017286_574009261392_344865621_n
One of my favorite parts of our time in Ecuador was driving through the El Cajas National Park in the Andes mountains. It was a rough ride with lots of very sharp turns and the altitude was really hard to adjust to, since there isn’t as much oxygen so high up it was hard to catch your breath! But the views of the mountains were absolutely breath-taking! The picture above shows the tips of the mountains covered in a thick mist of clouds, it was just one of the most beautiful things I’ve ever seen!
.
DSCN9330 copy
DSCN9307-1 copy
.
DSCN9592 copy
We walked up to the Continental Divide which runs through the El Cajas National Park and is 14,000 feet above sea level! I didn’t realize just how hard it would be to walk up there because of the high altitude, it was really hard to breathe with so little oxygen up there, and it made our hearts pound so hard! We had to walk slow and pace ourselves, and take lots of deep breaths, but it was definitely worth it!
.
 DSCN9590 copy
DSCN9588 copy
The foggy way back down.
.
DSCN9423 copy
We also drove up to a horse ranch in the mountains near the city of Cuenca. It was a cold and rainy day, but the ranch had a cute little lodge with a big fireplace and a little seating area to relax in!
 .
DSCN9427 copy
My husband and I.
.
 DSCN9447 copy
DSCN9440 copy
The beautiful mountains around the ranch. The air was so fresh and everything was so peaceful and quiet.
.
DSCN9338 copy
The city of Cuenca, where we spent most of our time. Cuenca is in southern Ecuador, completely surrounded by mountains, as you can see in the picture.
 .
DSCN9375 copy
DSCN9377 copy
The New Cathedral in Cuenca.
DSCN9352 copy
The flower market in the center of Cuenca. This was one of my favorite places, I absolutely LOVED all the beautiful flowers they sold. So many different colors of roses! Every morning we would see the vendors arranging the flowers and setting up their stalls, and I so wished I could have brought some flowers back with me!
.. 
DSCN9587 copy
Some of the beautiful handmade crafts sold at one of the markets in Cuenca.
 .
I hope you enjoyed the little tour and pictures of Ecuador, and that you are having a great summer and going on lots of new adventures too! Hope you all have a great weekend!

Our Trip to Ecuador – Part 1: Food

Posted on July 11, 2013
Hi, Everyone! Since we just got back from spending a couple of days in Ecuador, I wanted to share a little bit about our trip with you today! This was my first time visiting South America, and it was such a fun adventure! I would love to go to South America again, I’ve seen the cruises on https://www.voyagers.travel/river-cruise/ and will defintely be looking into that! But first, let me tell you about the trip. In this first part, I want to tell you about all the different kinds of food we had in Ecuador! I love trying new things whenever I travel, and since food is such a big part of a culture, you can learn a lot from it about the country’s history and its people. The cuisine in Ecuador is pretty diverse, and includes lots of different kinds of meats (including guinea pig, which we did try!), seafood, rice and a huge variety of fruits. Let me tell you a little more about it…
.
DSCN9320 copy
One of my favorite places that we went to was a trout farm and lodge in the El Cajas National Park called Dos Chorreras (you can find out more about it HERE!) The lodge is in the Andes mountains and the scenery around it is just breathtaking! It was very cold and foggy up in the mountains, and this lodge was so beautiful and cozy, decorated in a traditional style with bright colors and comforting warmth coming from the fireplace!
.
DSCN9322 copy
The cozy interior of the lodge restaurant. What’s special about this place is that they have their own lakes and you actually see them catch your trout! Then they take it back into the kitchen and prepare it for you depending on how you order it!
.
.DSCN9321 copy
.
DSCN9324 copy
The first course was a traditional Ecuadorian potato soup with egg and avocado. It was deliciously creamy! We discovered that soups are very popular in Ecuador and are usually served to start the meal off. We tried a couple of different versions of this potato soup, some were more creamy, some were more of a broth, served with different toppings.
.
DSCN9323 copy
To start the meal off, we got this warm, cider-like drink. It was sweet with a hint of cinnamon, and the perfect thing to warm us up on a very cold day!
.
DSCN9325 copy
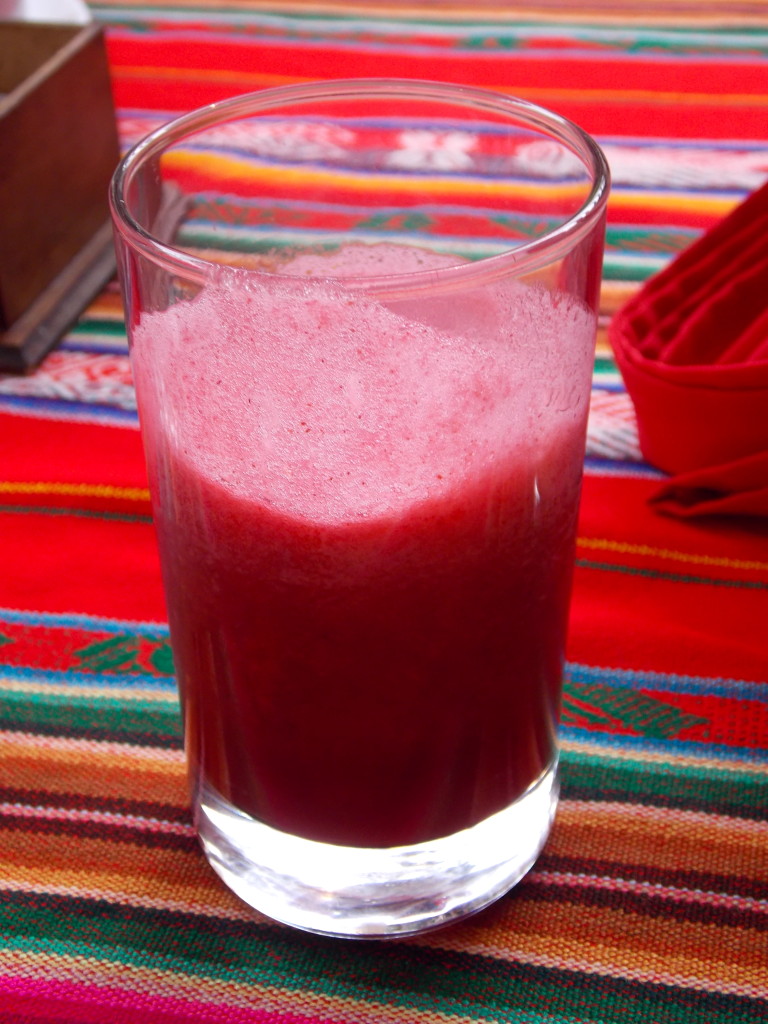
We tasted so many different kinds of fresh fruit juices, like pineapple, mango, orange, lime, and papaya, but this mulberry juice was my absolute favorite!
.
DSCN9326 copy
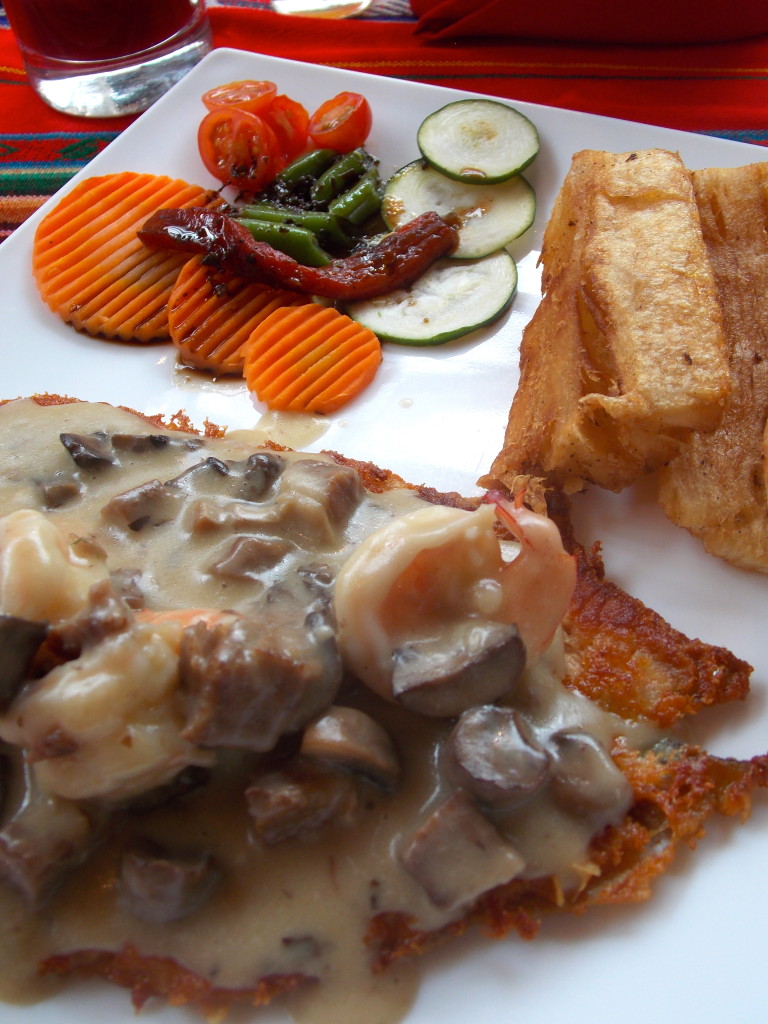
This was my dinner at the trout farm – trout with shrimp and bacon in a creamy sauce with yucca and vegetables! It was definitely the freshest fish I have ever had, since we saw them catch it just a couple of minutes before it was served to us!
.
DSCN9328 copy
And the sweetest part of the meal – Flan with raspberry sauce.
.
DSCN9372 copy
I loved how there was so much fresh fruit sold on the street. There were lots of people like this lady, pushing carts with cut up pieces of pineapple, coconut and other fruit like strawberries and apricots selling them to people passing by. There were also lots of people carrying big baskets selling different little pastries and sweets.
.
DSCN9365 copy
One of our many stops at the bakery! There were lots of little bakeries on the streets of Cuenca (the town where we were staying) selling different cakes, sweet pastries, and sweet and savory breads. The empanadas stuffed with cheese were my favorite! There was also lots of dark chocolate being sold everywhere. The dark Ecuadorian chocolate was delicious, and it was so cool to see all the cocoa beans growing along the streets on many of our drives through the country!
.
DSCN9572 copy
I had never seen plantains served like this – with rice and beef! Plantains are like bananas, and are often used in cooking. They are sweet and soft, and we had them served alongside meals like this, with queso fresco (cheese) and saw them sold as chips on the streets.
.
DSCN9578 copy
A little coffee shop selling bags of Ecuadorian coffee. You could either buy it ground or buy the beans (which we did). This place smelled AMAZING, and was definitely the freshest coffee I have ever seen – they told us the beans had been brought down from the mountains that very morning!
.
DSCN9581 copy
.
I hope you enjoyed this little food tour of Ecuador, come back again soon to hear more about our time in Ecuador! Have a great rest of your week, Everyone!

Ballerina Flat Sugar Cookies

Posted on July 5, 2013
Hi, Everyone! I hope you’ve all been having a great week so far! I have a fun cookie idea to share with you today! These little Ballerina Flat Sugar Cookies are delicious and just melt in your mouth, and are the perfect little treat or favor for any girly party! I used my favorite sugar cookie recipe which you can find here, and this royal icing recipe. I made a simple stencil in the shape of the shoe and then used it to cut shapes out of the sugar cookie dough. I just did a simple design with the royal icing, but you could use whatever colors and designs you choose and decorate the cookies however you like! It would also be fun to decorate these at a party and let everyone design their own “shoes”!
 /
Happy Baking, Everyone!
Stuffed Zucchini Boats

Posted on June 25, 2013
Hi, Everyone! It’s been a very busy and super hot week here so far, and I have the perfect summer dinner recipe to share with you for days when it’s too hot to eat anything heavy and you only have a half hour or so to throw dinner together! I love making these Stuffed Zucchini Boats, mainly because they are light, delicious and you can make so many different versions of them! I stuffed mine with fresh corn, grilled chicken pieces and feta, but you could definitely add different meats or go vegetarian with them, and use whatever vegetables and cheeses you have on hand! This is exactly what summer cooking should be like – light, quick, easy and using fresh ingredients!
.
STUFFED ZUCCHINI BOATS
*Makes 4 Zucchini Boat halves*
 .
YOU WILL NEED
2 medium sized zucchinis
1 grilled chicken breast, chopped
1 ear of corn
1 small red onion, diced
1 clove of garlic, minced
2 tbs olive oil
1/4 cup crumbled feta cheese
1/4 cup shredded cheese of your choice
Fresh parsley, chopped
Salt and Pepper
 .
DIRECTIONS
 .
1. First, prepare your filling by adding the olive oil to a medium sized pan, and sauteing the onion and garlic until softened. Add in the fresh corn kernels, chopped chicken breast (I had some left over grilled chicken and just used that), parsley and season well with salt and pepper. Cook until vegetables have softened. Take off heat and set aside.
 ,
2. Preheat your oven to 350 deg F and line a baking sheet with parchment paper. Slice your zucchini in half (long way) and scoop out the inside, leaving about a 1/4 inch border around the edges. Discard the seeds and dice the rest of the scooped out inside and add it into the vegetables. Add in the crumbled feta cheese and mix all together.
 .
3. Place your zucchini halves on your baking sheet and stuff with the vegetable and chicken mixture. Sprinkle with shredded cheese and bake for 15 to 20 minutes, or until the cheese has melted and the filling is slightly browned.
 /
Happy Cooking, Everyone!

A Sweet Afternoon at Georgetown Cupcake

Posted on June 22, 2013
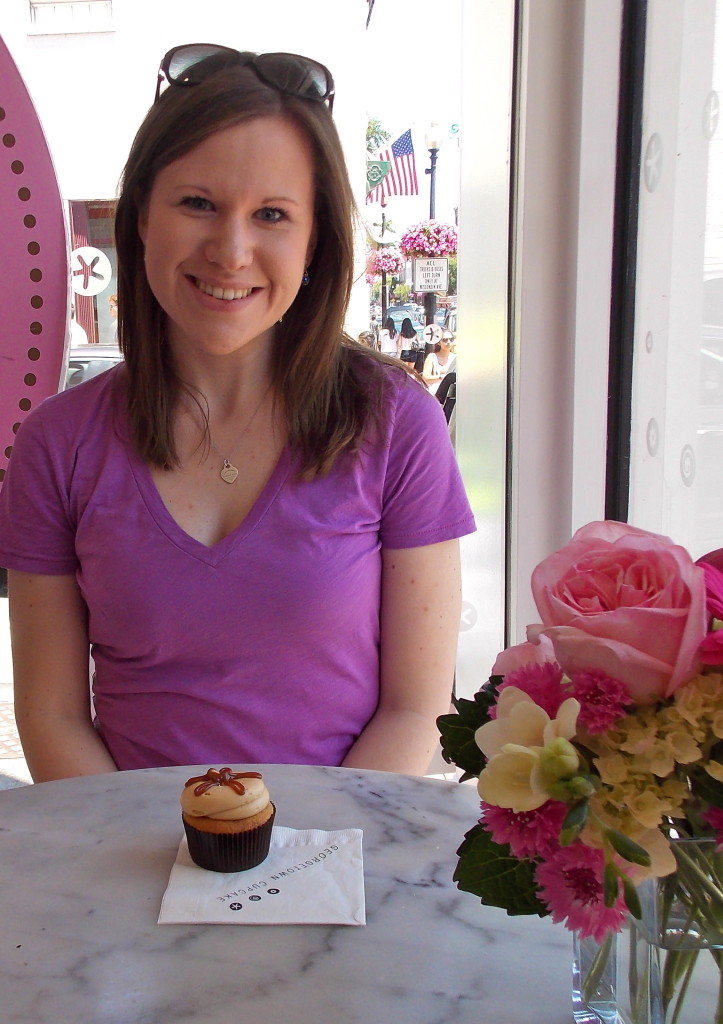
Hi, Everyone! I hope you are enjoying the first official weekend of the summer! It’s been a great weekend here so far, and I wanted to share some fun pictures with you today! I met up with a sweet friend of mine in beautiful Georgetown this morning, which is one of my favorite places in this area! It’s filled with beautiful historic houses, quaint little streets, and lots of cute shops and restaurants! It’s also the home of Georgetown Cupcake (which you may know from TLC’s DC Cupcakes show) which has the most DELICIOUS cupcakes! You may have to wait in line in front of the bakery for a couple of minutes, but it’s definitely worth it! The cupcakes are just as amazing as everyone says they are!
.
    DSCN9169
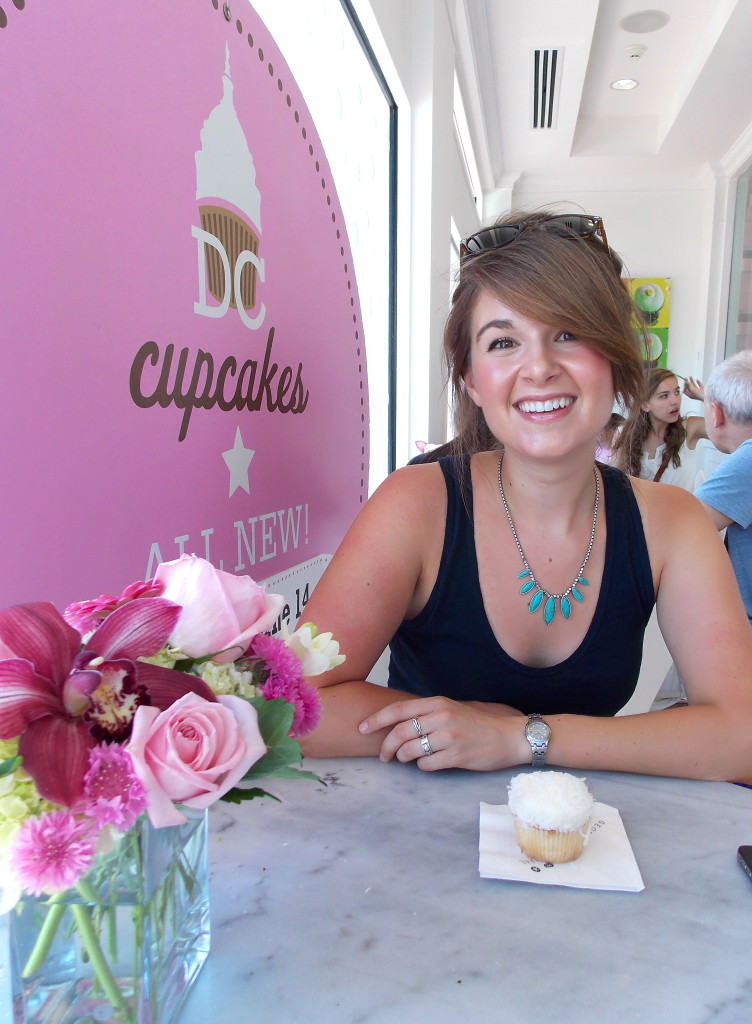
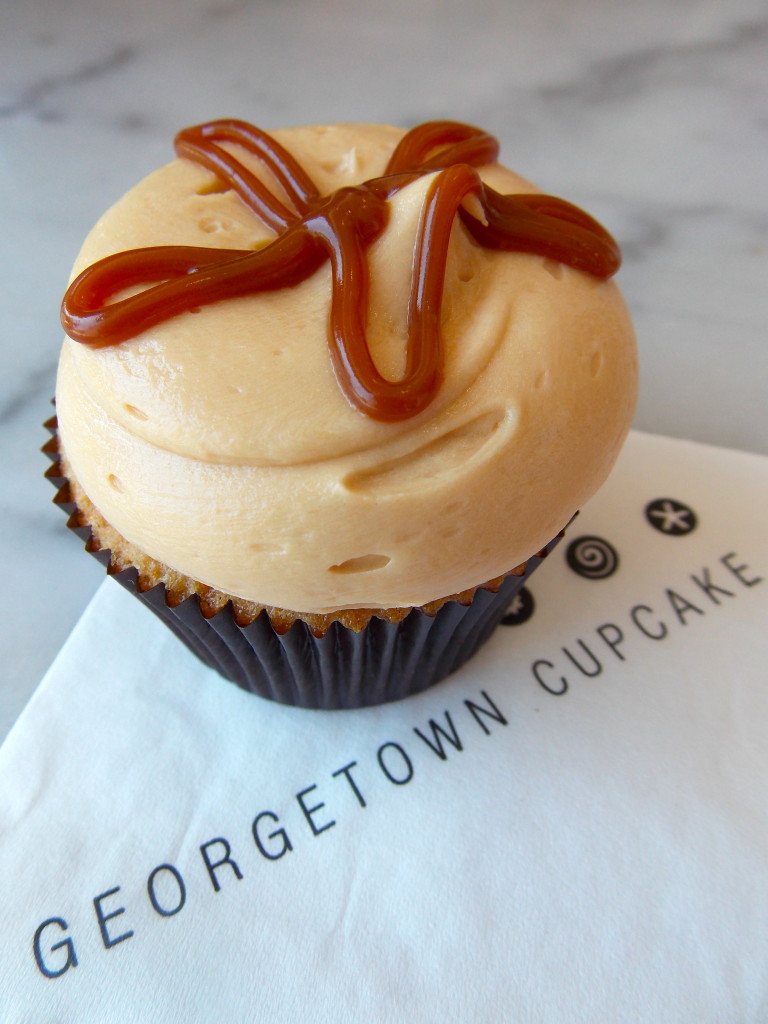
My Salted Caramel Cupcake which was heavenly!!! You can check out the Georgetown Cupcake menu HERE, they have an everyday selection of cupcakes and they also have different specials for every day of the week, as well as for every month and different holidays! There are LOTS of different ones to choose from!
.
 DSCN9176
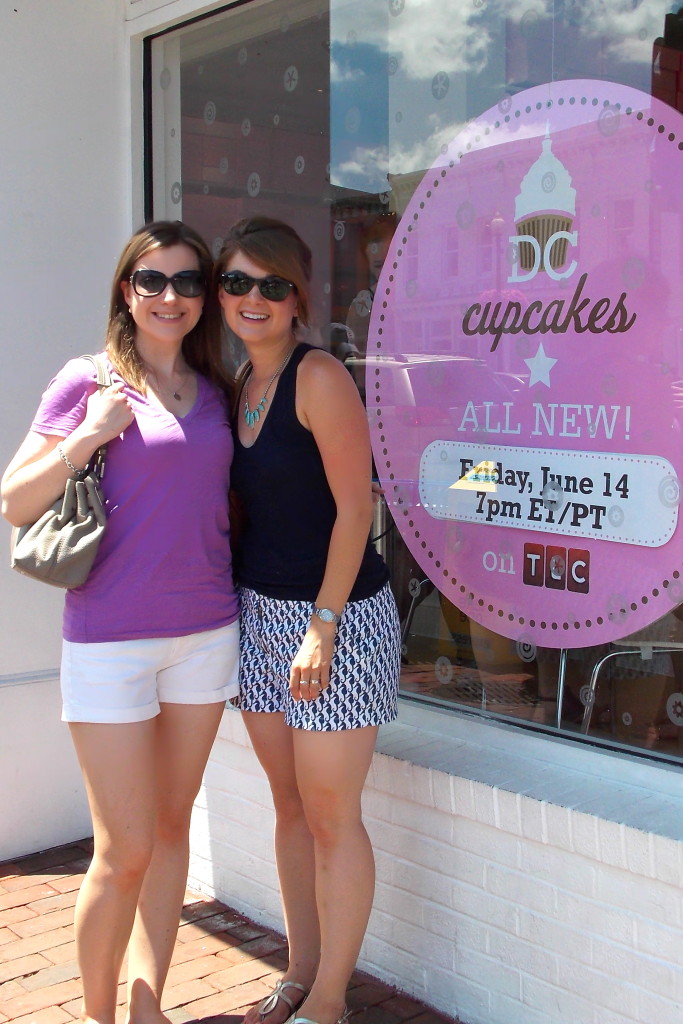
Two girls who love cupcakes!
.
 DSCN9163
Waiting in line… and trying to decide what cupcakes to pick!
.
DSCN9164
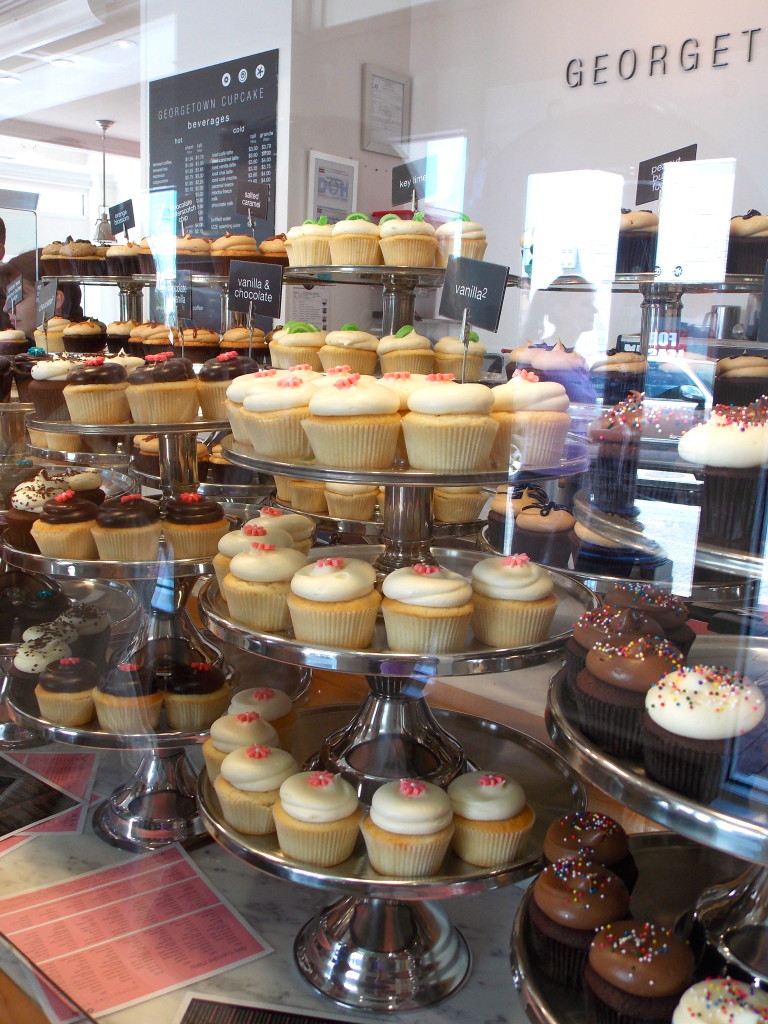
This is why it’s so hard to choose… all the cupcakes look delicious!
,
DSCN9167
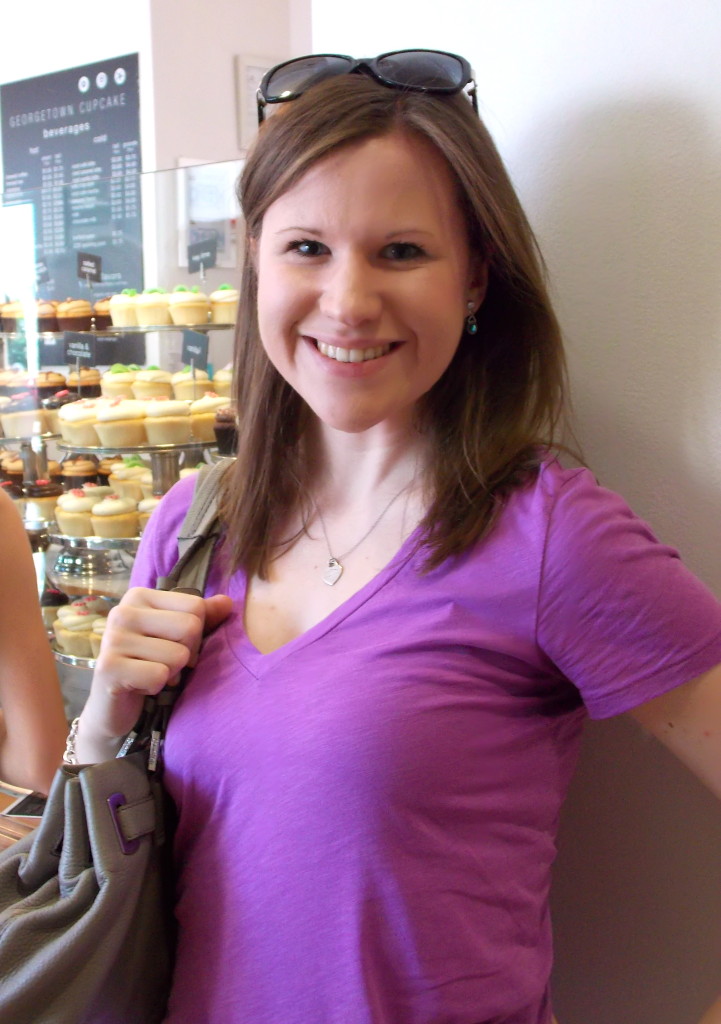
My sweet friend!
.
 DSCN9168
.
 DSCN9170
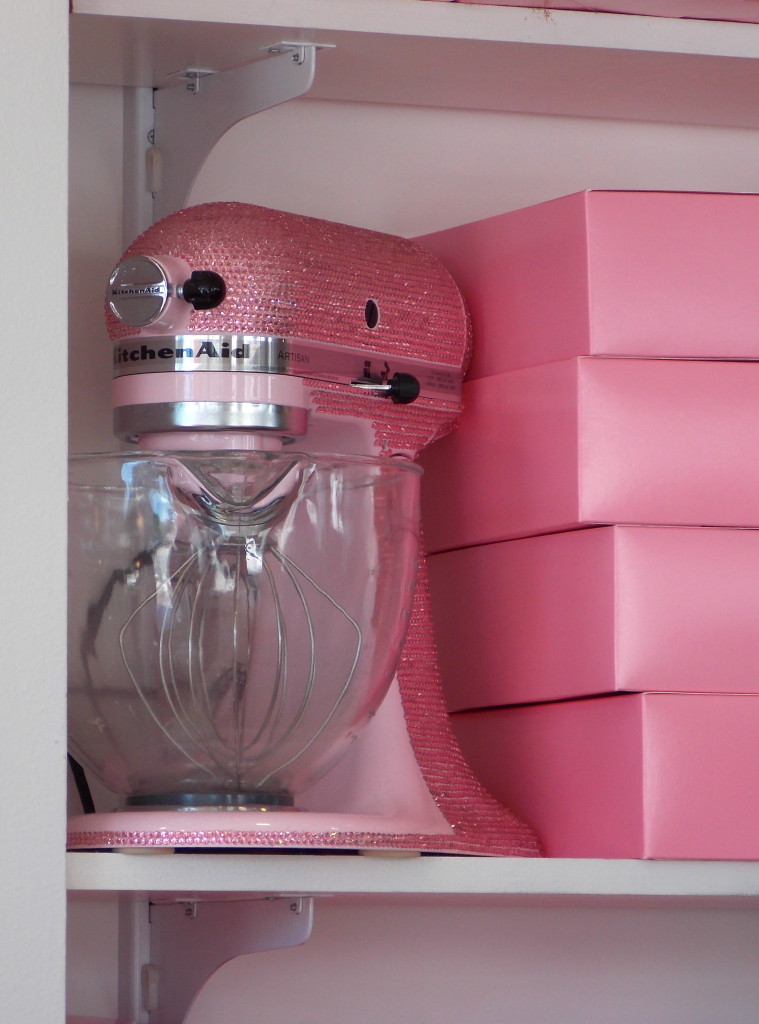
How cool is this pink bejeweled Kitchen Aid mixer?!!!
 .
So if you are ever in the DC area, make sure you visit the lovely Georgetown neighborhood and if you have a sweet tooth, stop by Georgetown Cupcake for a little sweet treat! Have a great rest of your weekend, Everyone!

Blueberry Crumb Bars

Posted on June 19, 2013
Hi, Everyone! I’m sharing one of my favorite summer recipes with you today! These Blueberry Crumb Bars are one of my favorite things to bake in the summertime! The sweet, buttery, almost shortbread-like crust covered with a thick layer or tart, gooey blueberries and sprinkled with more sweet, delicious clusters of dough makes these seriously addictive! You could definitely use different berries if you prefer something other than blueberries, and the bars would still be just as delicious! I hope you love these just as much as I do!
Blueberry Crumb Bars
 BLUEBERRY CRUMB BARS
(Adapted from The Smitten Kitchen)
*Makes 12 bars*
 .
YOU WILL NEED
DOUGH
1 1/2 cups all-purpose flour
1/2 tsp baking powder
1/2 cup granulated sugar
1/2 cup (4 oz) unsalted butter
1 egg
FILLING
2 cups (1 pint) fresh blueberries
1/4 cup granulated sugar
2 tsp cornstarch
1 1/2 tbs lemon juice
 .
,
DIRECTIONS
 .
1. First, prepare your blueberry filling. In a small bowl, gently toss together the fresh blueberries, sugar, lemon juice and cornstarch. Set aside, and preheat your oven to 375 deg F, and grease your baking pan (I used an 8×8 inch baking pan).
 .
2. In your electric mixer bowl, combine the flour, sugar, baking powder, butter and egg, and mix until the dough is moist but very crumbly. Divide the dough in half, and press one half into your prepared pan so you have an even layer of “crust”.
 ;
3. Next, pour the blueberry filling mixture over the dough pressed into the pan. Take the rest of the crumbly dough and sprinkle it over the blueberries. Bake for 35 – 45 minutes, or until the juices are bubbling and the dough has browned a little bit (watch the bars carefully towards the end of the baking time so they don’t brown too much and don’t dry out). Let cool completely before cutting and eating!
 .
Happy Baking, Everyone!

Zucchini Patties

Posted on June 17, 2013
Hi, Everyone! I hope you all had a great weekend and are enjoying the beginning of the summer! It’s been a crazy one here so far, with a tornado warning last week and heavy rain most nights, I’m hoping this isn’t what the rest of the summer is going to be like! I’m ready for some warm, no-clouds-in-the-sky beach days! I have another quick and easy summer recipe to share with you today – Zucchini Patties! This is definitely my favorite way to use fresh zucchini, you only need a couple of ingredients and these are so quick and easy to whip up for a delicious appetizer or side dish.
.
ZUCCHINI PATTIES
*Makes 6*
 .
YOU WILL NEED
2 cups grated zucchini (one medium sized zucchini)
1/2 small onion, finely diced
1 large egg
1/4 cup grated Parmesan cheese
1/2 cup all-purpose flour
Salt and Pepper
Olive oil
*You could add garlic or herbs for some extra flavor
 .
DIRECTIONS
 .
1. To make these zucchini patties, grate the zucchini, then pat it dry with some paper towels (try to get as much of the moisture out as possible, without mushing up the zucchini). Place all the grated zucchini in a bowl, and add in the finely diced onion, Parmesan cheese (you can add in whatever cheese you like), the egg and flour and stir well. Season with salt and pepper.
 .
2. Heat the olive oil in a large pan and using a 1/4 cup measure, drop the zucchini batter into your pan, patting it down a little with a spatula. Cook on medium heat for about 2 – 3 minutes on each side, or until you get a nice, golden brown crust on the outside and the patties have cooked on the inside. Let cool for a couple of minutes before eating.
.
Have a great Monday, Everyone!

Asparagus and Cherry Tomato Frittata

Posted on June 13, 2013
Hi, Everyone! I’m sharing a very quick and easy lunch or brunch recipe with you this morning – an Asparagus and Cherry Tomato Frittata. Frittatas are the perfect go to dish for when you don’t have hours to spend in the kitchen (this is definitely a 30 minute meal!) and you only have a couple of ingredients on hand, but you still want a delicious, satisfying meal. And the great thing is that you can customize it as much as you like and use whatever vegetables and cheeses you have (you could also add meat – bacon, pancetta or any kind of breakfast sausage would work well!) Super quick, easy and tasty!
.
 ASPARAGUS AND CHERRY TOMATO FRITTATA
*One large portion or two small portions*
 l;
YOU WILL NEED
2 large eggs
1 tbs grated Parmesan cheese
1 tbs half-and-half (or milk)
2 – 3 asparagus spears, cut into 1 inch chunks diagonally
Cherry tomatoes (whole)
Salt and pepper to season
Fresh herbs of your choice (I used flat leaf parsley)
Butter/cooking spray to grease baking dish
 .
DIRECTIONS
 .
1. Preheat your oven to 350 deg F and grease your baking dish (this recipe makes one large portion or two small ones and I used a small, 7 inch oval baking dish. You could also bake these in muffin cups for individual little portions!).
 ;
2. In a small bowl, whisk together the eggs, half-and-half and grated Parmesan cheese, then season with salt and pepper. Add in your herbs, asparagus and tomatoes and stir. Pour the mixture into your baking dish (spread out the asparagus and tomatoes evenly) and bake for about 20 minutes, or until the frittata has puffed up and shrunk away from the edges of the baking dish. Serve warm.

 .
Have a great day, Everyone!

Homemade Ice-Cream Sandwiches

Posted on June 10, 2013
Hi, Everybody! These Homemade Ice-cream Sandwiches are hardly a recipe, but they were too delicious not to share with you! I’d rather not admit the amounts of ice-cream that I am capable of eating all year round, but whenever the summer starts, it almost feels like ice-cream, or some form of it, is a prescribed daily treat, or so I tell myself! I think my college years are slightly to blame for this addiction! These ice-cream sandwiches are the perfect little dessert – you get ice-cream, a cookie and candy all in one bite! What could be better!
.
HOMEMADE ICE-CREAM SANDWICHES
 .
YOU WILL NEED
Cookies (either homemade or store-bought)
Ice-cream of your choice
Chocolate or candy, chopped
(You can go as crazy as you want with it! Any sort of candy, chocolate, chopped nuts or sprinkles will work!)
 .
DIRECTIONS
To make these ice-cream sandwiches, simply prepare your cookies (I used chocolate chip cookies with pecans. If you are using homemade cookies make sure they are completely cooled, you may even want to pop them in the freezer for just a couple of minutes), place a scoop of slightly softened ice-cream on one cookie and top with the other one (make sure the ice-cream isn’t super soft otherwise this will be a huge mess! If you need the ice-cream to harden a little once you’ve already made the sandwich, just put it in the freezer for a little while). Next, chop your candy, chocolate, nuts, coconut or whatever else you may be using for your ice-cream sandwiches! Place the chopped goodies onto a large plate or chopping board and roll the edges of the sandwich in it, until everything sticks to the ice-cream. Immediately place the ice-cream sandwiches back into the freezer until they are firm, then they are ready to eat!
 ;
Have a great day, Everyone!
Back to top