Chocolate Chip Pecan Granola Bars

Posted on January 9, 2013
Hi, Everybody! Like most other people at this time of year, I’m trying to get back into eating healthy, getting more fresh ingredients into my diet and limiting all that late night snacking! I used to make a batch of granola bars every week to grab for breakfast in the mornings, and after not making any for a couple of months, I decided to make some again! I love that with just a basic recipe, you can add whatever you want to granola bars. These Chocolate Chip Pecan granola bars are deliciously sweet, chewy and crunchy, and make for the perfect breakfast on the go!
.

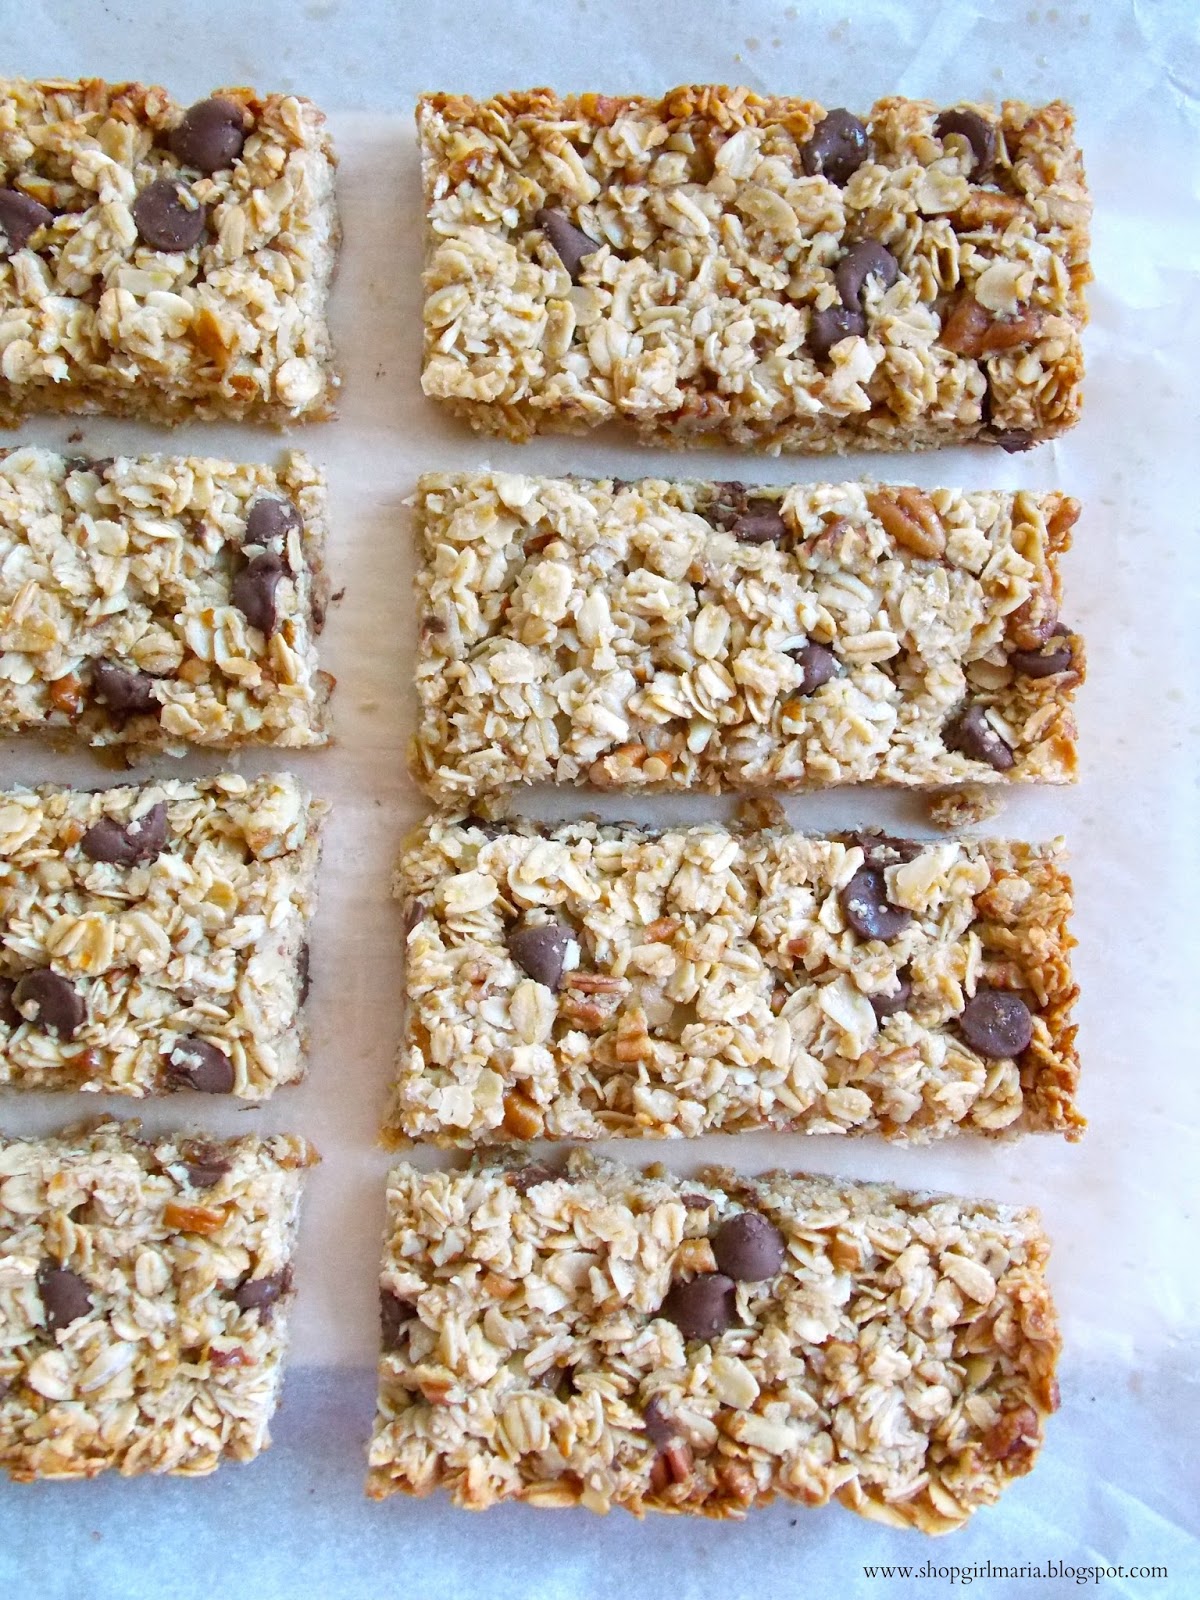
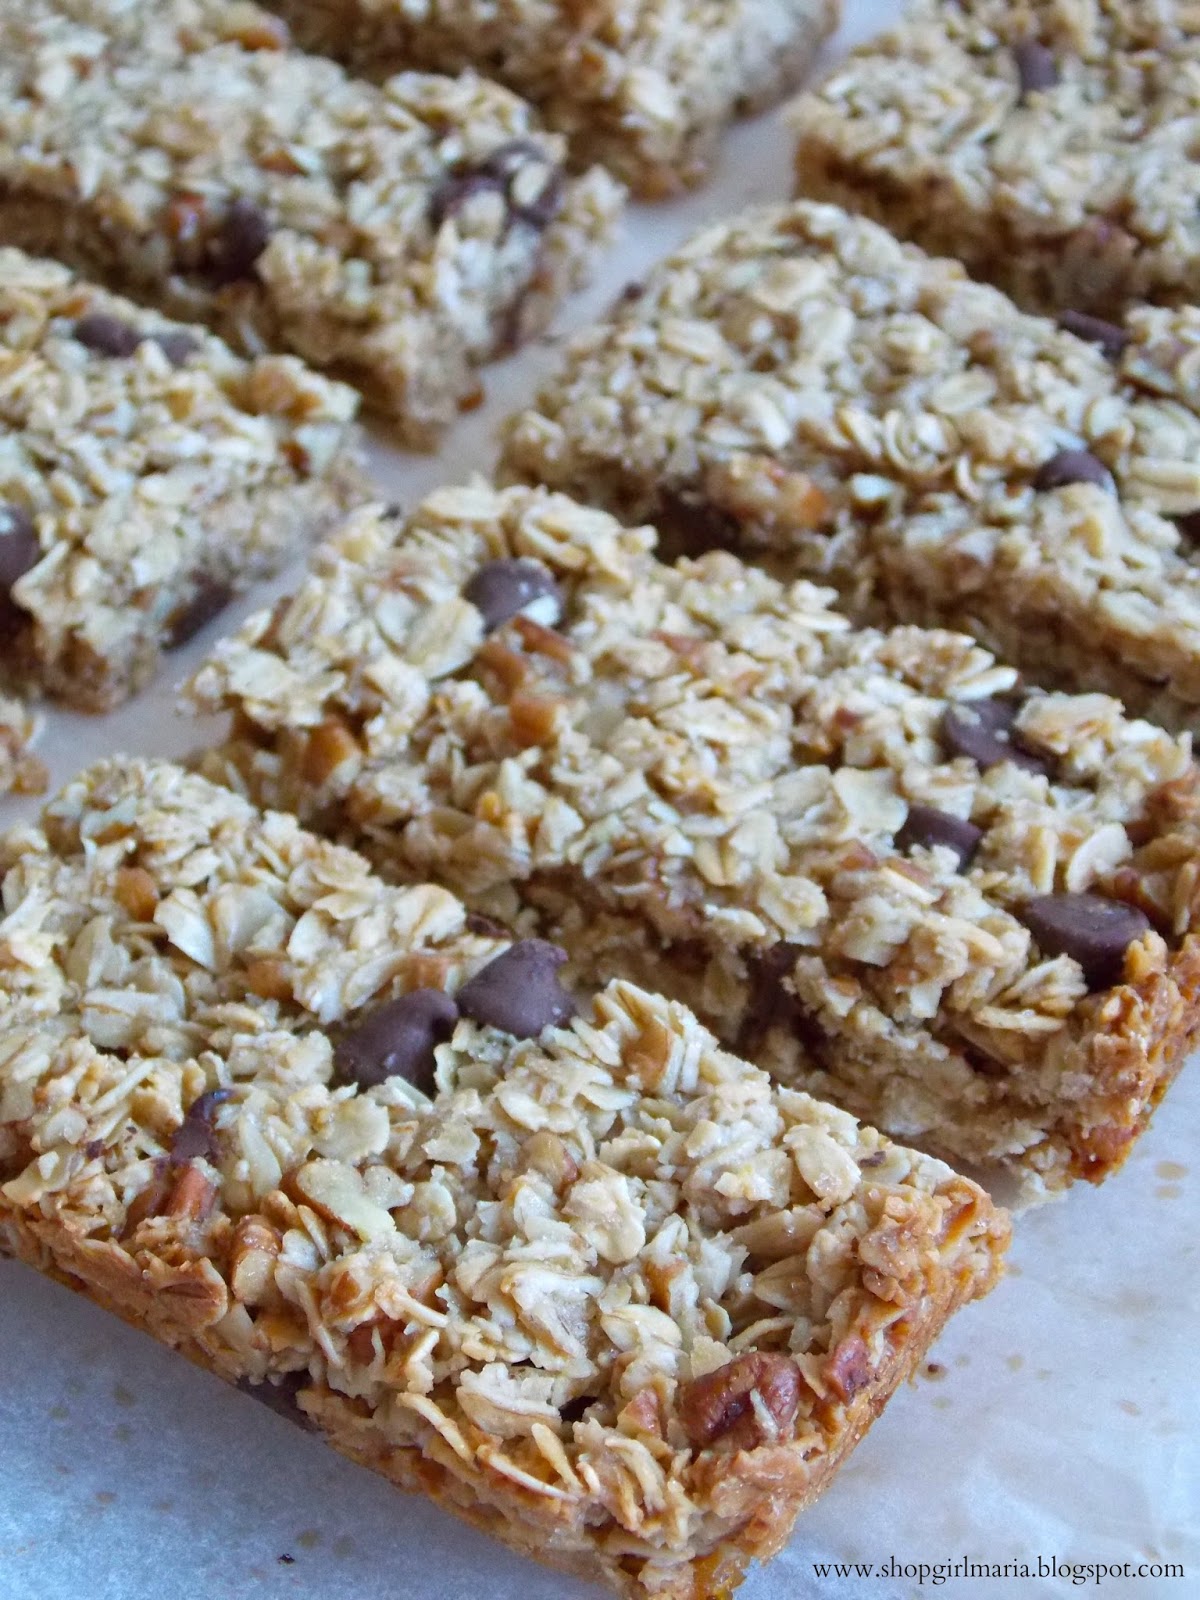
CHOCOLATE CHIP PECAN

GRANOLA BARS
(Adapted from The Barefoot Contessa)
*Makes 8 granola bars*
 .
YOU WILL NEED:
2 cups rolled oats
3 tbs unsalted butter, melted
1/3 and 2 to 3 tbs honey (the original recipe called for 2/3 cup)
1/4 cup light brown sugar
1 1/2 tsp pure vanilla extract
1/4 tsp kosher salt
1 cup chopped pecans
1/2 cup chocolate chips
.
;
DIRECTIONS
1. Preheat your oven to 350 deg F and line an 8×8 inch baking pan with parchment paper. In a small bowl, mix together the butter, honey, brown sugar, vanilla extract and salt. Pour in the oats, chopped pecans and chocolate chips, and mix until all ingredients are well incorporated. (If the mixture doesn’t stick together, add a little more honey.)
.
2. Pour the mixture into the prepared pan, wet your hands and pat it down pressing it into the pan gently. Bake for 18 – 20 minutes, or until the edges are slightly browned. *Important* – Let the granola bars cool for at least 2 hours before cutting them up otherwise they will crumble!
.

Happy Baking, Everyone!

Caramelized Bacon

Posted on January 3, 2013
Hi, Everyone! I hope you have all had a great start to the new year! I know that this probably isn’t the best recipe to share with you today since most of us are trying to eat light and start the year off eating healthy food, but I just had to share it anyway! There is no other way to describe this Caramelized Bacon than as ridiculously sinful but unbelievably delicious. Why? These four ingredients: Bacon, pecans, brown sugar and maple syrup. How could these four ingredients NOT taste delicious together?! As soon as I saw this recipe in the new Barefoot Contessa cookbook, I knew I had to try it over the holidays. It may not look like the prettiest appetizer, but these little bacon bites are seriously addictive! Sprinkled with the brown sugar and chopped pecans, and drizzled with the sweet, sticky maple syrup, every bite is wonderfully sweet, salty, meaty and crunchy… and just delicious!
.
CARAMELIZED BACON
(Recipe adapted from The Barefoot Contessa)
*Makes 15-20 pieces*
YOU WILL NEED:
1/2 lb thick sliced bacon
1/2 cup light brown sugar
1/2 cup chopped pecans
2 tbs maple syrup
Salt and Pepper
DIRECTIONS
1. First, line a baking sheet with foil or parchment paper and preheat your oven to 375 deg F. In a little bowl, combine your chopped pecans, salt and pepper, and brown sugar. Next, cut your bacon slices in half, and place them on your baking sheet.
2. Sprinkle each slice of bacon with an equal amount of the brown sugar mixture, then drizzle each with some maple syrup. Bake for 25 – 30 minutes (this is what the cookbook said, but I actually only baked mine for about 15 minutes and it was enough), then transfer the bacon onto some paper towels so you can get rid of some of the grease, let cool for a couple of minutes before eating!
l;
Happy Cooking, Everyone!

Fabric Lined Envelopes

Posted on December 30, 2012
Hi, Everyone! I don’t know about you, but even though I open, read and write lots of emails every week, I still love to send and receive handwritten letters and cards in the mail. There is just something about opening your mailbox and finding a letter that a friend took the time to write to you. Maybe it’s because I’ve lived in different countries and have always had friends and family in different places to write to, or maybe I’m just a little old-fashioned with this! I can never resist buying a nice pack of greeting cards, or a pretty stationery box and have a whole drawer full of them. It’s also fun to make your own stationery, so today I’m sharing my Fabric Lined Envelopes with you! These are so fun to make, and I love the vintage look to them. It’s a really simple way to make a plain envelope a little fancier and more fun. Here’s how you can make your own…
.
YOU WILL NEED
Cotton fabric (pattern of your choice)
Envelope
Scissors
Glue stick or a fine-tip glue pen
 .

All you need to do to is cut your fabric to the right size by measuring the size of the envelope and then adding the triangle part to it at the top. Draw the shape onto your fabric, then cut it out. Slide it into your envelope, and create a crease where you would fold the envelope. Place a little bit of glue along the edges of the fabric and press down to make sure it is stuck on well.

You could use these to send little love notes for Valentine’s day, for party invitations (you could make them a little more fun by sending everyone the same invitation but giving everyone a different envelope) or just for a letter to a friend. You can use different kinds of fabric for different occasions, or just use scrapbook paper if you don’t have any fabric (I just thought the fabric added to the vintage look).
.

Happy Crafting, Everyone!

A New York City Christmas

Posted on December 29, 2012
Hi, Everyone! I wanted to share some pictures of our Christmas with you today! New York City is one of my favorite places at Christmastime. With its beautiful lights and decorations, the big tree at Rockefeller Plaza and festive shop window displays, there’s just no place like it! My husband surprised me with tickets to see the Rockettes’ Christmas Spectacular for Christmas, and I was so excited because I’ve always wanted to see them! It was the 85th anniversary of the show, and it really was spectacular! We had a great day in the city, walking around as it began to snow, going to see the Rockettes at Radio City, going to see the big Christmas tree, walking by all the beautiful and festive window displays, eating some good food and stopping at Magnolia Bakery, and just spending the day together!
;
  DSCN6731
The beautiful Christmas tree at Rockefeller Plaza. Even though I’ve seen it so many times, it’s always just as magical as it is in all the movies!
l
DSCN6720
My husband and I by the tree. It was a freezing cold day, and it started snowing really hard a little while after we took the picture, but it made the day just that much more Christmassy!
m
 DSCN6739
The drummer boy by the Christmas tree.
,
 DSCN6724
By the Christmas tree.
,
 DSCN6728
This is always the only time I ever wish I could skate!
.
 DSCN6732
The beautiful angels that lead to the Christmas tree.
.
 DSCN6737
,DSCN6750
Huge Christmas ornaments
,
 DSCN6754
Eating a cupcake from one of my favorites, Magnolia Bakery.
,
 DSCN6753
Magnolia Bakery deliciousness.
,
DSCN6748
Radio City Music Hall
.
 DSCN6765
The beautiful interior of Radio City. I absolutely loved the Christmas Spectacular show! I loved all the dancing, singing, acting, the 3D additions to the show, and how it told the story of a New York City Christmas! It was one of my favorite Christmas presents this year!
.
 DSCN6744
My husband with one of the giant nutcrackers.
.
DSCN6745
DSCN6701
I always love the creative window displays that department stores come up with at Christmastime! These window displays at Macy’s were some of the most beautiful I have ever seen! All the elements of the displays moved and described Christmas in the city!
.
DSCN6767
The Empire State building lit up in red and green at night!
 ,
I hope you enjoyed the little tour of the city at Christmastime, and hope you enjoyed whatever you did for Christmas too!

Merry Christmas!

Posted on December 24, 2012
Hi, Everyone! I just wanted to stop by and wish all my wonderful readers a Merry Christmas! I hope your Christmas is filled with peace, love and joy more than ever before, and that you celebrate it with those you love most! Merry Christmas!
,
.
“But the angel said to them, “Do not be afraid. I bring you good news that will cause great joy for all the people. Today in the town of David a Savior has been born to you; he is the Messiah, the Lord.”
 .
Merry Christmas from our home to yours!

A couple more Christmas Sweater Gift Tags

Posted on December 22, 2012
Hi, Everyone! I hope you are all having a great weekend and don’t have too much running around left to do before Christmas! I thought I had everything ready and done only to realize that there were a bunch of things I forgot to do and buy… so tomorrow it’s back to the store to buy some more things, wrap more gifts and bake more goodies! In the meantime, I just wanted to show you a couple more of my Christmas Sweater Gift Tags! You can read all about how to make your own here!
 .
Have a great weekend, Everyone!

Christmas Sweater Gift Tags

Posted on December 20, 2012
Hi, Everyone! If you are in the middle of all your Christmas shopping or haven’t started your gift wrapping and are looking for some ideas, I have a REALLY cute one to share with you today! These are my Christmas sweater gift tags that I made a couple of days ago! Look how beautiful they are!

This is a really cute way to personalize a gift and add a little something extra to boring old wrapping paper! And wouldn’t it be funny if the gift sweater you bought using a Raise coupon was the gift inside? You would be foreshadowing the gift for days before they opened it! Just a fun little gift idea if you haven’t finished shopping yet, just make sure they’re a fan of sweaters before you commit to the plan. For example, if they tend to prefer something like a percolator bong or spoon pipe as a Christmas gift, you might find coal in your sweater!

These little sweater can also be used as a Christmas ornament once you’ve opened your gifts or if putting them on wrapping isn’t your thing. The fun part is that you can make your Christmas sweater look as festive and cute as you want! Here is how you can make one of these gift tags yourself…

.
,
YOU WILL NEED
Felt (color of your choice)
Needle and thread (color of your choice)
Ornament hooks
Polyfill
Gluegun
.
.
DIRECTIONS
.
1. First, make your sweater stencil on a piece of cardstock, by drawing out your sweater shape in your desired size. Cut it out, then cut out two identical sweater shapes out of some felt.
,
2. Next, using the colored thread, decorate the top sweater piece with whatever design you come up with! Using hot glue, stick the top and bottom sweater pieces together by applying hot glue to the edges little by little, stuffing the sweater with polyfill as you go along (leave the neckline open for now, don’t apply glue to it yet).
,
3. Make a little hanger out of an ornament hook, place it inside the sweater and secure it with some hot glue. Place hot glue along the neckline part, too. And you’re all done!
m

Happy Christmas Crafting, Everyone!

Sopressata and Cheese in Puff Pastry

Posted on December 16, 2012

Hi, Everyone! Hope you are all having a good weekend! I have the perfect holiday appetizer to share with you today! If you’ve never tried the Barefoot Contessa’s Sopressata and Cheese in Puff Pastry, you should give it a try over the holidays! This is one of my favorite recipes of hers, and like all of her recipes, it’s delicious, easy to make and has all the right flavors paired together! And the great thing about this recipe – only five ingredients! This is a great snack or appetizer – salty salami paired with Swiss cheese or Gruyere and dijon mustard in a pocket of crispy, light puff pastry – how bad can that be! Here’s the recipe…

l

 SOPRESSATA AND CHEESE 
IN PUFF PASTRY
(Recipe from The Barefoot Contessa)
*Serves 9 – 12*
 ,
YOU WILL NEED:
1 package (2 sheets) frozen puff pastry, defrosted
1 tbs Dijon mustard
1/4 lb (about 12 slices) Sopressata (or Genoa salami, Black Forest Ham, or any other salty ham/salami)
1/2 lb cheese (Swiss or Gruyere)
1 egg plus 1 tbs water (for the egg wash)
 .
DIRECTIONS
 l

1. First, defrost your puff pastry. Once it is good to work with, on a floured surface, roll each sheet into a 10×12 inch rectangle. Preheat your oven to 400 deg F (the original recipe said 450 deg F, but I lowered the temperature to suit my oven) and line a baking sheet with parchment paper.

m

2. Transfer one rolled out sheet of puff pastry onto your baking sheet, then spread it with the Dijon mustard, leaving a 1 inch border around the edges. Layer the sopressata on top of the mustard, and then the cheese slices on top of the sopressata, leaving a 1 inch border around the edges again.

,

3. Make an egg wash by whisking together 1 egg with a tbs of water. Brush the border with the egg wash, then place the second sheet of rolled out puff pastry on top and press down the edges. Cut around the edges so you have a perfect rectangle, then press them down using a fork.

m

4. Brush the top of the puff pastry with the egg wash, then cut three slits on top of it. Bake for 20 to 25 minutes, until the top is golden brown (make sure you watch it so it doesn’t burn!) Let cool for a few minutes before serving!

.
Happy Baking, Everyone!

Glazed Eggnog and Pecan Cookies

Posted on December 12, 2012
Hi, Everyone! I don’t know about you, but one of my favorite things about Christmastime is baking cookies; both old family favorites and trying out new recipes. One of my favorite holiday flavors is eggnog, so I thought… why not put the two together and make some eggnog cookies?! These cookies are deliciously soft and have a wonderful warm, spicy flavor from the eggnog and cinnamon, sweet crunch from the pecans, and some added sweetness from the eggnog glaze! If you’re looking for a new cookie recipe this Christmas, give these Glazed Eggnog and Pecan Cookies a try! Happy Christmas baking, Everyone!
,
GLAZED EGGNOG AND PECAN COOKIES
(Makes about 15 large cookies)
 ,
YOU WILL NEED:
1 1/2 cups all-purpose flour
1/2 cup plus 2 tbs granulated sugar
1/2 tsp baking powder
6 tbs unsalted butter, softened
1/4 cup eggnog
1 egg
1/2 tsp vanilla extract
1/2 cup chopped pecans
1/4 tsp ground cinnamon
1/4 tsp salt
 ,
Glaze:
3/4 cup confectioners’ sugar
1 1/2 tbs eggnog
 ,
,
DIRECTIONS
 ,
1. First, sift together your dry ingredients (flour and baking powder). Set aside. In a different bowl, cream together butter and sugar, then add the eggnog, vanilla extract, the egg and the cinnamon and salt, and mix until you get a nice, smooth mixture.
 ,
2. Mix the flour and baking powder into the bowl with the wet ingredients, then add the chopped pecans, and mix until you get a smooth dough (it will be a pretty wet dough). Wrap the dough in plastic wrap and let chill in the refrigerator for at least 30 minutes.
 ,
3. Preheat your oven to 350 deg F and line your baking sheets with parchment paper. Drop spoonfuls of cookie dough onto your baking sheets, leaving about 2 inches in between the cookies. Bake for 10 – 12 minutes, or until the edges begin to brown.
 ,
4. Let the cookies cool completely, and make your glaze while they are cooling. To make the glaze, simply whisk together the confectioners’ sugar and eggnog. Once the cookies have cooled, drizzle them with the glaze.
,
Happy Christmas Baking, Everyone!

Glittered Monogram Ornament

Posted on December 6, 2012

Hello, dear friends! I have a cute Christmas craft to share with you today! My glittered monogram Christmas ornaments! Christmas ornaments are one of my favorite things about Christmas, I love unwrapping them every year, carefully taking them out of the tissue paper they had been hiding in all year, and hanging them on our tree. There is really no theme to our Christmas tree, I love decorating it with ornaments that hold special memories, and that bring a warm feeling to my heart every time I look at them! I have some vintage ornaments that belonged to my grandmother, some that my mom and mother-in-law have given me over the years and some that I have collected, and I love them all! You could hang these glittered monogram ornaments on your tree, make them as gifts, or embellish wrapped presents with them!

.

GLITTERED MONOGRAM ORNAMENTS
Supplies
Printed/drawn monogram
Cardboard
Modpodge (and paintbrush) or glue
Glitter
Ribbon (thick for bow, medium for hanging ornament, and thin for attaching little ornaments)
Two small ornaments
Hot glue
 ,
Directions

1. First, trace your monogram onto a piece of thick cardboard, then cut it out. Cover it with an even layer of modpodge or glue and sprinkle it with glitter so the whole thing is covered in it. Shake the excess glitter off, then let it dry completely.

,

2. While it is drying, make a bow out of the thick ribbon. Once the monogram is dry, attach the bow to the top of it using hot glue. Then, using the medium ribbon, make a loop for the hanging part of the ornament and glue it to the back.

,

3. Attach the two little ornaments by threading some thin ribbon through them, then sticking them right under the bow using hot glue. Let all the glue dry completely, then hang on your tree!

,

Happy Christmas Crafting, Everyone!
Back to top