Recycled Gift Wrap Ideas!

Posted on April 26, 2012

Hi, Everyone! So, a couple of days ago I shared my Handmade Paper Bow Tutorial with you, and I promised I would be back with some cute and creative gift wrap ideas! I had a couple of presents that I needed to wrap up, and even though I have a whole drawer full of pretty wrapping paper and ribbon, I decided to recycle some different materials and come up with fun ways to wrap the presents up! Here is what I came up with, I hope it gives you some good ideas…!DSCN4938

   DSCN4933

DSCN4898

DSCN4911

DSCN4939
DSCN4909
 I love wrapping gifts, I always have, so this was a lot of fun for me! I hope I’ve given you some good ideas for the next time you’re wrapping a gift for someone! There’s nothing more fun than receiving a present that’s as pretty on the outside as it is once it’s unwrapped! Have a great weekend, Everybody! Happy Crafting!

Handmade Paper Bow Tutorial

Posted on April 23, 2012
Hi, Everyone! I hope you all had a great weekend! Since a special someone’s birthday is coming up soon, I’ve been looking for some cute gift wrapping ideas, and one of my favorite things I found were handmade paper bows! I tried a couple different ways of making them, and finally came up with this, so I’m sharing the tutorial with you today! I love nicely wrapped gifts, it just makes what’s inside the gift even more special! These bows may look a little complicated at first, but they are actually really easy to make, and once I started making a lot of them it only took me a couple of minutes to make each! All you need is a sheet of paper (you can use anything from brown paper bags and magazine pages to scrapbook paper and felt!), a hot glue gun and a good pair of scissors! Later on in the week, I will show you how I used these and other recycled materials for cute gift wrapping ideas, so be sure to come back! Here is a tutorial for my paper bows…
 ,
.
HANDMADE PAPER BOW TUTORIAL
 .
1. First, cut your paper into 7 strips, each 3/4 inch wide. Cut the first three strips to be 10 inches long, the next three strips 9 inches long, and the last one to be 4.5 inches long.

 .
,
2. Next, begin twisting each of the 6 long strips so that they have a loop at each end (see picture below). Secure with hot glue in the center. Make a loop out of the last strip (the 4.5 inch one).
l
This is what all all the loops will look like when you are done! Now you are ready to start layering and sticking them down to make your bows!
 ,
 .
3. Layer and stick the three largest pieces, then layer and stick the next three pieces, and finally stick the loop in the center.
,
.
This is what the bow looks like when the first layer of the longest three strips (now loops) is done.
 .
This is what the bow looks like once you’ve stuck the second layer of loops down:
.

This is what the bow looks like when it’s done, once you’ve attached the ring into the center.

 And that’s it! I told you this was super easy! These bows are so much fun to make and make for really cute additions to plain wrapping paper! I hope you try this out! And make sure you come back later on in the week to see some cute recycled gift wrapping ideas! Happy Crafting, Everyone!

Italian Easter Bread

Posted on April 5, 2012
Happy Easter, Everyone! I hope you all have a wonderful weekend celebrating Easter with your friends and family, eating some good food, remembering old family traditions and maybe starting some new ones! I wanted to share this Italian Easter Bread that I made today with you! It’s one of my husband’s family traditions, and so I wanted to make it this Easter! One of the fun things about being from different backgrounds and different countries are all the different baked treats during holidays! This is the first time that I actually made this bread successfully (there have been several disasters previously!) and I was very excited! It smells wonderful and is deliciously soft and sweet thanks to the sugary vanilla glaze on top. Here is the recipe that I used.
 .
DSCN4543
ITALIAN EASTER BREAD
(Recipe adapted from Taste of Home)
*Makes one bread*
 .
YOU WILL NEED
Bread
3 – 4 cups all-purpose flour
1/4 cup sugar
1/2 tsp salt
1 package active dry yeast (0.25 oz)
2/3 warm milk (I used fat free milk)
2 tbs unsalted butter, softened
2 eggs (plus another 6 dyed eggs for decoration)
1/2 cup raisins (or candied fruit)
1/2 cup chopped blanched almonds
 .
Egg Wash
1 egg
2 tsp water (or milk)
 .
Sugar Glaze
1 cup powdered sugar
1/8 cup milk
1/2 tsp vanilla extract
Sprinkles
 .
Egg Dye
20 drops food coloring
1 tbs vinegar
1/2 cup water
 .
DSCN4544
 .
DIRECTIONS
 .
1. In your electric mixer bowl, combine a cup of flower, sugar, salt and yeast. Mix for a couple of seconds just to get everything combined. Then add warm milk and the butter and beat for 2 minutes on medium speed. With the mixer running, add 2 eggs and a half a cup of flour, continue mixing for another couple of minutes until the flour is incorporated. Add the fruit/raisins and nuts at this point and stir well. Add in the rest of the flour (add in enough to make a soft dough, it may be more or less than 4 cups of flour altogether). Using the dough hook attachment on your mixer, knead the dough for 6 – 8 minutes (you could knead the dough by hand, of course, but this is so much faster and easier!) Once this step is done, form the dough into a ball, rub with a little bit of oil and place in a bowl, cover with a kitchen towel and let rise in a warm place until doubled in size, about one hour.
 .
2. In the meantime, you can dye your eggs and let them dry. Take your dough out, and punch it down. Then, divide it into 3 pieces, and roll each piece into about an 18 inch rope. Begin braiding your bread loosely, and tuck the two ends under the braid. Rub a little bit of oil on the part of the egg that’s going to touch the bread (to prevent the color from running). Cover with a kitchen towel and let rise for another 30 minutes. Preheat your oven to 350 deg F.
 .
3. Make your egg wash by whisking together one egg and 2 tsp of water (or milk), and brush on top of the braid, making sure that the egg wash doesn’t run and touch the eggs (this is very important, as this will make the color run!!!!!) Bake for 30 – 35 minutes, until the top is golden brown. Let cool on a wire rack before glazing with sugar glaze.
 .
4. Once the bread has cooled, make your sugar glaze. In a small bowl, whisk together the sugar, milk and vanilla extract, brush it on top of the braid and cover with colorful sprinkles. The glaze dries pretty quickly, so glaze a part and sprinkle immediately, then glaze another part and sprinkle again, and so on.
 .
This really could have made two smaller braids, it rose a LOT and made one huge braid (a third of which is already gone – I told you it was really good!)! Or you could make smaller, individual size “nests” by making round little braids and putting one egg in the middle. The sugar glaze and the sprinkles are completely optional – the glaze just adds some extra sweetness and the sprinkles make it even prettier!
 /.
 DSCN4548
Happy Easter, Everyone!

Easter Ruffle Wreath

Posted on March 18, 2012
Hi, Everybody! I hope that you all had a great weekend and that the weather is just as beautiful where you are as it’s been here in New Jersey! It feels more like the beginning of summer, not spring here! I’m loving it! I realized that Easter is just three short weeks away… time to get started on some Easter decorations! I’m so excited to share my Easter Ruffle Wreath with you today, and teach you how you can make your own!
.
DSCN4112
EASTER RUFFLE WREATH
TUTORIAL
 ..
For this project, you will need a wreath form (I didn’t have one on hand, so I cut one out of a piece of cardboard!), some burlap and two other different colored fabrics (about 1/4 yard of each), a little nest, three faux eggs and some ribbon! And don’t forget your glue gun, of course! First, prepare your fabric strips. You will need three different kinds of fabric, you can pick whatever kinds and colors you like. Cut them into 2 x 8 inch strips. Begin making your ruffles by taking a strip of fabric, folding it over and creating layers and bunching them together in the center. Glue each ruffle down onto your wreath form using your glue gun. Continue making ruffles and attaching them to the form, overlapping them slightly, as the picture shows, and cover the whole wreath with the ruffles. Now, use hot glue to stick the eggs inside the nest, then using hot glue again, attach the nest onto the wreath. Now pick some ribbon that complements your wreath and use it to make a bow and to hang your wreath up! Here are some more pictures of the wreath…
.
 .DSCN4075
DSCN4077
DSCN4081
DSCN4082
DSCN4103
DSCN4097
I hope you are inspired to make your own wreath, and customize it to fit your taste! I love the neutral colors I used, and they fit perfectly into our living room! And the best part was… I already had all my supplies and didn’t have to go out to buy anything! The fabric was all scraps I found in my craft room and I already had the ribbon, eggs and little nest!
Have a great week, Everyone!
Happy Crafting!

Little Molten Coffee-Chocolate Cakes

Posted on March 12, 2012
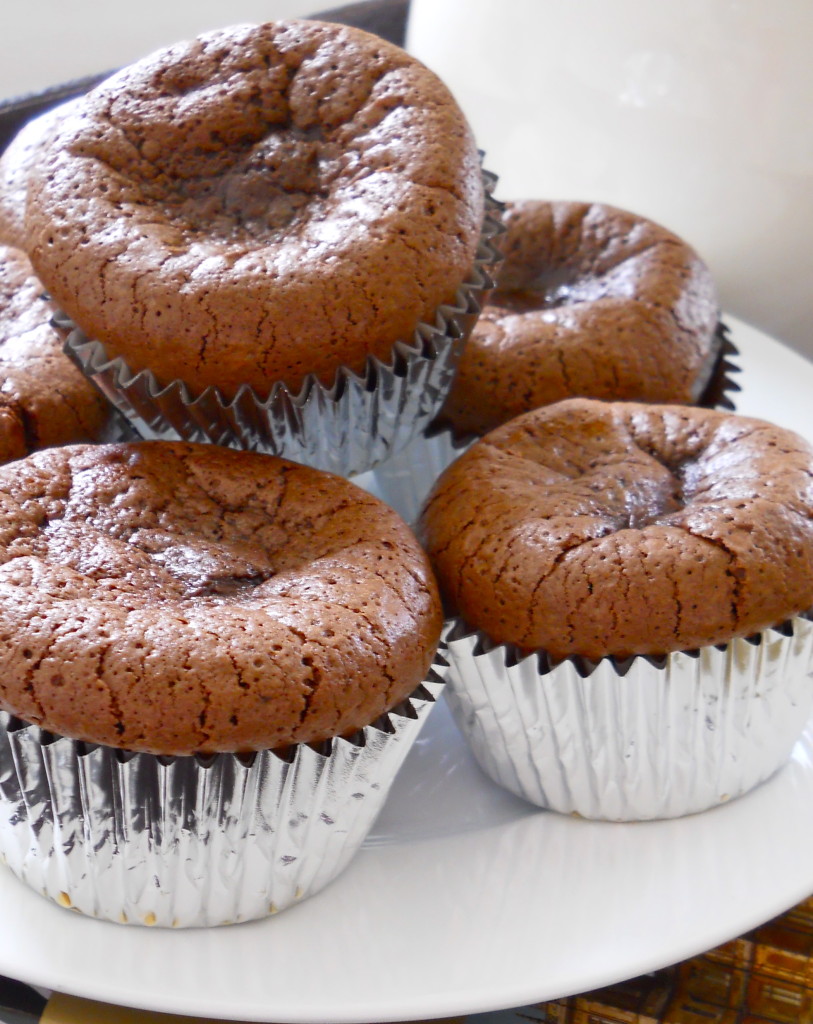
Hi, Everybody! I hope that you are all having a great week and have had a good start to the month of March! Although, it felt more like May here today, with the beautiful sunshine and high temperatures! I love March, it’s one of my favorite times of the year because after months of dark winter, the world outside begins to burst with beautiful colors again. I’m so happy that spring is finally on its way! I have a great recipe to share with you today – Little Molten Coffee-Chocolate Cakes! These are absolutely delicious little cakes that make for a great little dessert when served warm with some ice cream melting on top, or for an afternoon treat just by themselves! These dense cakes have the most deep, rich coffee and chocolate flavor, and are wonderfully smooth and soft in the center. I’ve used instant coffee in this recipe, but you could grind down some beans for a richer flavor or maybe even use some CBD Wholesale Coffee help give these cakes a relaxing effect. Whatever kind of coffee you choose to use, these cakes will be absolutely delicious and perfect for the coffee lovers among us. I can just imagine eating this after making a fresh pot of coffee using the best drip coffee maker I have at home. They only take about a half hour or so to whip up, making them the perfect dessert for a night when you don’t really have lots of time to bake! If you are a coffee lover, you will LOVE these! Happy Baking, Everyone!
.DSCN3990 LITTLE MOLTEN
COFFEE – CHOCOLATE CAKES
(Adapted from Dinner at Home)
*Makes 6 Cakes*
.
YOU WILL NEED:
.
1/3 cup all-purpose flour
1/3 cup sugar
4 tbs (1/2 stick) unsalted butter, softened
8 oz bittersweet chocolate, coarsely chopped (or 8 oz semi-sweet chocolate chips)
1 tbs instant coffee powder (or instant espresso powder)
1/4 tsp salt
3 eggs
1 tsp vanilla extract
.
DIRECTIONS
,
1. First, prepare your chocolate. Coarsely chop the bittersweet chocolate, place it in a heatproof bowl, and set it over a pot of simmering water. Stir until you get a smooth chocolate sauce, making sure that none of the water bubbles over into it. Once done, set aside and let cool for a while.
.
2. Next, preheat your oven to 400 deg F and line a muffin pan with six muffin cups. In a small bowl combine flour, coffee powder and salt. Then in the bowl of your electric mixer, beat together butter and sugar until you get a light and fluffy mixture. With the mixer going, add your eggs one at a time, then add vanilla extract and mix until all ingredients are well mixed.
.
3. Slowly begin adding both the flour mixture and the melted chocolate, and mix until you get a smooth, chocolaty liquid batter. Divide the mixture between the six muffin cups equally, then bake for 10 – 12 minutes, or until the center of the cakes no longer jiggles (they will rise slightly). Let the cakes cool for a couple of minutes on cooling racks before eating!
.
DSCN3996
.
The insides of these little cakes are wonderfully smooth and soft, especially when eaten warm! The amount of instant coffee powder in the recipe gives them quite a strong coffee flavor, so if you would prefer just a hint of coffee, reduce the amount. But, if you are a true coffee lover who’s always going through a cold coffee recipe, you might like it strong! These cakes would be delicious with any sweet ice cream to complement the deep taste of coffee; vanilla would be a perfect choice!
.
And what else is sitting on my tray along with these delicious little cakes? The beautiful white roses that my husband got me for my 25th birthday (which I celebrated last week!) and The World of Downton Abbey book, of course! If you are (an obsessive) Downton Abbey fan like me, you need this book! It was one of my birthday presents, and I’m almost done reading it already!
/
DSCN4003
Happy Baking, Everyone!

Pink and Gray Bow Pillows

Posted on March 10, 2012
Hi, Everybody! I hope that you have all had a great week and have some fun plans for the weekend! Today I wanted to show you some Bow Pillows that I recently made for a customer. She requested gray pillows with pink bows, a color combination that I love! Here are some pictures of the pillows that I made for her!
.
DSCN3826
  DSCN3833
DSCN3836
 /
All of the pillows are made according to my own design, and every part of them is handmade. It’s a pretty simple design that consists of a classic envelope pillow cover with an oversized bow that is sewn into the sides of the pillow case. I love the pink and gray together, I think it’s such a pretty color combination. It looks soft, elegant and sophisticated, and I love how the pink bow pops on top of the gray background.
.
DSCN3848
I hope you all liked these bow pillows and that they make their new owner very happy!

Cozy Comfort Food: Cauliflower and Leek Gratin

Posted on March 2, 2012
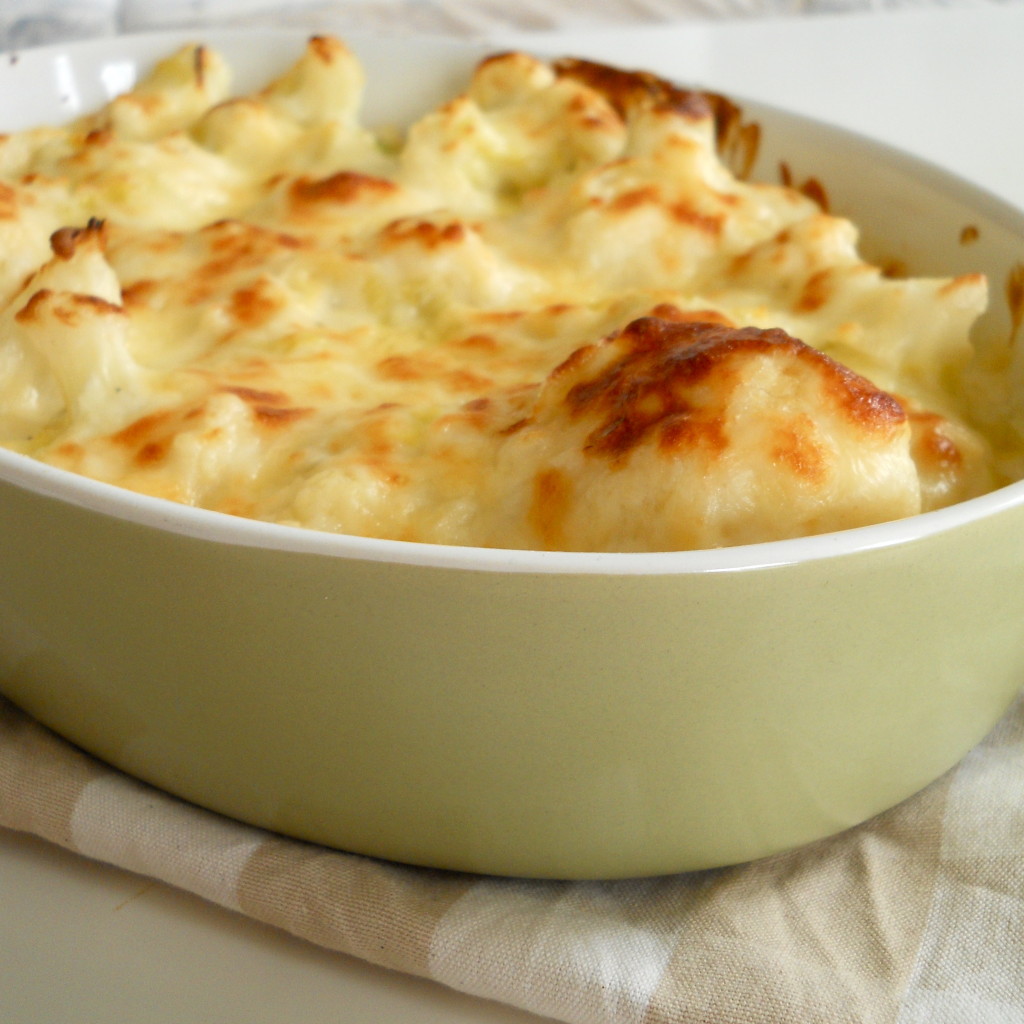
After a long day, what I really crave is some soothing comfort food. Something warm and familiar, that brings back happy memories. And that’s exactly what this Cauliflower and Leek Gratin is – it’s a comforting and satisfying side dish, and it’s so quick and easy to make! There seems to be this idea that comfort food is always heavy and high in fat, but that doesn’t need to be the case! Whenever I’m cooking, I’m always looking for ways to lighten things up, so I used fat free milk and low fat cheese in this recipe… it’s still just as creamy and delicious, with wonderful flavor added by the leeks. If you are looking for a good, vegetarian side dish to add to your dinner table, try this one out! Here’s the recipe…
 /.DSCN3889
CAULIFLOWER & LEEK GRATIN
(Adapted from Martha Stewart)
*Serves 6*
YOU WILL NEED
.
1 head of cauliflower
2 leeks
2 small shallots
1/4 tsp dried thyme
Red pepper flakes (quantity depends on how much heat you want in the dish)
3 tbs unsalted butter
1/4 cup all-purpose flour
1 1/2 cups milk (I used fat free, and it was still very rich and creamy!)
1 1/2 cups shredded cheese (I used mild cheddar)
Salt and pepper to season
 /
DIRECTIONS
 ,
1. First, prepare your cauliflower. Cut into florets, and wash well. Bring a large pot of salted water to boil, and cook the cauliflower for 3 minutes. Then, take the florets out and wash them under cold water, place them in a large bowl, and set aside.
 .
2. Now finely dice your shallots, and slice your leeks (use white and light green part of the leek) into 1/4 inch wheels. Melt the butter in a small pot, and add the shallots and leeks, as well as thyme and red pepper flakes. Cook this for about 5 minutes, stirring occasionally, until the vegetables are nice and soft. Then, stir in the flour and stir well, cook for a minute to let the flour taste cook off, then slowly begin adding the milk, stirring constantly, until you get a nice smooth sauce type consistency. Turn the heat up to a boil, and cook at a boil for 2 minutes, until the sauce is thickened. Remove from heat. Preheat your oven to 350 deg F.
 .
3. Once you have removed the pot from heat, stir in 3/4 of shredded cheese, and season the sauce well with salt and pepper. Now pour this over the cauliflower and stir until all the little florets are coated. Butter or spray your baking pan, and transfer the mixture into it, then top with the remaining 3/4 cup of shredded cheese. Bake for 25 minutes at 350 deg F, then, broil for another 5 minutes, until the cauliflower begins browning slightly. Let cool for 5 minutes before serving!
 /
Happy Cooking, Everyone!!! Hope you all have a wonderful weekend, and that March has been off to a good start for you!

Mini Pain au Raisin Pastries

Posted on February 24, 2012
I love big breakfasts on lazy Saturdays, when you have nothing to do and nowhere to hurry to, and you can make a special breakfast to enjoy. One of my favorite parts of this big breakfast are the fresh(ly bought) pastries. I LOVE good pastries… Croissants, Pain au Chocolat, Pain au Raisin… and I finally tried making some at home for the first time! These mini Pain au Raisin pastries make a great addition to your breakfast table! They are buttery, flaky and really delicious! Now, just be prepared, this isn’t the kind of recipe that takes thirty minutes to make and you can whip up for breakfast any morning. No, this literally takes HOURS to make and you need to let the dough chill and rest overnight. As intimidating and time consuming as it may look though, it’s really not that hard to make these if you just follow the steps carefully and set aside enough time to make them. Here’s exactly what I did…
.


 DSCN3800
PAIN AU RAISIN
*Makes 12 pastries*
(Recipe adapted from Brown Eyed Baker)

YOU WILL NEED

RAISINS:
1 cup raisins
1 1/2 tsp sugar
1/4 tsp ground cinnamon
 .
PASTRY:
2 tsp instant dried yeast
1/4 warm water
1 3/4 cup all-purpose flour
1/4 cup milk
1/6 cup granulated sugar
1 1/2 tbs unsalted butter, melted and cooled
1/2 tsp salt
1/2 cup unsalted butter, melted
.
PASTRY CREAM:
1 cup milk
3 large egg yolks
1/4 cup sugar
1/6 cup cornstarch
3/4 tsp vanilla extract
1 3/4 tbs unsalted butter, diced
 ..
EGG WASH:
1 egg
2 tbs milk
 ;
DSCN3803
.
DIRECTIONS
 .
1. First, prepare your raisins. In a small bowl, cover them with boiling water and let them sit for a couple of minutes, until they are plump. Once they are plump, drain them and set them aside. In a little dish, mix together the sugar and cinnamon and set it aside.
 .
2. Next, start working on the dough. In your electric mixer bowl, dissolve the yeast in warm water for about 5 minutes. Once dissolved, add flour, milk, sugar, salt and melted butter, and mix for a couple minutes, until a solid dough begins to form. If it’s still too sticky, add a little more flour. Using your hands, form it into a ball, then cover and let it rest for half an hour.
 .
3. After the half hour is up, roll the dough into a 10×15 inch rectangle, then cover it and let it sit for another half hour. Now spread the 1/2 cup of softened butter over the rectangle evenly (you can brush it on top or just use your hand) and fold the dough into thirds, like you would a letter. Once you have the folded “letter”, roll it out into a 10×15 inch rectangle again. Once again, fold it into thirds like a letter, then wrap it in plastic wrap and then refrigerate it for an hour.
 .
4. Repeat this process ONE MORE TIME now! So roll it out again, fold it into thirds, roll it out again, fold it into thirds, then wrap it up in plastic wrap and let it chill in the fridge overnight! Yes, this is a very time consuming and repetitive baking process, but this will ensure that your pastry is wonderfully buttery and flaky once it’s baked!
 .
5. The next morning, when you are prepared to continue the baking, prepare your pastry cream. In a small pot, bring the milk to boil. In another pot, whisk together egg yolks, sugar and cornstarch until they you get a thick, smooth mixture. Pour in half of the milk WHILE WHISKING vigorously (very important!! Otherwise your eggs will curdle!!!) Still whisking, slowly pour in the rest of the milk. Turn the heat on medium at this point and bring it to a boil, while whisking constantly, and let it boil for about a minute or until it thickens (this will happen VERY quickly, and you need to whisk constantly!), then remove it from heat. Stir in the vanilla extract and let it sit, then a couple of minutes later, stir in the diced butter. Pour the cream into a bowl, and cover it with plastic wrap (cover it directly on its surface so it doesn’t form a skin), and refrigerate it until it’s cool.
 .
5. Roll the dough into a 10×20 inch rectangle (if you want nice smooth edges, trim the rectangle with a knife), and spread your pastry cream on evenly, leaving an inch bare on one of the long sides. Scatter the raisins on top and sprinkle with the cinnamon sugar. Roll the dough up jelly roll style, starting with the long side nearest to you. Make sure you roll it tightly and evenly.
 .
6. Prepare your baking sheets by lining them with parchment paper. Then, slice the roll into 1 inch wheels, and place the slices onto your baking sheets, leaving at least 2 inches between each piece. Cover the pastry lined baking sheets with a kitchen towel and let the pastries rise until they are doubled in size (about an hour).
 .
7. Preheat the oven to 375 deg F, and brush the pastries with the egg wash. Bake the pastries for 14 – 16 minutes, until they are golden brown! Then transfer them to a cooling rack and let cool for a couple of minutes!
;
DSCN3790
.
Now, after all that work you just did, sit down in your favorite armchair with one of these Pain au Raisin pastries, a nice cup of tea and your favorite book or magazine and relax!!! Since my newest Vogue just arrived, that’s what I’ll be reading today!
 ,
Happy Baking, Everyone, and have a great weekend!

Silk Ruffle Wreath Tutorial

Posted on February 12, 2012
I love anything with ruffles. Clothes, table linens, pillows, bedding… anything! They create dimension, add texture and an illusion of movement, and just make everything prettier, I think! I’ve seen and admired so many beautiful fabric ruffle wreaths, and finally made my own! I looked at how other people made them, and adapted the technique to what was easiest for me to do, and hopefully you will find it easy to do too! It’s a really simple project, it looks a lot harder than it actually is, and the end result is very impressive! All you need is a yard of fabric (mine was a light, silky type), a foam wreath form, some sewing pins, scissors and a hot glue gun! Follow my tutorial to make your own wreath!

 /
DSCN3716
.
1. You will need a yard of fabric for this project. Begin by cutting strips of fabric along the length of your 1 yard piece. Each strip should be about 2 inches wide, make sure all the strips are about the same width. Once you’ve cut up all the fabric, cut each strip in half, so that you have double the amount of fabric strips.
2. Next, wrap strips of fabric around your foam wreath form until it is all covered in fabric, as the pictures below show. Stick the beginning and end of each strip to the wreath with hot glue to make sure that it doesn’t unfold.
 
3. Now begin making the ruffles and attaching them to the wreath using pins. What you do is take a strip of fabric, and begin folding it over to create layers, holding them all together in the center. Once you have your ruffle done, pin it to the wreath (you should only need one pin for each ruffle, but use more if one isn’t enough). Keep making ruffles and pinning them onto the wreath, so they overlap slightly, as the pictures below show.
 //
4. Once you get to the last one, gently fold up the first ruffle you pinned, and pin your last ruffle underneath it, so that there is no gap. Now attach some ribbon to the back using hot glue so you can hang it up, or use a wreath holder to hang it. You could also attach a big bow to the top of the wreath if you wanted, or use two different colored pieces of fabric, and alternate the colors of the ruffles! The possibilities are endless…!
.
 I hope I’ve inspired you to make your own wreath! All you need is some fabric, a wreath form and some pins, and you can make it yourself! So easy, so pretty, and all under $10! Hope you all have a great week! Happy Crafting, Everyone!

Mocha Swirl Cookies

Posted on January 27, 2012
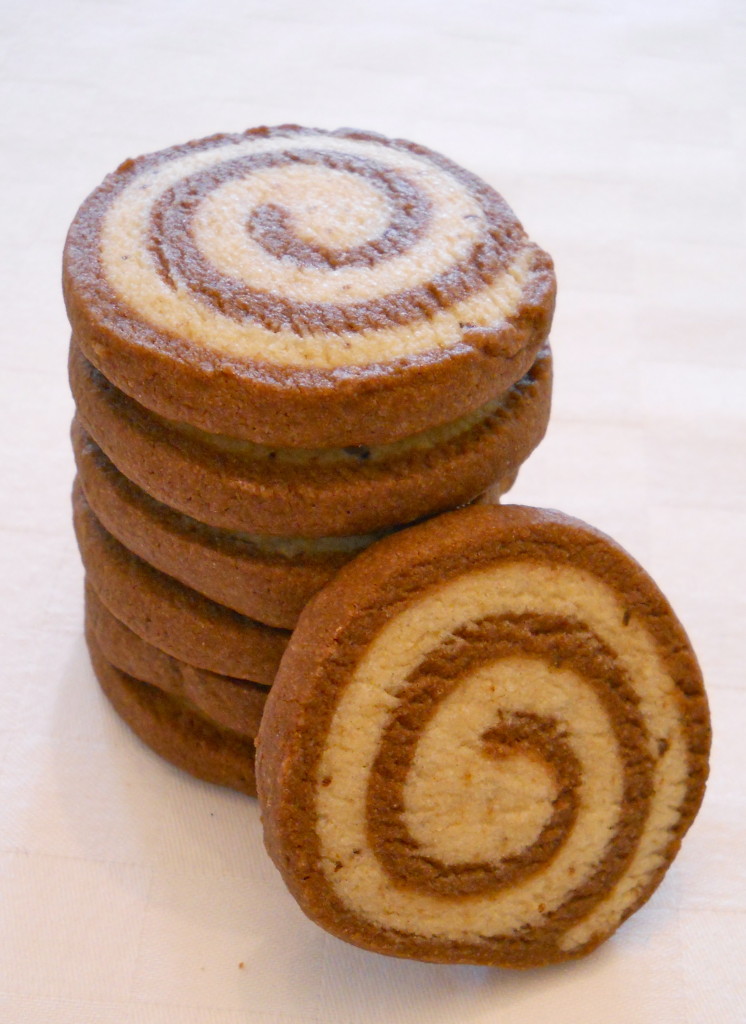
I am not a coffee drinker, in fact, I don’t think I’ve ever drank a full cup of coffee. I just don’t like the taste of it. I love coffee flavored desserts though, and really like these Mocha Swirl Cookies that I’m sharing with you today! I love how pretty these cookies look, with their coffee speckled vanilla and dark chocolate swirl! They are buttery and have that wonderful coffee smell, and are so delicious with some milk or hot chocolate (or coffee if you’re a coffee drinker!) Here’s the recipe…
 .
DSCN3320
 MOCHA SWIRL COOKIES
(Recipe from Sprinkle Bakes)
 ..
YOU WILL NEED
 ,
3 cups all purpose flour
1 1/2 tsp baking powder
1/4 tsp salt
1 cup (2 sticks) unsalted butter, softened
1 cup sugar
1 egg
1 tsp vanilla extract
1 1/2 tsp instant coffee
2 oz dark chocolate, melted and cooled
 ,
 DSCN3338
 .
DIRECTIONS
 .
1. In your electric mixer bowl, cream your softened butter. Then, with the mixer running on low, add the sugar, egg and vanilla extract, until all the ingredients are combined into a smooth mixture.
 .
2. In another bowl, combine flour, baking powder and salt. With the mixer running, begin adding the flour mixture to the butter mixture, and mix until everything is well incorporated.
 ,
3. Now remove the dough from the mixer and divide it into two parts. Return the first half into the mixer, and add the instant coffee to it. Mix until the coffee is incorporated and the dough is speckled with the granules.
 .
4. Next, return the other half of the dough into the mixer, and add the melted chocolate to it, and mix until the dough is smooth and chocolaty! (I absolutely love this dough, it’s smooth, buttery, and smells like vanilla and chocolate = amazing!)
 .
5. Now roll out both of the doughs between some sheets of wax paper (roll each out separately) into about a 9 x 14 inch rectangle. Place each piece of rolled out dough onto a baking sheet, cover it, and refrigerate it for at least 30 minutes.
 .
6. Once they are ready to be taken out, top the chocolate dough with the coffee dough, and gently press them together with a rolling pin. (Make sure the dough isn’t so cold that you can’t work with it, you don’t want it to tear or crumble because it is too cold).
 .
7. If your dough is uneven, cut it to make a rectangle using a knife. Begin rolling the dough like a jelly roll (make sure you roll it tightly!) Roll it SLOWLY and CAREFULLY so it doesn’t start tearing. Once you have your roll, wrap it in wax paper, and chill it in the fridge for up to an hour (this will make it easier to slice it). The original recipe says you should rotate the halfway through chilling, so that it doesn’t get flat on one side.
 .
8. Preheat your oven to 350 deg F and line your baking sheets with parchment paper. Take your roll out, and cut it into 1/4 inch slices. Bake for 10 – 12 minutes.
 ,
If you are looking for a new cookie recipe, try these Mocha Swirl Cookies! They taste great fresh out of the oven, but the coffee flavor is actually even more fragrant and delicious the following day! These cookies would also make a very cute addition to a gift basket for someone who loves coffee – you could pack the basket with different kinds of coffee, mugs, and some of these cookies!
 .
Happy Baking, Everyone!
Back to top