SQUIRREL SUGAR COOKIES

Posted on October 18, 2014
Hey Everyone! I hope you’re having a good weekend! I wanted to stop by and share a cute and super simple sugar cookie idea with you today! I feel like this is the best time of year for all kinds of cookie baking… you can package them nicely and give away as little gifts, make them for holiday parties or enjoy them with some hot chocolate on a cold night like this! I have so many cookie cutters; I have many that my mom has given me over the years, some that belonged to my grandma, and some that I’ve added to my collection every holiday season. I have a cute set of woodland animal cookie cutters which is where this squirrel one is from, and I thought they would make for fun fall sugar cookies, especially decorated with chocolate sprinkles to make the squirrel’s fluffy tail! They are super easy to make (you only need one color of royal icing!) and are so delicious too! Here’s how I made them…
.
SQUIRREL SUGAR COOKIES
 .
YOU WILL NEED
Sugar cookie recipe (like THIS one)
Royal icing recipe (like THIS one)
Chocolate sprinkles
 .
 /
DIRECTIONS
First, make your sugar cookies, either following your favorite sugar cookie recipe or you can use my favorite sugar cookie recipe which you can find here! Let the cookies cool completely, then prepare your royal icing (recipe here). To make brown royal icing, I added a couple drops of red gel food coloring and about twice as many green drops of green gel food coloring to the royal icing, but you can experiment with the proportions of the food coloring to make it the exact brown color you want! Once you have the right consistency and color of icing, fill a clear piping bag with it and cut off the tip. Then, first decorate the tail; outline and flood the tail with icing, then immediately sprinkle it with chocolate sprinkles. Let sit for a couple seconds, then shake off the excess sprinkles, and using a toothpick, make sure the sprinkles adhere to the icing well and reposition any if you need to. Then, outline and flood the rest of the squirrel’s body with icing and use one sprinkle for its eye. Let the icing dry completely before eating.
 .
 .
For more of my sugar cookies, check these out!
 .
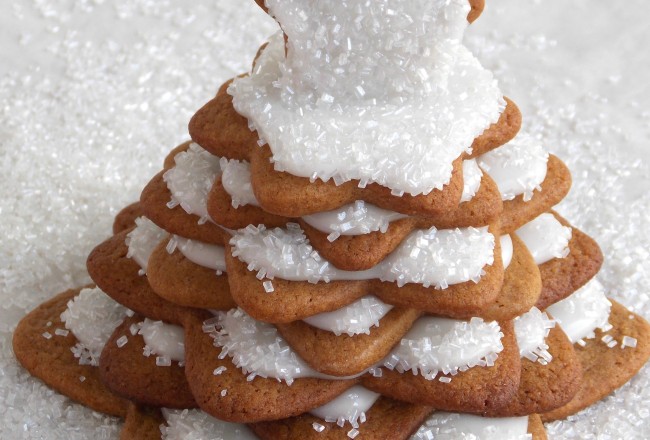
Left: Snowy Tree Sugar Cookies (recipe HERE) Middle: Simple Iced Gingerbread Man Cookies (recipe HERE) Right: Plaid Sugar Cookies (recipe HERE)

 Left: Pumpkin Sugar Cookies (recipe HERE) Right: Daisy Sugar Cookies (recipe HERE)

Happy Baking, Everyone!

PEAR, GOAT CHEESE & WALNUT FALL SALAD

Posted on October 16, 2014
Hello Everyone! Fall is definitely in full swing here… last weekend we took a trip to our favorite pumpkin farm in Pennsylvania and got our pumpkins, the first apple pie of the season has been baked, there’s a big jug of apple cider in the fridge and the leaves outside are looking more and more colorful every day! I wanted to share another fall salad recipe with you today, a couple of weeks ago I shared this Fall Quinoa Salad and this Fall Salad with Roasted Acorn Squash with you, and this Pear, Goat Cheese & Walnut Salad is so delicious too! I’ve been on a serious salad kick this fall if you can’t tell (and a soup one too! Scroll down for some of my soup recipes). I hope you’re all enjoying the fall season so far!
PEAR, GOAT CHEESE & WALNUT FALL SALAD
 ,
YOU WILL NEED
Greens of your choice (I used a baby spinach mix)
Sliced pears
Chopped walnuts (or pecans)
Shredded chicken
Goat cheese
Vinaigrette of your choice (I used a honey mustard one)
.
 .
DIRECTIONS
This salad really doesn’t require any directions, simply toss your greens with your vinaigrette and add in the shredded chicken (warm or cold), chopped nuts, sliced pears and goat cheese! You can use plain goat cheese, or if you’re looking for a little extra flavor use a store-bought flavored one like I did, or buy a plain one and add in some flavor yourself! I used plain goat cheese coated in chopped dried cranberries, orange zest and cinnamon (perfect for fall!), but you could coat it in herbs or anything else you prefer!
.
For other fall salads, check these recipes out!
 .
Right: Fall Salad with Roasted Acorn Squash (recipe HERE) Left: Fall Quinoa Salad with Roasted Butternut Squash (recipe HERE)
 .
Happy Cooking, Everyone!
I will be linking to THESE wonderful blogs!

Grocery Store Flower Arrangement

Posted on October 9, 2014
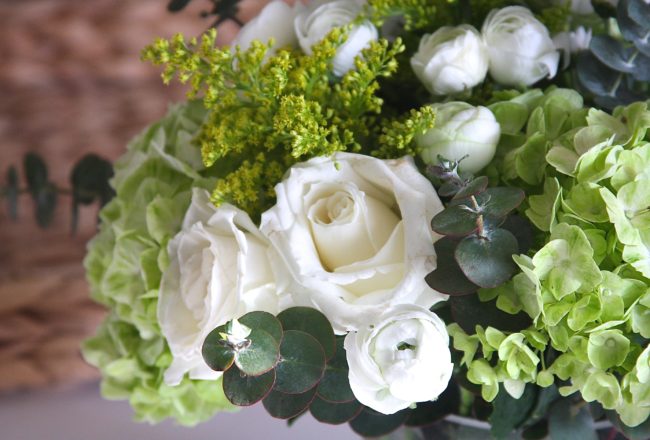
Hello Everyone! I have a fun little flower arrangement to share with you today, as well as a couple tips & tricks for how to create a pretty arrangement using grocery store flowers! If you are looking to give flowers as a gift then you may want to seek further inspiration. Checking out some house warming gift ideas may help you. I absolutely love fresh cut flowers, and I love having them around the house; nothing will freshen up a room like a bouquet of flowers. That being said, you don’t always have to have huge, sophisticated arrangements for this, because you can use pretty much any flowers to create something beautiful! I love how colorful this arrangement is, and how it brightens up the room as it sits on the coffee table. Here’s how I created it, and how you can make your own! And if you want to bring a smile to someone’s face with some gorgeous, fragrant flowers then why not head over to Flowercard and see what you can send to that special someone!
.
TIPS & TRICKS FOR ARRANGING GROCERY STORE FLOWERS
.
1. You are probably starting with a bouquet of flowers that looks a little bit like the picture below. So the first thing you want to do is separate all the flowers and lay them all out. Grocery store bouquets will usually have a couple different kinds of flowers which is nice, because it will make your arrangement look bigger and fuller. By separating all the flowers, you can see how many of each you have, and think about how you want to group them together.
.
.
2. Next, pick the container that you will arrange your flowers in. I like using a low, round glass container for my arrangements, because it doesn’t “drown” the flowers or make the arrangement look sparse. Instead, the low height of the vase makes it look fuller.
.
.
3. Once you have your container, you can begin arranging the flowers. You can either go ahead and start cutting the stems and arranging the flowers directly in the vase, or arrange it in your hand like a bouquet first, which is what I prefer doing. I like to start with the larger flowers and the ones you have fewer of in the middle, and work my way around them with the smaller flowers, leaving a couple of small flowers out to use later.
.
.
4. Once you’ve created a bouquet in your hand and you’re happy with it, cut the stems to the approximate length you need to fit the vase, and place them inside it. If some are too long, this is when you can trim them. Rearrange them if you need to, and fill in the gaps with the smaller flowers that you set aside earlier.
.
.
I like to use arrangements like this on my coffee table, placing them on stacks of books or magazines, or adding them to a large decorative tray. But a couple of arrangements like this would also be great for your dinner table, parties, or even wedding receptions if you’re trying to keep things within a budget!
.
For other flower arrangement ideas, check these out!
Left: Simple Carnation Flower Arrangement (find it HERE) Middle: Teapot Flower Arrangement (find it HERE) Right: Repurposed Tea Tin Flower Arrangement (find it HERE)
.
Have a great week, Everyone!
I will be linking to THESE wonderful blogs!

Creamy Potato Soup

Posted on October 4, 2014
Hi Everyone! I hope you are having a good weekend and are enjoying the fall weather! So far, October has been exactly as it should be; filled with cool and crisp days, perfectly blue skies, long walks, warm sweaters, cozy dinners and apple pies! (And sinus pressure mixed with allergies, but lets try to forget about that!) I wanted to share one of our cozy October dinners with you today, because it’s the perfect fall night comfort food! I love potato soup, especially when it’s super creamy, topped with crispy bacon and served with warm homemade bread! What could be better! This is a great weekend meal too, cook a big pot of this and reheat it the following day, and your weekend cooking is done! I always think that soups get better as they sit, somehow the flavors have time to hang out together and everything gets even better!
 .

CREAMY POTATO SOUP
*Serves 6*
 .
YOU WILL NEED
5 – 6 medium sized potatoes
1 medium sized onion, diced
6 tbs unsalted butter
6 tbs all-purpose flour
2 1/2 cups skim milk
4 cups whole milk
3/4 cup half and half
Salt & Pepper
Optional: Crispy bacon or pancetta for topping
Crusty white bread to serve with the soup OR
these no-knead bread bowls!
 .
DIRECTIONS
1. First, prepare your potatoes. Peel them and dice them into small-ish cubes. Then, cook them in salted water until just tender. Drain and set them aside. In a large pot, saute the diced onion in the butter over low heat, until translucent. Then, sprinkle in all the flour and whisk constantly for about a minute, to cook out the flour taste.
 .
2. Next, pour in the skim milk while whisking constantly, so no lumps form. Once smooth, pour in the whole milk and the half and half (*note: you can change up the skim/whole/2%/half and half ratio to suit your taste, of course, this is just what I like to use), and season with salt and pepper and cook on a low simmer for about 10 minutes until smooth and thickened, making sure you stir it frequently so the bottom doesn’t burn! Then, turn it down to low and add in the potatoes, and cook for another minute or so. Serve hot, topped with crispy bacon, and with some fresh crusty white bread, or in bread bowls like these!
.
For other soup recipes, check these out:
 .
Left: Venison Stew (Recipe) Middle: Roasted Butternut Squash Soup (Recipe) Right: Bread Bowls (Recipe)
 .
Left: Creamy Tomato Soup with Grilled Cheese Croutons (Recipe) Right: Hearty Beef Stew (Recipe)
.
Happy Cooking, Everyone!

BLACK PLUM CRISP

Posted on September 30, 2014
Hi Everyone! I hope your week is going well so far! It’s hard to believe that tomorrow is the first day of October. And you know what that means… less than 90 days until Christmas! I start getting excited about Christmas as soon as the summer starts coming to an end, so this is pretty happy news to me! I’ve been meaning to share this recipe with you for the longest time, and finally got around to doing it now. I love fruit crisps, and this black plum one is one of my favorites. The soft, tart filling with the sweet, crispy topping is so delicious, especially under a giant mountain of vanilla ice-cream!
BLACK PLUM CRISP
*Serves 6*
 .
YOU WILL NEED
FILLING
5 – 6 black plums (depending on their size)
1 – 2 tbs granulated sugar
1 tsp lemon juice
2 tbs all-purpose flour (or cornstarch)
TOPPING
3/4 cup all-purpose flour
3/4 cup rolled oats
8 tbs (4oz) unsalted butter, softened
1/4 cup plus 3 tbs brown sugar
 .
 .
DIRECTIONS
1. First, prepare the plums. Cut them into slices and in a large bowl, toss them with the sugar, lemon juice and flour (or cornstarch), then place them in your baking dish. Next, prepare your topping, by mixing together all the topping ingredients until you have large crumbs. Spread them evenly over the plums. Place the whole baking dish onto a large baking sheet lined with parchment paper, so that it can catch any juices that might leak from the crisp as it bakes… it makes clean-up so much easier!
 .
2. Preheat your oven to 350 deg F and bake the crisp for about 35 – 45 minutes, until the juices are bubbling and the topping is beautifully golden brown. Let cool for a couple of minutes, then serve with vanilla ice-cream! (*Note: Make sure to check on the crisp after about 20 minutes of baking time, and if the topping is getting too dark, cover it with some foil to prevent burning.)
 .
Happy Baking, Everyone!
I will be linking to THESE wonderful blogs!

Cinnamon Recipe Collection

Posted on September 26, 2014
Happy Weekend, Everyone! I don’t know about you, but I don’t think there is a scent or a taste that reminds me more of fall than cinnamon does. I love that spicy warmth it adds to everything, and I love the aroma that fills the kitchen when you bake with it! There’s nothing like it! So if you’re looking for something to bake this weekend, here are some cinnamon flavored goodies to inspire you! Have a great weekend, everyone!
 .
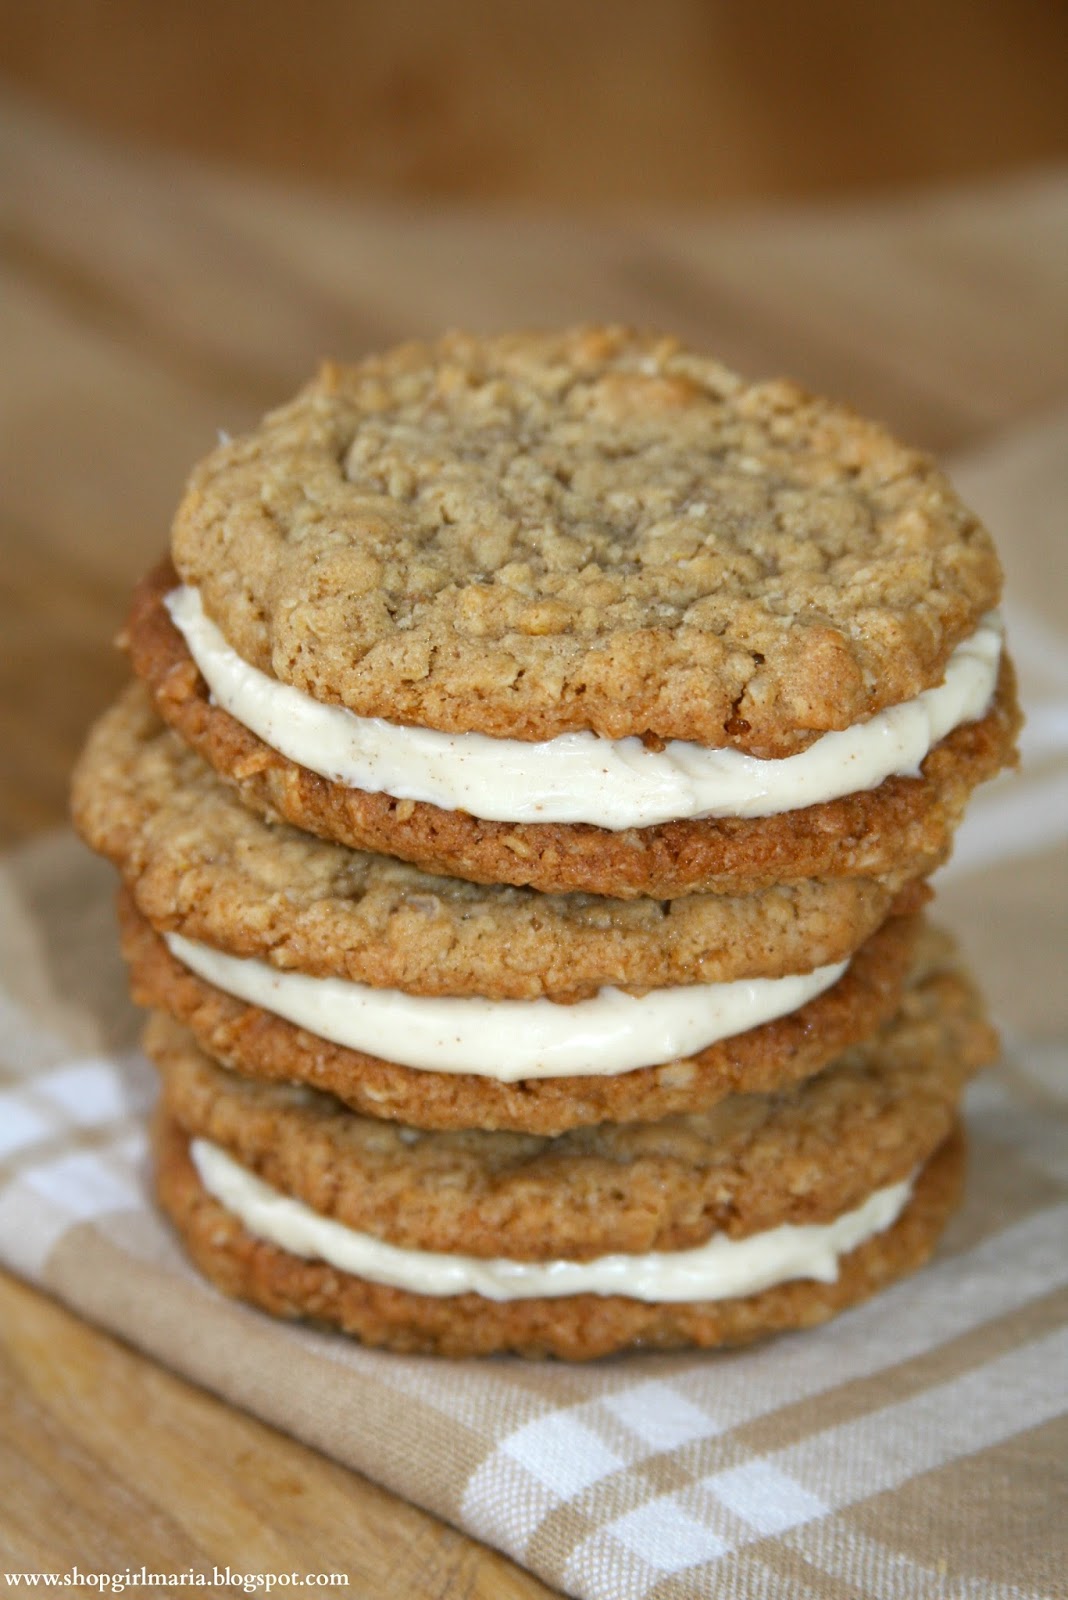
Left: These Cinnamon Monkey Bread Muffins (recipe HERE) are a recent favorite, and they are oh-so good! Let me warn you though, they will disappear pretty quickly! Right: These Oatmeal Cookie Sandwiches with Cinnamon Cream Cheese Filling (recipe HERE) are the perfect little fall treat. Soft and chewy oatmeal cookies stuffed with a sweet, cinnamon flavored cream cheese filling?! Delicious!
.
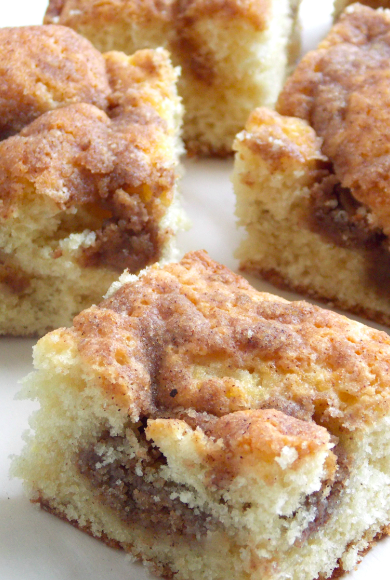
Both of these cinnamon recipes would make a great weekend breakfast or afternoon snack with a big cup of tea or coffee! The best part? The sugary cinnamon pockets hidden throughout them! Left: Cinnamon Swirl Quick Bread (recipe HERE), Right: Cinnamon Coffee Cake (recipe HERE)
 .
Left: These Cinnamon Sugar Donut Muffins (recipe HERE) are another favorite! Soft donut muffins brushed with butter and sprinkled with cinnamon sugar = pure deliciousness! Right: And for a cinnamon classic, these Cinnamon Rolls (recipe HERE) are always a hit!
 .
And for a cinnamon flavored cozy hot drink, try this decadent Hot Chocolate for Two (recipe HERE) that’s the perfect treat for a cold fall day!
 .
Happy Baking, Everyone!
I will be linking to THESE wonderful blogs!

No-Knead Bread Bowls

Posted on September 24, 2014
Hi Everyone! With the fall season also comes soup season, which I am very happy about since I could pretty much eat soup for every meal of the day, every day. At least in the fall. I love baking bread and do so pretty regularly, often using the NY Times No-Knead Bread recipe which is so easy and always very good! It always makes a beautiful loaf of bread that’s great to serve with salads, pastas, soups and stews, but can also be used to make something else… soup bread bowls! Because you can hardly find a cozier meal than some steaming hot soup in a big bread bowl. Sure, it’s not exactly light on the calories or the carbs, but on those days when you are craving some serious comfort food, it’s just what you need!
 .
NO-KNEAD BREAD BOWLS
(Adapted from The NY Times No-Knead Bread Recipe)
 .
YOU WILL NEED
3 cups all-purpose flour
1/2 tsp dry yeast
2 tsp salt
1 5/8 cup water
Cornmeal or extra flour for dusting
Delicious soup to fill the bread bowls with!
 .
DIRECTIONS
1. Combine the all-purpose flour, yeast and salt in a large bowl. Add in the water and stir together until a super sticky dough forms. Then, cover the bowl with plastic wrap and let it sit in a warm spot for 12 – 20 hours. (I usually let mine rise for about 14 hours.)
 .
2. Once the rising time is up, you should have a VERY sticky dough with lots of bubbles all over the surface. It will seem like you won’t even be able to work with the dough because it’s so wet, but don’t worry about that, that’s the consistency you are looking for! Take the dough out of the bowl and place it on a generously floured surface, divide it half, and form each half into a loaf shape (make sure you cover your hands with flour, because this will be very sticky!) Sprinkle both with more flour and cover with some plastic wrap. Let it rest for about 15 minutes.
 .
3. In the meantime, preheat your oven to 450 deg F and place your baking dishes in the oven while it preheats. (The no-knead bread is baked in a Dutch oven or a covered casserole dish. I used two 2 quart covered casserole dishes to bake these two bread bowls.) Once the oven is preheated, carefully take the hot baking dishes out and place a loaf in each. Cover with the lid and let bake for about 30 minutes, then take the lid off and bake for about another 15 minutes, or until the loaves are nice and golden on top! Let the loaves cool completely before cutting out the holes on top and hollowing them out to serve your soup in! (*Note: this made two BIG & hearty sized bread bowls, if you want smaller bread bowls, divide the dough into three or four loaves, and adjust baking time so they don’t burn!)
 .
 For other variations of the NY Times No-Knead Bread, check out these recipes:
Left: NY Times No-Knead Bread (Recipe HERE), Middle: Pesto No-Knead Bread (Recipe HERE), Right: Whole Wheat No-Knead Bread (Recipe HERE)
 .
Happy Baking, Everyone!
I will be linking to THESE wonderful blogs!

DIY Sweater Candle Cozies

Posted on September 22, 2014
Hello dear friends! Happy Fall! I am so excited that fall is officially here, and I have a fun little fall-inspired project to share with you! These little candle holders only take a couple of minutes to make and look so pretty with a tea light burning inside! Plus it’s a great way to repurpose two things… old candle jars and old sweaters! See, this is why I never throw things away! You just never know when you might need them! Or at least that’s what I tell my husband. You could embellish these with ribbon, bows or buttons, or leave them plain like this, either way, they will instantly cozy up your home!
.
DIY SWEATER CANDLE COZIES
YOU WILL NEED
Small glass jar or cleaned out old candle jar
Old sweater (preferably the sleeve part)
Scissors & Hot Glue Gun
Tea light/candle
.
.
DIRECTIONS
First, make sure your jar is clean (if you are re-using an old candle jar and need to clean it out, you can check out my tutorial on how to remove wax from a jar HERE!) then wrap the sweater around it. I used the sleeve part which fit around the small jar perfectly. Roll down the sweater by about an inch at the top of the jar, then cut off the sweater at the bottom of the jar, leaving about a half inch sweater boarder. Using hot glue, stick the sweater boarder you reserved onto the bottom of your jar, making sure there aren’t too many bumps and that the surface is as even as possible, so your candle holder doesn’t stand unevenly! Then, just place your tea light or candle inside the jar, and you are all done!
Making candle jars are an easy thing to do, and you can make this for friends and family, or even make and sell them online for some extra bucks. This would also serve to be a great gifting option. For all that, you might need to look at wholesale bottles that can be used as candle jars. These types of bottles are available in plenty and wouldn’t be much of a problem to procure. So, what is stopping you from making your candle jars?
.
For more candle projects and ideas, check out these posts on Shopgirl…
.
Left: How to remove wax from jars (HERE) Right: Pumpkin Candle Holder Tutorial (HERE)I’m super excited that my Pumpkin Candle Holders were featured by Better Homes & Gardens! Check it out HERE!

Happy Crafting, Everyone!
I will be linking to THESE wonderful blogs!
*This project was originally featured on Or So She Says, where I am a monthly contributor. If you’re looking for more fun projects and recipes, head on over to the site!

Kitchen Tip: Freezing Cheese for Easier Grating

Posted on September 19, 2014
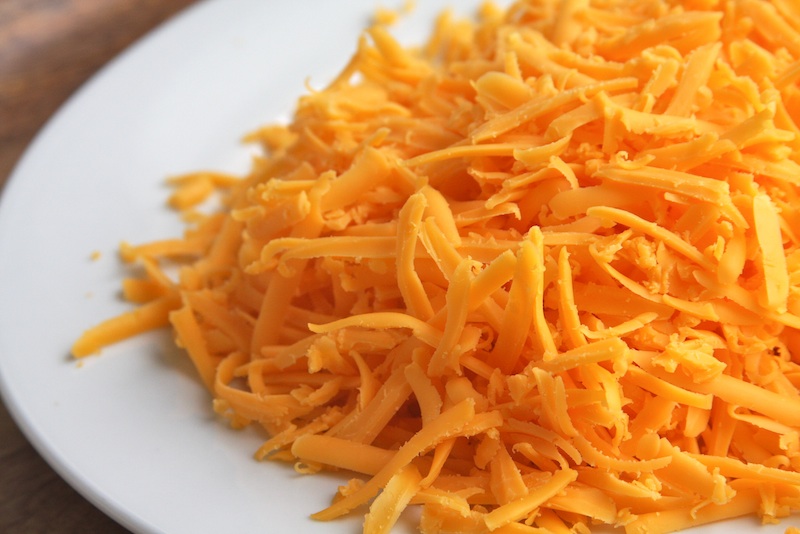
Hi Everyone! I have a quick and easy kitchen tip to share with you today, that’s all about cheese! Maybe you already do this, but if you don’t, you should definitely give this a try because it will make your life so much easier! If you are hand-grating a block of cheese or any kind of soft cheese, place it in your freezer for about 15 – 20 minutes (time depends on how soft the cheese is), or until it feels firm; this will make it much easier to grate!
 .
 .
Happy Cooking, Everyone!
I will be linking to THESE wonderful blogs!

Carnation Flower Arrangement

Posted on September 17, 2014
Hey Everyone! I love having fresh flowers around the house, because they are such a simple and easy way to brighten up a room! You don’t necessarily need big, lavish flower arrangements to do this, you can use simple and inexpensive grocery store flowers to create pretty arrangements that will instantly add color and life into your home. Carnations are one of my favorite flowers to use for this. I feel like they are a very underestimated flower that sort of has a bad reputation, but with just a couple simple tricks, you can make beautiful little arrangements with them!
 .
SIMPLE CARNATION FLOWER ARRANGEMENT
SIMPLE AND EASY TIPS
 .
1. Stick to one color. Carnations sort of have this bad reputation of looking cheap, tacky and old fashioned, but you can create clean and elegant arrangements with them if you stick to just one color. Another fun idea is creating three or four different carnation arrangements for your table in ombre shades, and placing them down the center of your dining table for a cool effect! You could also go seasonal with your arrangements… reds or whites for Christmas, oranges for fall…
 .
2. Bunch them together tightly. Flower arrangements look more professional and luxurious the fuller they look. If the arrangement looks sparse it will look incomplete. Instead, bunch the carnations together tightly, almost creating a snowball look. Because the carnations are pretty big flowers and the curly petals give them a look of lots of volume, you don’t need very many of them to make a full looking arrangement. I like to place these small bunches (I used about 10 large carnations here) in some clear, low vases that make the arrangement appear even fuller.
 .
3. Make them last even longer. Carnations naturally stay fresh for a very long, which is another advantage when using them in arrangements! To make them last even longer, cut the stems on an angle before placing them in water. If you see that they start wilting a little bit, just cut the stems on an angle again to make them last even longer!
.
 .
For other fun flower arrangements, check out these ideas:
 .
Left: Repurposed Tea Tin Flower Vase (HERE) Right: Teapot Flower Arrangement (HERE)
 .
Have a great week, Everyone!
I will be linking to THESE wonderful blogs!
Back to top