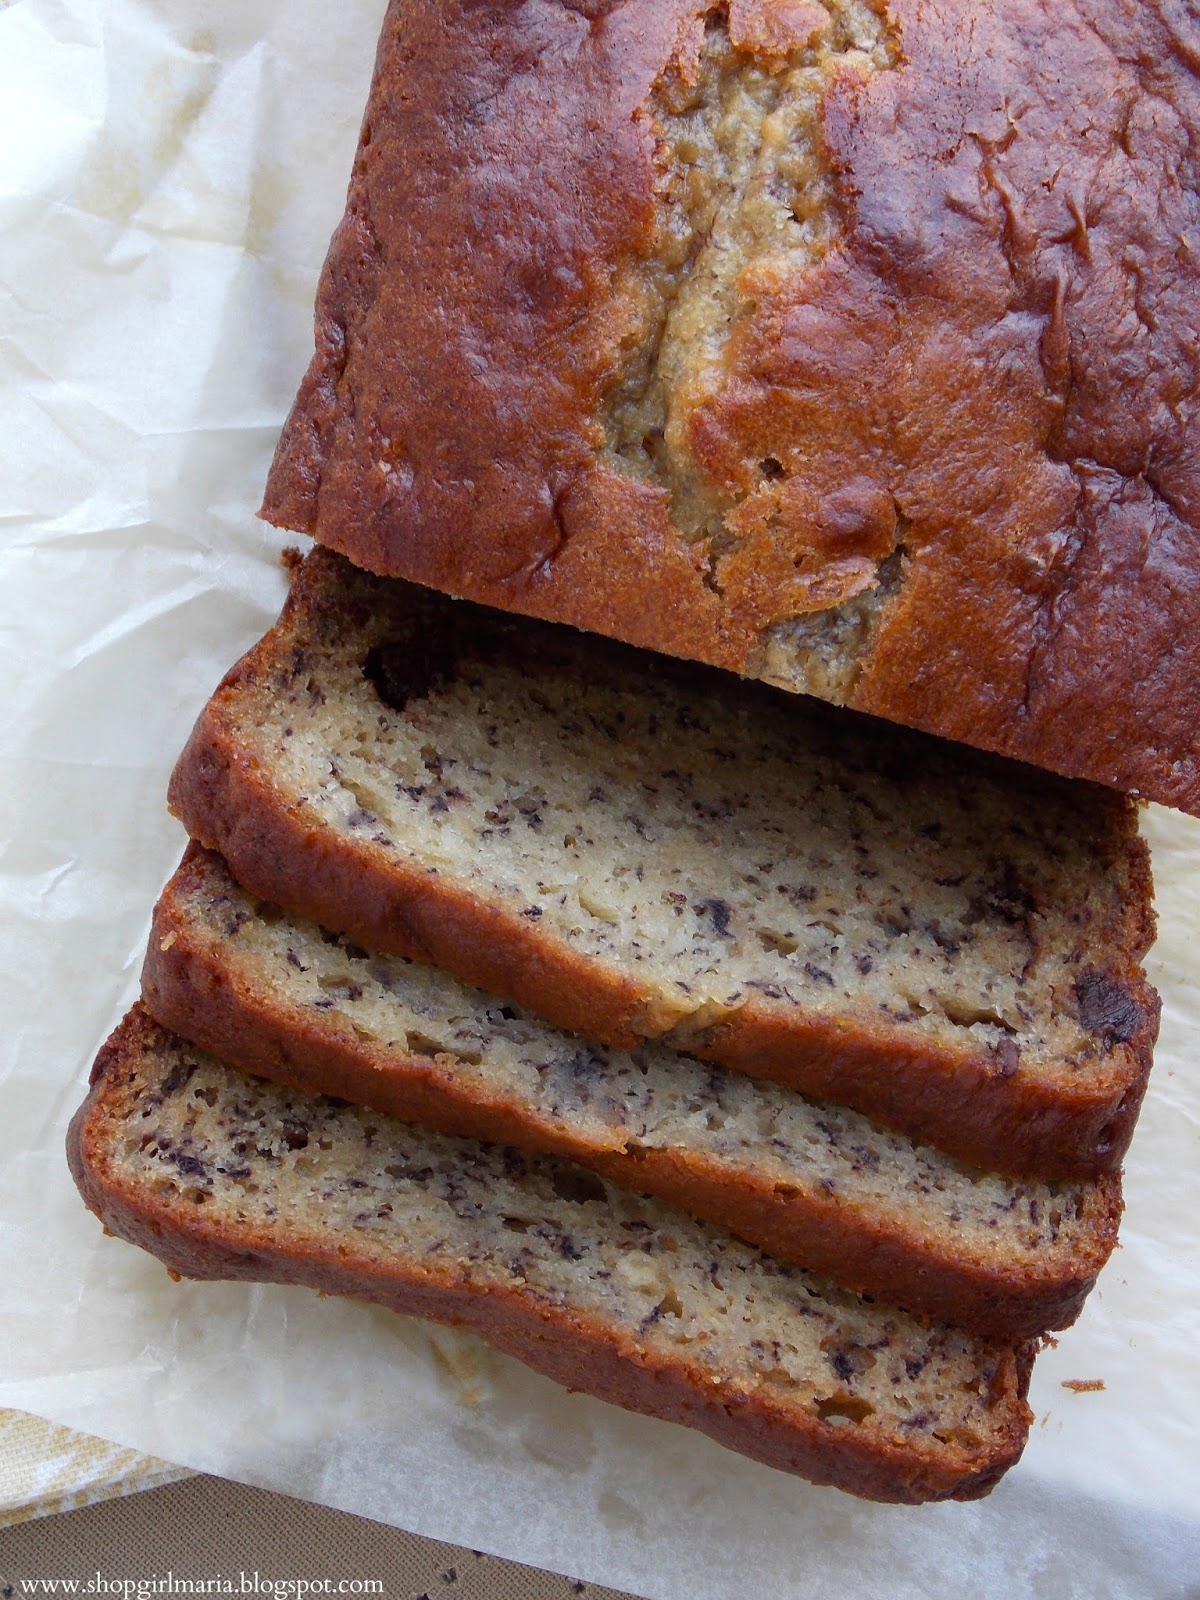
CHOCOLATE CHIP BANANA BREAD
Classic White Bread
Posted on February 27, 2013Sugary Snowflake Gingerbread Squares
Posted on November 27, 2012Traditional Christmas Gingerbread Cookies
Posted on November 25, 2012DIRECTIONS
Brown Sugar – Raisin Bread
Posted on October 31, 20121. In a small bowl, combine the yeast, a little bit of sugar and a 1/4 cup of warm water. Cover and let stand for a five minutes, until the mixture gets frothy. Set aside.
l;
2. In your electric mixer bowl, combine the rest of the water, the warm milk, butter, the rest of the sugar, salt egg and a cup of the flour. Mix until you get a creamy texture, then add the yeast and another cup of flour. Mix for a couple of minutes, then add in the raisins and continue mixing. Add the rest of the flour and beat on medium speed until a soft dough forms (if the dough is too sticky add a little more flour. Using the dough hook attachment, knead for five minutes. Then, form the dough into a ball, place it in a greased bowl, cover and let rise in a warm place for an hour.
,
3. Line a standard size loaf pan with parchment paper. Turn your dough out onto a floured surface and roll it into an 8×12 inch rectangle. In a little bowl, combine the brown sugar and cinnamon, then evenly sprinkle it over the rectangle. Tightly roll up the dough jelly-roll style beginning at the narrow end until you get a log. Pinch the ends and transfer the log into your prepared pan (make sure you place it in the pan seam side down). Cover it loosely and let rise for another hour and a half.
k
4. Preheat your oven to 350 deg F. Bake the bread for 35 – 40 minutes, until the top is beautifully golden brown! Let cool for 10 minutes before slicing and eating.
Italian Easter Bread
Posted on April 5, 2012Valentine’s Day Watercolor Heart Cookies
Posted on February 4, 2017Hey Everyone! It’s a beautiful sunny Saturday morning here, I can hear birds chirping outside the kitchen window and it feels like spring has started it’s long journey towards us! I hope that February has been off to a good start for you… it’s been a busy week here, but I wanted to stop by and show you these fun Valentine’s Day cookies today! I love that everything turns pink in February. Because I love anything pink any time of the year, I love Valentine’s Day. These heart shaped sugar cookies are so fun and easy to make; all you need to do is bake basic sugar cookies and cover them with icing, and then get creative painting them with food coloring as you would paint a watercolor picture! It’s a fun technique and an easy way to personalize cookies, too!
VALENTINE’S DAY WATERCOLOR HEART COOKIES
YOU WILL NEED
Sugar cookies (like this basic sugar cookie recipe)
White icing (I used this recipe, but modified the sugar quantity & only made half a batch)
Food Coloring (I used gel food coloring)
DIRECTIONS
- First, bake your sugar cookies and let them cool completely. Next, make your icing. I used the same icing recipe as I did for my gingerbread house, but I made it a little thinner by adding less confectioners’ sugar, so that it would be easily spreadable. If you’re using this recipe, make sure to add the confectioners’ sugar in batches, adding just enough to get the desired consistency and thickness.
- Once you have your icing, fill your piping bag with it, and cut it at the end. Pipe the heart outline first, then flood the cookie evenly to get a nice, smooth surface. I always tap the cookie on the table surface a couple times, just to make sure there are no bubbles in the icing and it dries nicely. You will need to let the icing set completely, I let mine set overnight so that the surface would be completely dry and hardened and ready for you to paint on!
- So when the icing has dried and you’re ready to paint, get your food coloring out and use a plate as your paint palette. This is where the watercolor technique comes into play – you add a little bit of the food coloring to the plate and thin it out with water, and using a clean paintbrush, paint your designs on the icing! Make sure you paint very lightly and gently over the icing so as not to pierce or damage the surface. I just did simple Valentine’s themed designs on my cookies, but you can get really creative with this, and use this cookie technique for any season!
I hope you all have a great, sunny February weekend! Happy Baking!
Mitten Sugar Cookies
Posted on January 23, 2017Hey Everyone! I hope that 2017 has been off to a good start for you! I love the start of a new year. As much as I love the whole holiday season and all the baking, decorating and fun that comes with it, as soon as Christmas is over, I am so ready to take all the decorations down, de-glitter every surface (which pretty much seems impossible, since even after multiple cleanings, I am still somehow finding glitter around) and get a clean, fresh start on everything again. I don’t really make new years’ resolutions, but there are some things I want to do more of in 2017, and blogging is one of them… so here’s to keeping that up (at least somewhat consistently) all year long! I thought it would be fun to make these mitten sugar cookies this winter, but it turns out this has been the warmest January I think i can ever remember! It seems like every time the East Coast gets snow, it misses the DC area completely and we just get stuck with rain for days… I’m still hoping for at least one big snowstorm this winter… and knowing this crazy weather, it won’t come till April! But regardless of the weather, these are fun cookies to bake up this winter! You could obviously eat them, but they would be fun to use for a kitchen garland of some sort, or kitchen decor in general! Here’s how I made them…
YOU WILL NEED
Sugar cookies (like this basic sugar cookie recipe)
White icing (I used this one, but modified the sugar quantity & only made half a batch)
Shimmering sugar for sprinkling
DIRECTIONS
- First, bake your cookies and let them cool completely. Make sure you give them enough time to cool, you don’t want the icing to melt all over them! Next, make your icing. You can use any basic white icing recipe; I used this one, which is the same recipe that I used for my gingerbread house, only I changed the amount of confectioners’ sugar to make it less thick and more easily spreadable. If you use this recipe, add the confectioners’ sugar a little bit at a time, adding just enough to make it your desired consistency and thickness (also taste it to see if it’s good!). I also only used about half of this recipe for all the cookies.
- Once your cookies are completely cooled and your icing is ready, fill a plastic piping bag with some of the icing and cut the end of the piping bag. Next, pipe the outline of the mitten. Then, flood the inside part of the bottom of the mitten (the part that’s going to be covered with the shimmering sugar), and immediately shake the shimmering sugar over the whole area. Let it sit for a couple seconds, then shake the excess sugar off.
- Next, flood the whole surface of the mitten with icing, and let the icing set completely. Once I flood the cookie with icing, I like to tap it gently on the table surface, just to make sure there are no small bubbles in the icing.
- Once the icing has set, you can pipe on some of the detailing. I did a couple different sweater patterns on the mittens (just making it up as I went along..!) and then piped an outline around the mitten to make it nice and neat. Let the icing set completely and you’re done! You could of course make the mittens all colorful with different colored icing or shimmering sugar, I just liked the wintery white look here… the possibilities are endless though!
Happy Baking! I hope you all have a great week, thanks for stopping by today! Come back again soon!
Cranberry Orange Scones & Memories of Vermont
Posted on October 25, 2016Hello, Friends! It has been a while. A little over a year, actually, since I’ve stopped by here and shared a little bit of my world with you! It has been a busy year, to say the least, but I’ve missed blogging and thought it was about time I got back into it. I have been focusing on growing my socials like Instagram with the help of Nitreo which should in turn help my blog prosper. I made these Cranberry Orange Scones last week, and thought they would be the perfect thing to share with you today! If you’re a scone lover, you will love these! I’ve tried so many different scone recipes, and I love the consistency of these. They are soft and buttery on the inside, bursting with fresh flavor from the tangy cranberries and fresh orange juice and zest. They’re the perfect fall treat with a hot cup of tea or coffee on a cozy afternoon! The recipe is from The Vermont Country Store Cookbook, which was created by the family that owns this traditional New England general store. My husband and I spent a couple days in Vermont over the holidays last year, and fell in love with the area instantly! We’ve loved every single recipe from the cookbook so far and opening it always brings back memories of the cold, snowy days we spent up there; driving on remote snow covered country roads, walking through quaint little towns filled with New England charm, eating the sharpest cheddar cheese and every meal involving maple syrup in some form or another! On our way to the little Bed & Breakfast we were staying at, we stopped for dinner and at the end of our meal we ordered the richest, most decadent bread pudding I have ever had, that was drowned in a thick pool of maple syrup. Since it was late and the roads were getting pretty icy, we took it to go, and within about two minutes I managed to spill the maple syrup all over the front seat of the car… needless to say, it was a sticky mess for the rest of the trip. A sweet smelling sticky mess, thanks to which the smell of maple syrup will always remind me of Vermont and that perfect snowy Christmas! Sometimes the worst messes turn into the best memories… But back to the scones!
CRANBERRY ORANGE SCONES
*Makes 6 scones*
(Recipe adapted from The Vermont Country Store Cookbook)
YOU WILL NEED:
2 cups all-purpose flour
1/2 cup granulated sugar (plus extra for sprinkling scones)
1/2 tsp salt
1 TBS baking powder
3/4 of a stick of unsalted butter, cold (6 TBS)
1 cup fresh cranberries
1/2 TBS fresh grated orange zest
1/4 cup fresh orange juice
1/4 cup heavy cream
1 egg
A couple TBS of milk for brushing tops of scones
DIRECTIONS:
- First, mix together the flour, sugar, salt and baking powder (I did this in my electric mixer bowl). Next, cut your butter into small pieces (make sure the butter is very cold!) and mix it with the flour mixture until it resembles coarse crumbs. (*Note – the original recipe says to grate frozen butter into the flour mixture, but I found this to work just as well.)
- Using a wooden spoon, gently stir in the fresh cranberries and the grated orange zest. In another smaller bowl, whisk together the egg, heavy cream and orange juice, then pour it into the flour mixture while gently stirring just until a dough forms.
- Preheat your oven to 425 deg F and line two baking sheets with parchment paper.
- Turn the dough out onto a lightly floured surface and form into a rectangle about 2 inches high. With a knife, cut the dough into 6 equal sized triangle shaped scones.
- Place the scones on the parchment paper lined baking sheets leaving enough room in between them, as they will definitely rise and get bigger as they bake! Pat the scones down just a little, and brush the tops with a little bit of milk and sprinkle generously with sugar. Bake the scones for about 18 – 20 minutes, until they are lightly browned on top and around the edges (watch them carefully the last couple of minutes so they don’t burn!) Once baked, let them cool for a couple minutes before eating!
*Note: The original recipe is for 12 scones, so simply double this recipe if you want to make 12! They are definitely best eaten fresh and preferably the same day as you baked them (which won’t be hard to do, trust me!) but you can definitely store them in an airtight container and they will be good for a day or two!
Thank you so much for stopping by A Homemade Living today! I promise I’ll be back again soon! I hope you have a great rest of your day, and that you’re enjoying some beautiful fall weather wherever you are!
Beef Stew with Roasted Garlic
Posted on September 1, 2015Hi Everybody! Happy September! Although this crazy heat and humidity sure doesn’t feel like September fall is on it’s way, I’m hoping I wake up to a cool and crisp morning one of these days… because I’m so ready for it! As you may be able to tell by another fall themed recipe! I know I’ve shared several different stew recipes with you over the past couple of years, but I couldn’t resist sharing another. Stews are one of my favorites things to cook; not only are they so hearty and cozy, but I also happen to love the slow cooking process. All the chopping, peeling, and stirring is curiously comforting as the ingredients in the big cooking pot begin to fill the kitchen with such warmth and deliciousness! I would also love to make goulash soon too. The flavours are amazing and the food has a very interesting history too. Another thing I love about making stews, is that no stew ever turns out exactly the same; you can add in different herbs, seasonings, vegetables, even meats, depending on what may be in season or what you have on hand, and somehow, it always turns out delicious! I love this particular stew because of all the fresh herbs, but also because of the roasted garlic. It’s a simple way to add more flavor, and really it’s not just for stews, you could use this in any sauce, dip or spread, to give the garlic such great sweetness and softness. Another great thing about stews is that they get better the longer they sit… the flavors marry and intensify, making it the perfect make-ahead meal!
BEEF STEW WITH ROASTED GARLIC
*Serves 4*
(Recipe adapted from Julia Child & Epicurious)
YOU WILL NEED
3 1/2 lbs beef, cut into about 1 1/2 inch pieces
1 head of garlic
A couple of tbs of olive oil
2 tbs unsalted butter
1 medium onion, diced
6 carrots
8oz mushrooms, sliced
3 fresh rosemary sprigs
3 fresh thyme sprigs
1 bay leaf
3 – 4 cups beef broth (homemade or low sodium)
2 cups red wine or extra beef broth
3 tbs tomato paste
2 tbs all-purpose flour
Salt & Pepper
To serve with beef stew: crusty white bread and/or mashed potatoes
DIRECTIONS
1. The first step is a sort of “pre-step” and that’s roasting the garlic! Preheat your oven to 400 deg F and cut the top off your head of garlic. Place the garlic cut side up on a piece of foil, drizzle it with about a tablespoon or so of olive oil, then bring up the sides of the foil and make a little “garlic package”, making sure it’s sealed well. Bake for about 30 – 40 minutes, or until the garlic cloves are nice and soft. Once soft, take the garlic out of the oven, and let it cool a little bit, then squeeze the softened garlic out!
2. While your garlic is roasting, begin cooking your stew. In a large pot, heat up some olive oil and the two tablespoons of butter, and brown your beef. Make sure you do this in a couple of batches so you don’t crowd the pot. Let the beef brown on all sides, then remove it from the pot, and add the diced onion as well as one diced carrot into the pot, season with salt and pepper, lower the heat and cook until the vegetables soften.
3. Add the flour to the vegetables and cook, stirring, for about a minute, then add the beef back in, and add the tomato paste at this point as well. Stir everything gently until the vegetables and the meat are coated in the tomato paste. Add the fresh herbs and roasted garlic (I mush it up with a fork before adding it. Also, add as much/little of it as you like, depending on how garlicky you want the stew to be! If you want it extra garlicky, you can roast more than one head of garlic!) and then drown everything with 2 cups of either red wine or beef broth. Let it simmer for about 15 minutes, then add 3 cups of beef broth, cover and let simmer for 1 1/2 hours, checking on the stew and stirring every 15 minutes or so. Then, uncover the stew, and let it cook for another 1 1/2 hours.
4. While it’s cooking, saute the sliced mushrooms until tender in some olive oil, then about 15 minutes before the stew is done cooking, add the mushrooms, as well as the remainder of the carrots (peel and cut them into chunks), and the rest of the beef broth if necessary – if the stew looks too thick, add in some extra broth to thin it out (you can use more than one cup if you need to). Discard the bay leaf and fresh herb sprigs, and check that the seasoning is right, adding in more salt and pepper if you need it (sometimes I add in a pinch of sugar at the end to balance out the flavors). Serve with mashed potatoes, fresh crusty white bread, and an extra sprig of fresh rosemary on top! Bon Apetit! (said in Julia Child’s voice, of course!)
(*Note: To make fishing out the herb sprigs easier, you can make a “bouquet garni” which basically just means placing the herbs in a piece of cheesecloth and tying it up, then placing that in your cooking pot. You could also just tie up all the herbs and place them in the pot. I would definitely recommend doing one of these, otherwise you will be spending time trying to fish those sprigs out, and there will be way too many little pieces of rosemary swimming around your stew!)
I hope you all have a wonderful day, and enjoy this hearty, cozy stew!
Thanks so much for stopping by today!