Healthy Berry Smoothie Recipe & Tips for Staying Healthy in the Winter & Spring Months

Posted on March 23, 2015

I’m excited to share with you a post today that’s all about staying confident even when you’re battling a cold sore. If you suffer from cold sores like I do, you know it isn’t easy to feel confident when you get one. Some people reach for these new kinds of treatments like Luminance RED, but I’ve yet to try and see if it works. For me, when the first sign of a cold sore coming on I reach for Abreva® to get rid of it fast. Then I follow the following simple tips to help keep my confidence high until Abreva® works its healing “magic”! And really, these tips aren’t just for battling cold sores, but for generally feeling good and staying healthy in the long, cold winter and spring months that we’re going through right now (since the first day of spring was a very snowy and cold one here!). But first, I have a great healthy berry smoothie recipe to share with you, that’s a perfect way to get some vitamins in your body and help you stay energized! You can add supplements like magnesium glycinate powder to this smoothie too to make sure you’re giving your body the nutrients it needs. Supplements like magnesium glycinate powder are great in smoothies and it will aid digestion, promote bowel movements, and fortify your immune system.

Berry SmoothieHEALTHY BERRY SMOOTHIE

4 ice cubes
1/2 cup low fat vanilla yogurt
3/4 cup fat-free milk
1/2 cup frozen berries
Pinch of ground cinnamon
Dash or two of pure vanilla extract

To make your smoothie, simply add all your ingredients into your blender, and mix until you get the desired consistency. Feel free to change up the amounts of the ingredients to suit your taste or to switch out the berries for other fruit. This recipe makes one giant, hearty portion!

Staying healthy and happy through the winter & spring months…

Load up on Vitamin C. This is one of the best ways to give your immune system a boost and a great way to help you stay healthy in the winter, but it’s also a great way to re-energize your body! According to Abreva®, you’re more likely to get a cold sore when you’re stressed, tired and run down, and your body’s immune system is weakened. So make sure you take care of yourself and get all the Vitamin C you need. The smoothie recipe above is a great way to get some vitamin C in a tasty way, since the fruit is filled with it!

Keep it clean. One of the simplest ways to protect your body and stay healthy is to wash your hands thoroughly and often. After you come home from running errands and being on public transportation, after shaking hands with people, after unloading your groceries, after coughing and sneezing… the list goes on, and you get the gist. While this may be so simple that it’s even silly to mention, this is such an easy way for bacteria to spread and attack your body. And if you’re a nail biter like I used to be, this is especially crucial! And along similar lines, when it comes to cold sores, make sure you switch out your toothbrush regularly! You don’t want old bacteria lingering on there, causing you to get a cold sore when you think you’re getting your teeth sparkly white!

Give yourself a break. Sometimes you don’t realize it, but your body is more exhausted than you think after a busy holiday season. As the new year has begun, give yourself a little bit of a break to regroup and regain your energy. Stress and exhaustion will affect you more than you realize, causing you to be more susceptible to colds and other attacks on your body.

It’s a wonder how much little things like this can help you on an everyday basis, giving you the extra energy you need and helping you feel more like yourself whether you’re fighting a cold sore, a cold, or when you may just be feeling a little run down. And the better and healthier you feel on the inside, the happier and more confident you will feel on the outside! For more information about Abreva® and how it can help you fight a cold sore quickly, check out their website here. You could Knock out your cold sore in 2.5 days*. Only Abreva® can do it, when you treat at the first sign**. Try Abreva® Cream during your next cold sore! Click here to learn more about Abreva® cream. *Median healing time 4.1 days. 25% of users healed in 2.5 days. **Among Over-the-counter products.

And if you could use a little extra boost, I have a chance for you to win a $100 Visa gift card! To enter for a chance to win, simply leave me a comment below answering the following question: What is your favorite way to stay confident?

Entry Instructions: No duplicate comments. You may receive (2) total entries by selecting from the following entry methods: 1. Leave a comment in response to the sweepstakes prompt on this post 2. Tweet (public message) about this promotion; including exactly the following unique term in your tweet message: “#SweepstakesEntry”; and leave the URL to that tweet in a comment on this post 3. Blog about this promotion, including a disclosure that you are receiving a sweepstakes entry in exchange for writing the blog post, and leave the URL to that post in a comment on this post 4. For those with no Twitter or blog, read the official rules to learn about an alternate form of entry. This giveaway is open to US Residents age 18 or older (or nineteen (19) years of age or older in Alabama and Nebraska). Winners will be selected via random draw, and will be notified by e-mail. The notification email will come directly from BlogHer via the sweeps@blogher email address. You will have 2 business days to respond; otherwise a new winner will be selected. The Official Rules are available here. This sweepstakes runs from 3/23/15 – 4/17/15. Be sure to visit Abreva brand page on BlogHer.com where you can read other bloggers’ posts!
Simple Spring & Easter Pansy Centerpiece

Posted on March 21, 2015

Hi Everyone! Happy weekend and happy spring! We had a rather unusual first day of spring here in Maryland yesterday, waking up to cold, snowy weather yesterday morning! It was the coldest first day of spring that I can ever remember, but now the snow has melted, it’s warmer outside, and on our walk at the park today I saw lots of daffodil leaves coming up out of the ground… looks like spring is fighting it’s way through after all! After this long winter, I wanted to bring a little bit of the coming spring indoors and since pansies are some of my favorite spring flowers, I bought a couple of pre-potted ones, re-planted them into a big white bowl and arranged them on the dining table surrounded by hyacinths (more of my spring favorites!) and lots of pastel colored eggs in egg cups! Here’s how I created this Simple Spring & Easter Pansy Centerpiece…

Spring & Easter Pansy Centerpiece
SIMPLE SPRING & EASTER PANSY CENTERPIECE

YOU WILL NEED
3 – 4 pre-potted pansies
Potting soil
Large white bowl

Spring & Easter Pansy Centerpiece

DIRECTIONS
First select your bowl, which is both wide and deep enough for you to plant the pansies in. I used a medium sized simple white “latte bowl” (similar in style to these Anthropologie bowls, but bigger) for mine. Begin by sprinkling a layer of potting soil into your bowl, then carefully taking the pre-potted pansies out of their little plastic pots, and arranging them into the bowl. Add in extra potting soil to fill in the bowl, making sure the flowers are well planted. Water the pansies whenever the surface of the soil feels dry, and make sure they get plenty of sunlight during the day! Planted in a bowl like this, they’ll last for up to a week!

Spring & Easter Pansy Centerpiece

Spring & Easter Pansy Centerpiece  Spring & Easter Pansy Centerpiece

Spring & Easter Pansy Centerpiece

For more Easter projects, check these out:

Mossy Easter Eggs Easter Egg Tree
Left: Mossy Easter Eggs (tutorial here) Right: Easter Egg Tree (tutorial here)

And if you liked this Simple Spring & Easter Pansy Centerpiece, check out some of my other flower arrangement ideas here:

Teapot Flower Arrangement  Grocery Store Flower Arrangement
Left: Teapot Flower Arrangement (tutorial here) Right: How to Create a Flower Arrangement using Grocery Store Flowers (tutorial here)

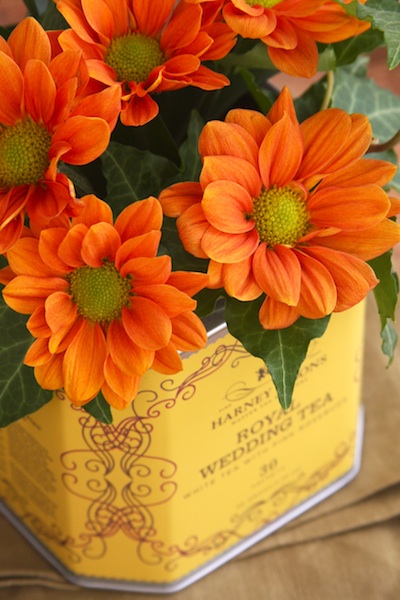
Simple Carnation Flower Arrangement Repurposed Tea Tin Flower Vases
Left: Simple Carnation Flower Arrangement (tutorial here) Right: Repurposed Tea Tin Flower Vases (tutorial here)
I hope you all have a great rest of your weekend, and that this spring is a wonderful one for you! Thanks so much for stopping by today!
I will be linking to these awesome blogs!

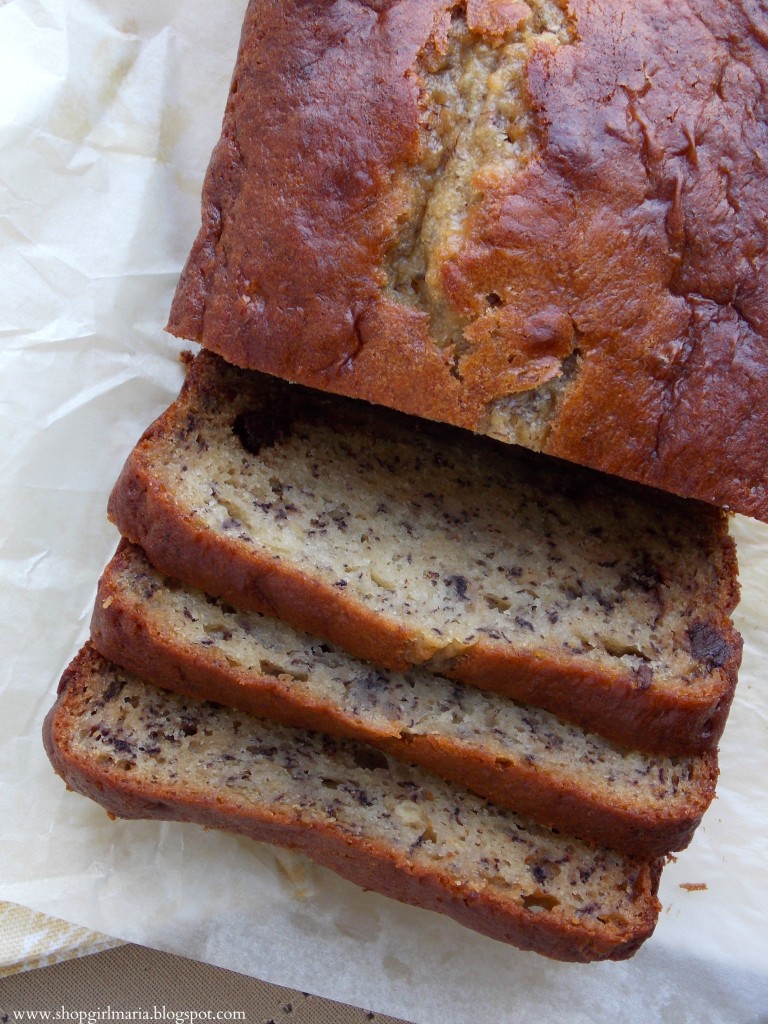
Nutella Swirled Banana Bread

Posted on March 15, 2015

Hi Everyone! I hope you had a good weekend and are ready for the last couple of days of winter before spring officially begins in just five days! But before the week begins, I have a banana bread recipe to share with you. And it’s not just any banana bread recipe, it’s a Nutella Swirled Banana Bread recipe! Because Nutella makes everything better, including banana bread! To tell you the truth, I try not to buy Nutella too often because it inevitably ends with giant late night spoonfuls of it… but every once in a while, I give into the craving and buy a jar! I used my favorite banana bread recipe that uses Greek yogurt for this, added dollops of Nutella on top, and created the swirls using a knife. I love banana bread as it is, but adding the Nutella swirls to it just makes it that extra little bit more delicious!

 Nutella Swirled Banana Bread
NUTELLA SWIRLED BANANA BREAD
*Makes 1 loaf*

YOU WILL NEED
1 recipe banana bread (this is my favorite!)
A couple of spoonfuls of Nutella

Nutella Swirled Banana Bread

DIRECTIONS

1. Follow the directions for making banana bread like you normally would (this Chocolate Chip Banana Bread with Greek Yogurt is my absolute favorite recipe for banana bread! It always comes out super moist and stays fresh for days! I use it for this Nutella Swirled Banana Bread too, but I omit the chocolate chips – you can definitely keep them in the recipe for additional sweetness if you like – and I add chopped walnuts).

2. Preheat your oven to 350 deg F and grease your loaf tin (or line it with parchment paper). Pour your banana bread batter into your prepared loaf tin, then add a couple of spoonfuls of Nutella on top, distributing them over the whole loaf. Take a knife and gently create swirls in the batter. (Make sure the Nutella is at room temperature and is nice and spreadable!) Bake for about 50 minutes to an hour, until an inserted toothpick comes out clean. Let cool in the baking tin for a couple of minutes, then transfer to a cooling rack.

  Nutella Swirled Banana Bread

For more Nutella and/or banana recipes, check these out!

Chocolate Chip Banana Bread with Greek Yogurt  Chocolate Banana Bread
Left: Chocolate Chip Banana Bread with Greek Yogurt (recipe here) Right: Chocolate Banana Bread (recipe here)

Banana Nutella Crepes Baked Banana Walnut Oatmeal
Left: Banana Nutella Crepes (recipe here) Right: Baked Banana Walnut Oatmeal (recipe here)

  Grilled Nutella, Peanut Butter and Banana Sandwich
Grilled Nutella, Peanut Butter & Banana Sandwich (recipe here)

Happy Baking, Everyone! I hope you all have a great week!
I will be linking to these awesome blogs!

Homemade Burrito Bowls

Posted on March 10, 2015

Hi Everyone! So we have gone from dead of winter to pretty much summer temperatures (well, at least compared to the past couple of months!) within a matter of days! The weather is most definitely very confused, which is just fine with me, because I’ll happily trade in my winter jacket for a sweatshirt! Yesterday I had the windows wide open because it was so nice and warm outside, while there was still snow on the ground! Yep, the weather is most definitely confused. But it finally feels like spring is around the corner, putting me in the mood for some lighter dinners after all the comfort food we’ve been devouring for the past couple of weeks! These homemade burrito bowls are so fresh, filled with lots of good ingredients – grilled chicken, brown rice, lots of vegetables (and cheese and sour cream, but that’s your dairy, right?!) and are such a quick and easy dinner to throw together on a busy week night! You could even prepare the chicken and rice beforehand, and then simply heat up and assemble everything when you’re ready for dinner. It’s also completely customizable, you can use other vegetables, add steak slices instead of chicken, make some fresh salsa…. the possibilities are endless!

Homemade Burrito Bowl
HOMEMADE BURRITO BOWLS
*Serves 2*

YOU WILL NEED
2 chicken breasts, skinless & boneless
Romaine lettuce
Cherry tomatoes
1 avocado (or store bought guacamole)
1 lime
1 can of corn
1 can of black beans
Shredded cheese
1 – 1 1/2 cups cooked rice
Sour cream
1 tbs chili powder
2 tsp garlic powder
1/2 tsp cumin
1 tsp salt
Dash of pepper

Homemade Burrito Bowls

DIRECTIONS

1. First, prepare your chicken. In a small bowl, mix together the chili powder, garlic powder, cumin, salt and dash of pepper. Butterfly your chicken breasts and rub each side with the chili powder mix. Then, grill them, let them rest for about a minute, and cut into medium sized slices.

2. Next, prepare all your toppings, you want everything in bite size pieces; so quarter your cherry tomatoes and shred the lettuce. You can either use store-bought guacamole, or make your own (I make it by simply mashing up a ripe avocado, seasoning it with salt and pepper, and adding a squeeze of about 1/2 of a small lime). Shred your cheese, and mix together the corn and black beans (make sure you drain the cans of the liquid and then thoroughly rinse the corn and beans).

3. Lastly, assemble your burrito bowls! Start with the rice on the bottom (I use brown rice to keep things healthy! You can add some cilantro to it, I leave it out, but if you like the flavor of it add it to the rice), then add the corn and bean mixture, lettuce, chopped tomatoes, sprinkle with the shredded cheese, top with the slices of grilled chicken, then add a dollop of sour cream and guacamole, topping the whole thing off with a wedge of lime to squeeze over the top!

Happy Cooking, Everyone!
I will be linking to these awesome blogs!

Banana Nutella Crepes

Posted on March 7, 2015

Hi Everyone! I have the most delicious yet easy dessert idea to share with you today! The other day, I got such a craving for some crepes and so last night, I decided to make a batch. Because what’s better than a sweet, indulgent dessert on a cold, snowy day. Crepes are one of my favorite desserts, especially stuffed with fruit, nuts and spread thick with Nutella! It has literally taken me years to even somewhat master the crepe making technique. They are still not as perfect as my mom’s, but I doubt that they ever will be! The key is in making a good batter and letting it rest for a while before cooking the crepes, not using too much oil, not turning the heat up all the way and getting the batter swirled around the pan as soon as it hits it. I always use this recipe, which makes a nice creamy batter. So if you’re in the mood for something sweet this weekend, give these a try!

Banana Nutella Crepes
BANANA NUTELLA CREPES
Makes about 12 – 15 crepes

YOU WILL NEED
Crepes (see recipe here)
Bananas, sliced
Nutella
Walnuts or pecans, chopped

Banana Nutella Crepes

DIRECTIONS
To make the crepes, follow these directions that I posted in my crepe recipe. To make these stuffed crepes, simply spread some Nutella on each crepe, add sliced bananas and chopped nuts, fold over and eat! There are so many other sweet filling options, so you can be as creative with this as you like! You could use sliced strawberries (another favorite when paired with Nutella!) & other fresh fruit, whipped cream, jam, lemon & sugar, caramel sauce, chocolate sauce…. and any other delicious thing you can possibly think of! I love savory crepes too, and will have to share some of my favorite savory filling recipes (including creamy mushroom!) with you one of these days!

Banana Nutella Crepes

For more Nutella deliciousness, check these recipes out!

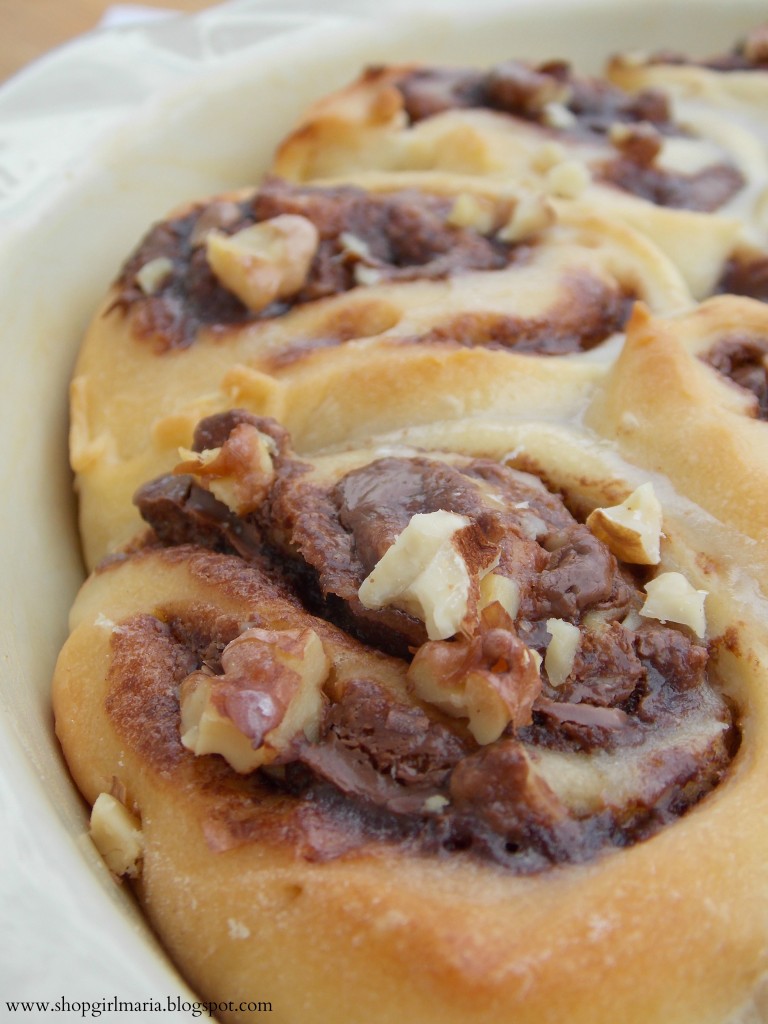
Nutella Swirl Rolls  Nutella Hot Chocolate
Left: Nutella Swirl Rolls (recipe here) Right: Nutella Hot Chocolate (recipe here)

  Grilled Nutella, PB and Banana Sandwich
Grilled Nutella, Peanut Butter & Banana Sandwich (recipe here)

Have a great weekend, Everyone!
I will be linking to these awesome blogs!

Pictures from a Winter Wonderland

Posted on March 5, 2015

Hello from a snowy winter wonderland, dear friends! I wanted to stop by and share a couple of pictures from our walk through the snow covered nature trails near our home today. The forecast last night called for 4 – 8 inches of snow today, but all we woke up to this morning was rain.  A couple of hours later the rain turned into snow, and another couple of hours later, the world outside transformed itself into a white winter wonderland! We decided to venture out for a walk in the afternoon and even though these pictures really don’t do it justice, I wanted to give you at least a little glimpse of how magical it was!

Screen Shot 2015-03-06 at 7.37.02 PM

Screen Shot 2015-03-06 at 7.32.41 PM

I love how everything is so quiet and still when it snows. The sparkly snow silently falls on the ground, and as if covers everything with a crisp white silence. Walking through the woods through the fresh snow, it was as if we were the only two people in this quiet world. All you could hear was the crunchy snow beneath our feet, and the occasional bird chirping to remind us that the world wasn’t completely frozen. There is a little path that leads through the woods to a small pond just a couple of feet away, but today, it looked more like a tree lined tunnel leading into snowy infinity.

Screen Shot 2015-03-06 at 7.33.24 PM  Screen Shot 2015-03-06 at 7.33.45 PM

Screen Shot 2015-03-06 at 7.32.03 PM  Screen Shot 2015-03-06 at 7.34.40 PM

Every time I walk through heavy snow, I think of my grandpa and how he used to have to walk through the mountains in Slovakia to get to school in the winter. It took him and his friends a couple of hours to get there every morning, and I can’t even imagine how cold and exhausted they must have been by the time they got to school! He said that some days they didn’t even make it there, because the snow was too deep to walk through, so they just had fun playing in the mountains. I guess the 1930’s were a very different world!

Screen Shot 2015-03-06 at 7.35.32 PM

Screen Shot 2015-03-06 at 7.36.12 PM

  Screen Shot 2015-03-06 at 7.33.02 PM

We came home covered in snow, our toes close to frozen, and so hungry from walking through all that snow! The day ended on a warm & cozy note; with a big bowl of hearty beef stew, a stack of magazines and a hot cup of tea! What better way to end the day! I found the new issue of Martha Stewart Living in our mailbox today, with the title “Bring on spring!” on the cover… even though I’ve been ready for spring for the past couple of weeks, this beautifully snowy walk was worth enduring the bitter cold weather for a little longer!

Screen Shot 2015-03-06 at 7.42.00 PM  Screen Shot 2015-03-06 at 8.21.42 PM

The snow is still coming down as I write this, and I’m ready for another hot cup of tea! I hope you’re all staying safe & warm wherever you may be!

Baked Banana Walnut Oatmeal

Posted on March 2, 2015

Hi Everyone! Happy Monday and happy March! Even though the month started off snowy and icy this weekend, the official beginning of spring is less than three weeks away now! Hopefully the weather catches up with that soon! I wanted to stop by and share a super quick and easy breakfast recipe with you today. One of my favorite sweet breakfasts are banana walnut muffins, and this baked oatmeal is basically those flavors, but in a slightly lighter and healthier oatmeal version! It’s a quick breakfast to throw together and bake off in the morning and it keeps you satisfied at least until lunchtime! If your mornings are very busy, you could bake this off the night before and re-heat a portion every morning, or bake individual little oatmeal cups that you can grab for a quick breakfast on the go!

Individual Baked Banana Walnut Oatmeal Cups

YOU WILL NEED

2 1/4 cups rolled oats

1/2 cup packed light brown sugar

1 tsp baking powder

2 cups fat-free milk

1 egg

1 tsp pure vanilla extract

1 tsp ground cinnamon

1 large ripe banana (or 2 medium sized), mashed

1/2 cup walnuts, coarsely chopped

Optional: 1 banana, sliced, to top oatmeal before baking

Baked Banana Walnut Oatmeal

DIRECTIONS

1. In a large bowl, whisk together the milk, egg and vanilla extract. Add in the rolled oats, brown sugar (this oatmeal is not super sweet so add in more sugar and/or honey if you like it sweeter), ground cinnamon and baking powder and stir well, until all ingredients are well combined. Mash a ripe banana (you want the banana to be ripe so you get lots of it sweetness in the oatmeal!) and coarsely chop your walnuts, add both into the oat mixture, and stir to combine. Preheat your oven to 375 deg F.

2. You can either bake this in a baking pan (I use one that measures about 8×10 inches), in which case you will want to very lightly spray it with cooking spray, then pour your mixture in (you can line the bottom with parchment paper to prevent sticking, too). If you want extra banana flavor, add banana slices on top of the oatmeal before baking. Bake for about 25 – 35 minutes, or until the edges turn golden brown and the center has set (if the oatmeal begins to brown too much, simply cover it with some foil as it bakes). Or you can bake the oatmeal in individual muffin liners instead, in which case you will want to fill the cups about 3/4 of the way, and bake them for about 15 – 20 minutes, or until they have set and the tops are a light golden brown color. Let cool for a couple of minutes, then serve with fresh fruit, or milk, sprinkled with more chopped nuts!

(*Recipe Notes: If you prefer a sweeter oatmeal, add in some extra sugar, this isn’t overly sweet. You can also substitute honey for the sugar, if you prefer that. The riper the banana, the more sweetness it will add to the oatmeal, too. I use fat-free milk in my baked oatmeal to keep it on the lighter side, but if you want to give it extra richness and creaminess, use a mix of whole milk and half-and-half instead. And if you’re feeling extra indulgent, splash in some heavy cream!)

Happy Baking, Everyone! Have a great week!

I will be linking to these awesome blogs!

February Favorites

Posted on February 28, 2015

Hi Everyone! So the month started off with snow, and it looks like it’s going to end with snow. It’s been beyond cold on most days, and I am so ready for spring at this point. I’m ready to exchange the winter boots for cute flats, my winter jacket for a trench coat and all the thick sweaters for thin spring cardigans! But despite the crazy weather, this month was filled with lots of wonderful things; seeing family and old friends, a great Valentine’s Day, cozy snow days, and lots of (way too many, in fact!) delicious treats!

Lindt  flowers

Left: There was entirely too much chocolate eating going on this month. I blame Valentine’s Day! Right: Beautiful flowers from my husband.

Indian dinner  Harrods Apron

Left: An Indian dinner on a cold, snowy February night. Right: My favorite Harrods apron.

Old recipes  Vanocka

Left: My great-grandmother’s handwritten recipe book. Right: One of my favorite Czech family recipes – Vanocka (recipe here).

rosehips  Traditional Slovak candlestick

Left: Frozen rose hips. Right: Cozying up a cold night.

I hope you all had a great February, and that March is even better! Stay warm and have a great rest of your weekend, everyone!

Vanocka – Traditional Czech Sweet Bread

Posted on February 23, 2015

Hello Everyone! I’m so excited to share one of my favorite family recipes with you today, for a Czech sweet bread called Vanocka. Sometimes, especially on the weekends, I really crave a sweet, indulgent breakfast, and this is one of my favorites. A vanocka is a rich, buttery braid filled with raisins and almonds, that’s beautifully golden brown and glossy on the outside (sometimes dusted with confectioners’ sugar), and super soft and rich on the inside; utter heaven in a bite. What’s even better is that you spread it thick with some butter and (preferably homemade) jam… what could be better with a big cup of tea on a lazy weekend morning or cold wintery afternoon! Traditionally, this bread is made for Christmas, but it’s baked and sold in stores all year round, so it’s not necessarily just a holiday treat. This recipe is one that I’ve adapted from my grandmother’s recipe, which we’ve been baking for years. I love the consistency of this dough; it’s so soft and it rises beautifully, making this bread wonderfully rich and fluffy. The perfect slice of home when I’m craving one!

Vanocka

YOU WILL NEED

4 to 4 1/2 cups all-purpose flour

3/4 cup granulated sugar

1/2 tsp salt

1 package instant dry yeast

1 stick (8 tbs) unsalted butter, softened

2 egg yolks

250 ml lukewarm milk (approx. 1 cup + 2 tbs)

Handful of raisins

Handful of sliced almonds

Egg wash: 1 egg & 1 tbs water

Optional: confectioners’ sugar for dusting

Vanocka

DIRECTIONS

1. In a small bowl add the dry yeast to the lukewarm water, cover and let sit for about 5 minutes, until the mixture is frothy on top. Then, pour it into the bowl of your electric mixer, and add in the flour, sugar, 2 egg yolks, softened butter and salt, and mix until a soft dough forms. (I usually add in the four cups of flour, and if the dough is still too wet and unworkable, I add in more flour by 1/4 cups, so you may need more than 4 1/2 cups of flour, or may not. The amount of flour I add in differs almost every time, so add in just enough to have a soft dough.) Towards the end, add in the raisins and almonds (reserve enough sliced almonds to sprinkle the top of your braid at the end), and form your dough into a ball. Place in a large, lightly greased bowl, cover and let rise in a warm spot until doubled in size (1 – 2 hours).

2. Once your dough has risen, take it out and divide it into 5 pieces (3 large, and two smaller. The three larger pieces will be for the large bottom braid, the two smaller pieces will be for the “twisted” braid that will go on top of the large braid.) Roll each of your 5 pieces of dough into a rope. The three larger pieces should be rolled into a rope about 22 inches long each, the smaller pieces should be rolled into a rope about 14 inches long each.

3. Line a large baking sheet with parchment paper. With the three longer ropes, make your braid directly on the parchment paper lined baking sheet (braid the ropes like you would your hair, and make sure you don’t braid it too tightly, the braid will expand as it rises again and bakes, so do it pretty loosely. Tuck in the ends underneath). Twist the two shorter braids together, then place them on top of your braid, tucking the ends under too. Cover with a kitchen towel, and let rise for another 30 minutes.

4. Preheat your oven to 350 deg F. Make your egg wash by whisking together an egg with a tbs of water, then brush your whole bread with it, and sprinkle it with your remaining sliced almonds. Bake for about 45 minutes to an hour, or until nicely golden brown and well baked through (and an inserted toothpick must come out clean). If the bread starts getting too brown as it bakes, cover it with foil so it doesn’t burn (I usually cover mine after about 20 minutes of baking). Let cool (and dust with confectioners’ sugar if you want some extra sweetness) before slicing, then serve with a generous spread of butter and your favorite jam!

(*Recipe notes: To make sure the raisins are plump, soak them in some boiling water for a couple minutes and drain them before adding them to the dough. You can use regular or golden raisins, or you could also add in candied fruit, as well as the sliced almonds or other chopped nuts. As for the bread’s shape, you could do the braiding differently – – for example do the bottom braid out of 4 ropes instead of three and the top part out of three ropes instead of a twist of two ropes, or even do three levels of braiding instead of two. I just do this because I find it the easiest. Some people insert skewers into the braided bread so the top layer doesn’t slip as it bakes, I don’t do this but you can do it if you’re worried about it slipping. By braiding the bottom braid pretty loosely and nestling the top one into it, it ensures that the bread holds its shape and there isn’t any slipping. You can simply form the dough into a round loaf and bake it off like that too, if you want to avoid all the braiding business and save some time. I adapted this recipe from my grandmother’s, and I converted all the metric measurements into cups. Also, make sure your ingredients are at room temperature since you’re baking with yeast, and this will help the yeast to work better and your dough to rise nicely. Traditionally, the vanocka is baked with fresh yeast, not packaged dry yeast, which may alter the texture/taste just slightly. The vanocka is definitely best eaten the same day, but you can store it for a couple days. I always toast mine in the toaster the next day, and it’s just as delicious as when it’s fresh!)

Vanocka

For more of my beloved family recipes, check these out:

Star Linzer Cookies  Linzer Cookie Hearts

Left: Linzer Cookie Stars (recipe) Right: Linzer Cookie Hearts (recipe)

Classic Apple Strudel  Traditional Czech Buchty

Left: Classic Apple Strudel (recipe) Right: Traditional Buchty – Sweet filled buns (recipe)

Happy Baking, Everyone!

I will be linking to these awesome blogs!

Homemade Maple Almond Granola

Posted on February 19, 2015

Hi Everyone! As the freezing temperatures outside continue, I’m on my fourth cup of tea, just trying to stay warm and thaw my hands out after coming in from the cold. I always seem to forget just how cold winter gets. As much as I like the snow, I’m impatiently counting down until the first day of spring … 28 more days to go! And until then, I’m filling my kitchen with extra warmth and sweetness to get through the rest of the winter. Besides being delicious, this Maple Almond Granola will fill your home with the warmest and sweetest aroma of the maple syrup, almonds and oats all baking together into a perfectly delicious breakfast treat or snack!

Homemade Granola 1

YOU WILL NEED

4 cups rolled oats

1 to 1 1/2 cups almonds, coarsely chopped

1/2 cup maple syrup

1/2 cup vegetable oil

3 tsp pure vanilla extract

1/2 tsp ground cinnamon

1 to 1 1/2 cups dried cranberries

Homemade Granola 3

DIRECTIONS

Preheat your oven to 325 deg F and line a baking pan with parchment paper (I use a 9×13 inch baking pan). Next, in a large bowl, whisk together the maple syrup, vegetable oil, vanilla extract and ground cinnamon, until you have a smooth mixture. Add in your oats and chopped almonds, and toss everything together until everything is well combined and fully coated in the maple syrup mixture. Pour everything into your baking pan and spread it out into an even layer using a spatula (pack it together pretty well). Bake for about 30 – 35 minutes, or until the oats begin to turn just slightly golden brown. Let cool, then break off into chunks, and add the dried cranberries, or any other dried fruit (or even chocolate chips! Dark chocolate chips would be delicious with the almonds and cranberries!) and store in an airtight container. Serve over yogurt or milk with fresh fruit or eat as a snack!

(*Recipe notes: Towards the last ten minutes or so of baking time, watch the granola very carefully, as it can go from not done yet to burnt VERY quickly. Bake it until it’s just slightly golden brown so you get a nice chunky texture, but don’t have a burnt flavor. Baking time will depend on your oven, you may need to bake it for longer/shorter. As for the ingredients, I didn’t use any additional sugar other than the maple syrup, so this granola isn’t very sweet. If you prefer a sweeter granola, you can add in a couple tablespoons of brown sugar, or honey, or substitute honey for the maple syrup all together and even increase its amount. You could also add other ingredients besides almonds and dried cranberries, like other chopped nuts or dried fruit (I like to add the dried fruit once the granola is done baking, not before), chocolate chips, coconut and various seeds. Add in as much or as little of the nuts/dried fruit/etc as you like!)

Homemade Granola 2

Happy Baking, Everyone! Stay warm and have a wonderful rest of your week!

I will be linking to these awesome blogs!

Back to top