Chocolate Covered Strawberries

Posted on February 9, 2015

Hello Friends! I don’t know if there’s a dessert that screams Valentine’s Day more than chocolate covered strawberries do! They couldn’t be easier to make or more delicious to eat, and would make the perfect little edible gift this Valentine’s Day, since it’s less than a week away now!

Chocolate Covered Strawberries 2

YOU WILL NEED

Strawberries

Melted chocolate (I used milk chocolate)

Chopped walnuts (or other goodies to coat the strawberries!)

Chocolate Covered Strawberries

DIRECTIONS

First, line a baking sheet with wax paper or parchment paper (you will need this later to lay the strawberries on). Next, melt the chocolate in a heat proof bowl over a pot of simmering water (you can also do this in the microwave, of course, I just always seem to burn the chocolate when I use my microwave! I think it might be a good idea for me to look at something like this Best Microwave Australia 2021 guide to look for a new microwave, because at this point I’m not sure if it’s me or the microwave that’s causing me to burn the chocolate. If you want to go the extra mile, you could even use a chocolate melter!), pour it into a small bowl, and let it cool for a minute or two. Wash and dry your strawberries (I like to leave the leaves on, I just think it looks prettier) and chop the walnuts (you could also use almonds, hazelnuts, sprinkles, melted white chocolate, or anything else you can think of!) then dip them into the melted chocolate, letting the excess chocolate drip off, then dipping them into the chopped walnuts. Lay them on the prepared wax or parchment paper and let them set completely. To package them, place each strawberry into a mini paper muffin liner and place them all into a small box. Wrap with a big bow and you have the perfect little edible Valentine’s gift! (…. or you could always eat them yourself if it’s too tempting!)

For more fun Valentine’s Day ideas, check these out!

Heart shaped puff pastry pockets Valentine's Cake

Left: Heart Shaped Puff Pastry Pockets (recipe) Right: Strawberry Layer Cake (recipe)

Double Heart Paper Chain DSCN3291

Left: Valentine’s Day Paper Garlands (tutorial) Right: Felt Heart Ornaments (tutorial)

Have a great week, Everyone!

I will be linking to these awesome blogs!
No-Knead Oatmeal Bread

Posted on February 3, 2015

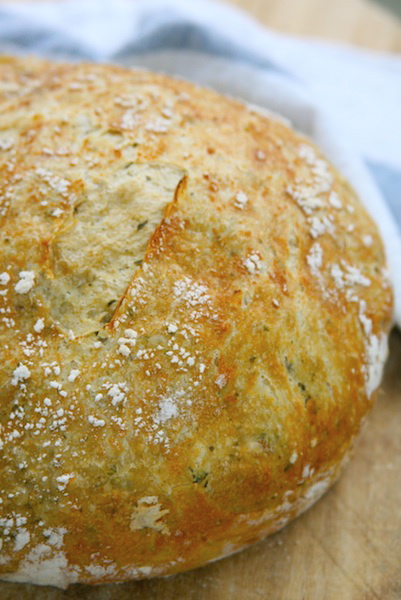
Hi Everybody! If you’ve been reading my blog for a while, you will know how much I love to bake bread! I love baking all different kinds of breads, but the no-knead recipe is one of my all-time favorites. I’ve made a couple different flavor versions of it, and have another one to share with you today! This oatmeal bread has a great earthy flavor and is super hearty; it would be perfect alongside a big bowl of steaming hot soup on a cold wintery night!

No-Knead Oatmeal Bread

YOU WILL NEED

2 cups all-purpose flour

1 cup whole wheat flour

1/2 cup plus 2 tbs rolled oats

1/2 tsp dry yeast

2 tsp salt

1 5/8 cup water

DIRECTIONS

1. In a large bowl, mix together the all-purpose flour, whole wheat flour, yeast, salt, 1/2 cup oats (reserve the oats for topping the loaf before baking) and water. (I used 2 cups all-purpose flour and 1 cup whole wheat flour, but you could reduce the amount of whole wheat flour to 1/2 cup and increase the amount of all-purpose flour to 2 1/2 cups if you prefer it.) Cover the bowl and let the dough rise for 12 – 20 hours (I usually make the dough the night before, then bake the bread off the following day) in a warm spot.

2. Once the rising time is up, uncover the dough, and you should see lots of bubbles on the surface (the dough will be very wet and sticky, but don’t worry, that’s exactly what it should look like). Turn the dough out onto a generously floured surface, and quickly shape it into a round loaf. Sprinkle it with more flour, then cover it with a kitchen towel and let it rest for another hour or two, until it has doubled in size.

3. Preheat your oven to 450 deg F, and place a Dutch oven or covered casserole dish inside it as it heats up. Once the oven is preheated, carefully take the dish out, and quickly place your loaf in it (optional: you can sprinkle it with the remaining 2 tbs of oats at this point), then cover the dish and bake for 30 minutes. Then, take off the lid and bake for another 15 – 30 minutes, until the loaf is golden brown and sounds hollow when you tap your fingers on it. Let the bread rest and cool before slicing.

*Recipe Notes: If you prefer less of a “whole wheat” flavor, reduce the amount of whole wheat flour and substitute it with all-purpose flour as mentioned above. My recipe also uses more salt and dry yeast than the original recipe does, but you can check out the original here.

For other no-knead bread recipes, check these out:

IMG_0637  Pesto No-Knead Bread

Left: NY Times No-Knead Bread (recipe) Right: No-knead Pesto Bread (recipe)

Whole Wheat Bread  No-Knead Bread Bowls 1

Left: Whole Wheat No-knead Bread (recipe) Right: No-knead Bread Bowls (recipe)

And speaking of cold winter nights, this is what it looks like outside right now… it’s a bitter cold wintery day, so a big bowl of soup and some of this freshly baked bread is definitely needed!

Rose hips

Happy Baking, Everyone!

I will be linking to these awesome blogs!

January Favorites

Posted on January 31, 2015

Hey Everyone! Happy Weekend! I wanted to stop by and share some of my favorite things from the past month with you today. I love the fresh start that the new year brings with it. Sometimes our minds and our bodies need to hit that refresh button and start over with a clean slate. Many people choose to revamp their homes to enable them to feel these ‘fresh start’ feelings. This might be with a home improvement or two, remodeling the kitchen or bathroom, perhaps even some fancy new decor like wall art! In fact, my friend has just bought herself cheap personalized neon signs, because she absolutely loves that retro vibe for her home. I’m surprised she managed to get such good quality for such an affordable price, these things are usually quite dear! It got me thinking actually, and I have been having a little browse online myself. There are just so many options for us online these days, the world, or the internet, is our oyster! And so that is why I’m going to be giving you a couple of clues as to what has worked for me this past month.

Whether it’s a healthier lifestyle or another goal you’re trying to reach, the beginning of a new year always seems to bring renewed hope and energy. For youngsters, it is mostly spent playing with their new gadgets and getting the utmost enjoyment out of it. My friend’s son got a drone like the ones from https://www.drdrone.ca/pages/mavic-mini for Christmas, and he has been a bundle of laughter and smiles ever since he opened it. I guess for us others, we’ve got a fresh start, a clean slate, a new leaf, and brand new year!

I always revamping my wardrobe in January too, I feel like it gets me ready for the new year. None of my new clothes will feature in this post, I’ll save that for another post, but I will let you in on a little secret. I’ve recently got an american express blue card, which means I get complimentary 2 day delivery from loads of retailers and it means you can buy tickets for concerts or sporting events before the general public can! Pretty nifty! Another little teaser is that I’ve been loving sportswear recently. I’ve bought a few athleisure items and I’ve even found some tracksuits for men that I’m going to buy for my partner. As I said though, the clothing will be in another post!

I hope you’ve had a great January, here are some of the littler but just as important things that I’ve been loving this month…

Desk flowers 2015 Memory Jar

Left: Bright yellow flowers on my desk to brighten up a gray day. Right: A fun little project for 2015 (you can see how to make your own memory jar here).

Marble Rolling Pin Ciabatta

Left: So it turns out that my husband read my Christmas Gift Guide for Bakers that I posted before Christmas, (you can see it here) because I found a couple of the items I listed in it under the Christmas tree! Including this marble rolling pin I had been wanting! Right: No-knead Ciabattas. I don’t know whether to call this a favorite this month, or an “un-favorite”, since I’ve been trying out different recipes and methods to bake the perfect ciabattas, but not quite successfully yet. Do any of you have a good recipe? I would love to know!

Jo Malone Chambray

Left: Jo Malone’s Wood Sage & Sea Salt scent. This is the freshest and most beautiful smelling perfume, and a current favorite. Right: Denim on denim. Too much?

191cad02e9d71faab81543a2305e9859 English Breakfast Tea

Left: Are any of you fans of Call the Midwife too? I loved the Christmas special this year and re-watched lots of the old episodes after Christmas. Right: And while watching Call the Midwife… lots of tea, of course!

I hope January was a good month for you and that 2015 has been off to a good start! What have been your favorite things this past month? I would love to know! Have a great February, Everyone!

Grilled Brie, Spinach & Strawberry Sandwich

Posted on January 30, 2015

Hello Everyone! How has your week been? Snow-covered? I hope you all had a good one, and that you have some fun plans for the weekend! I can’t believe the first month of 2015 is almost over… how fast did that fly by! It’s been a good year so far, and my 2015 Memory Jar (you can check it out here) is already filling up with lots of wonderful things that happened this past month! And speaking of wonderful things, let me tell you about this sandwich. I love grilled cheese sandwiches; whether they’re stuffed with just plain cheese or lots of other things, you can’t go wrong with gooey cheesy goodness oozing out of crispy toasted bread! This is a delicious little twist on the classic grilled cheese, filled with spinach, strawberries and some nice creamy Brie cheese that melts everything together into utter perfection as the sandwich cooks! Definitely a wonderful thing.

Grilled Brie, Spinach & Strawberry Sandwich

YOU WILL NEED

Fresh bread (white, sourdough or try this one)

Sliced Brie cheese

Sliced strawberries

Baby spinach leaves

Butter (for spreading on bread)

.DIRECTIONS

This recipe barely needs directions, but here’s how to make this sandwich! You will need two thin slices of bread, buttered on one side. Top the bottom slice (buttered side down) with thin slices of brie, spinach leaves, strawberries, and then another thin layer of brie slices, then top with the second slice of bread (buttered side up). Cook in a pan like a classic grilled cheese sandwich, for a couple of minutes on each side, until the bread is golden brown and the brie is oozing out of the sides! Serve with soup or salad!

For more sandwich deliciousness, check these recipes out…

Chicken&Pesto Croque Monsieur 1 DSCN0434 Grilled Nutella, PB and Banana Sandwich

Left: Chicken & Pesto Croque Monsieur (recipe HERE), Middle: Mushroom & Caramelized Onion Grilled Cheese (recipe HERE), Right: Grilled Nutella, Peanut Butter & Banana Sandwich (recipe HERE)

Have a great weekend, Everyone! Happy Cooking!

I will be linking to these awesome blogs!
Quinoa Three Ways: Breakfast, Lunch & Dinner Ideas

Posted on January 23, 2015
Hi Everyone! Happy Weekend! It’s a new year so you know what that means — New Year Resolutions! I’ve made mine already, I’m wanting to get started on writing a book because it’s been something I’ve put off for a long time – I’m determind to get it done this year, even if I have to find a ghostwriter! But, the two most common resolutions are to lose weight and to eat healthier. So, since lots of people made new year’s resolutions about a healthier diet, I wanted to share these three quinoa breakfast, lunch and dinner ideas with you today! I didn’t make a new year’s resolution about losing weight or sticking to a special diet; I’ve done that for years and found it never really lasts for me. Instead, what I’m trying to focus on is a healthier lifestyle, feeding my body the right way and breaking unhealthy habits. I’ve tried to lower my appetite too. This ensures that I’m not getting hungry in between meals. To stop myself from getting hungry, my friend recommended that I look into these bio x4 reviews to see if that supplement could help me. It did sound interesting, so that’s something that I might try out soon. I also cut sugar out of my diet for twenty-one days this January (that is, desserts and all sugary treats and drinks, I still eat fruit and other things that naturally contain sugar) and it’s been both difficult as well as eye-opening. I also decided to give different supplements and health options a go this year. I want to try and get my mood in a better state, because I’m sure I can improve it on those days I really don’t feel like doing anything. CBD products, such as those sold via Quicksilver Scientific, are known for balancing a mood out and calming any negative feelings you have. By committing to taking regular supplements, I’m hoping to get my mind and body to the healthiest I have felt in a long time. I realized just how addicting sugar is, and how much of my sugar-eating is out of habit, or boredom. I got so used to eating chocolate while sitting on the couch watching a movie in the evening, that I didn’t even realize how much of a habit it had become. Now, I’m not going to give sugar up forever because, frankly, I like dessert too much, and I love to bake! But I am going to watch how much of it I eat, and limit all that mindless eating! Plus, my teeth will definitely thank me for cutting down on my sugar intake, so that’s good. I’m sure my Dentist Coconut Grove will be glad to hear this news! So keeping with the healthier eating theme, here are some ideas for how to incorporate quinoa into any of your daily meals! Whenever I’ve limited my diet to mostly just vegetables, I’ve felt so hungry all day, but quinoa is a great way to make a light meal more hearty and satisfying!
.
BREAKFAST
.
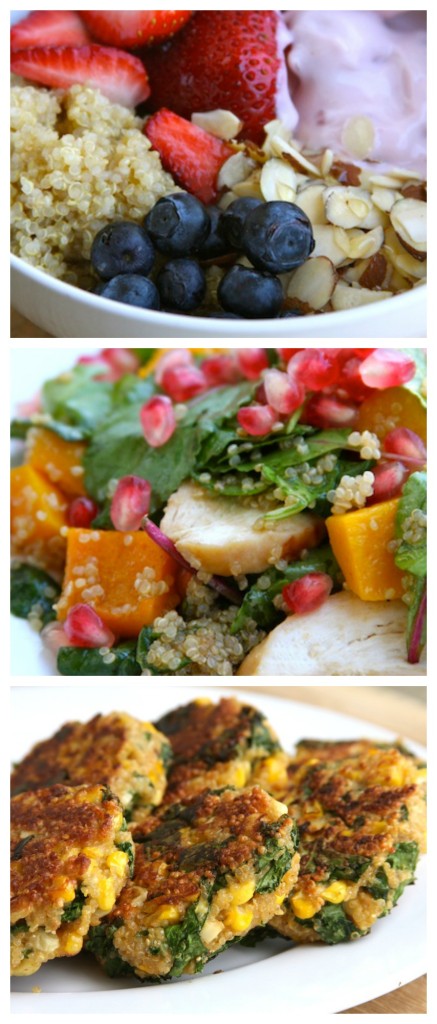
Quinoa Breakfast Bowl (recipe HERE)
This is a seriously hearty breakfast that will keep you full for a couple of hours at least, and will give you a great start to your day! You can make this quinoa bowl with whatever you like – I like to add some fresh fruit (berries are my favorite), yogurt and nuts to mine, but you could add whatever else you like. Other fruit and nuts, dried fruit, Greek yogurt, cinnamon…. whatever you like!
.
LUNCH
,
Kale Salad with Quinoa, Pomegranate Seeds and Roasted Butternut Squash (recipe HERE)
I love big, hearty salads for lunch and love adding in some quinoa, because it adds substance and makes a light salad more filling. This salad is filled with so many good things – baby kale, pomegranate seeds, chicken, roasted butternut squash and quinoa, of course! It’s so colorful and delicious, and one of my absolute favorites! For another great salad with quinoa, check out THIS one with spinach, butternut squash, walnuts & cranberries.
.
DINNER
,
Kale & Fresh Corn Quinoa Patties (recipe HERE)
Quinoa patties like these or like THESE Cheesy Broccoli & Quinoa Patties (which are still one of my most popular recipes on the blog!) are a great quick & easy yet still healthy dinner option. You can use whatever vegetables you like in them, add in some cheese or herbs to keep them vegetarian, or add some shredded chicken or turkey (great way to use leftovers!) if you like. Serve them with a big salad or a light yogurt sauce on top for a light but satisfying dinner!
,
Cooking Quinoa Tips…

1. You can cook quinoa with milk instead of water to make it more creamy (but be very careful not to burn the milk!)
2. To give the quinoa more flavor cook it in chicken or vegetable stock – it will absorb all its flavor.
3. Serve it warm or cold in salads – if you serve it warm, it’ll soak up all the salad dressing flavors, making it extra flavorful!
,
Whether you’ve cooked quinoa many times or have yet to try it, I hope this has given you some new ideas for how to use it in your cooking! What’s your favorite way to use it? I would love to know! Please let me know what your favorite quinoa recipes are! Thanks so much for stopping by today! Have a great rest of your day!
Quinoa for Breakfast, Lunch and dinner
Happy Cooking, Everyone!
I will be linking to THESE awesome blogs!

Rose & Hydrangea Teapot Arrangement

Posted on January 19, 2015

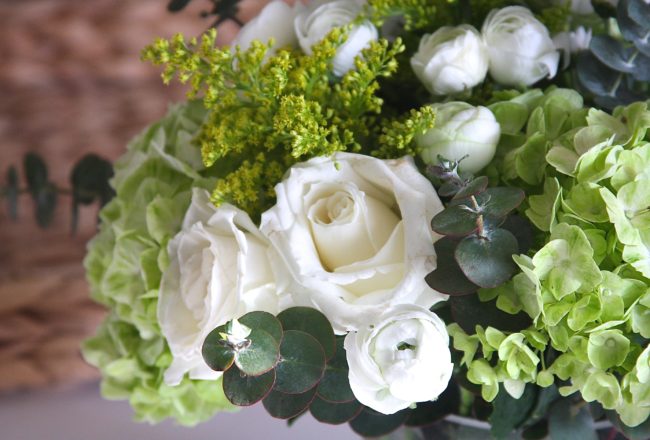
Hi Everyone! I hope you all had a great weekend, and that 2015 has been good to you so far! I don’t know about you, but this time of year is probably my least favorite of all; when winter starts feeling bitter cold and never-ending, and spring seems to be nowhere in sight. But as with most things in life, it’s the little things that brighten the world up. Like this sweet little teapot flower arrangement! This pale shade of blue and sunny yellow are one of my favorite color combinations, and roses and hydrangeas are some of my favorite flowers; the perfect way to brighten a dark and dreary day!

Teapot Flower Arrangement 5

One of my favorite things about arranging flowers is that you can have fun with it and be as creative as you want with the colors, flowers, and the container that you arrange them in! Since I’m a big tea lover, I have lots and lots of teapots (because you can never have enough, and because my mom shares my love of tea and supplies me with cute teapots regularly). Besides their obvious use, you can also use them to arrange flowers in and make sweet little arrangements like this. Little teapot arrangements like this would be so fun for a tea party, a bridal shower or a girly dinner party!

Teapot Flower Arrangement 9

You could of course use floral foam and place it inside the teapot, to insert your flowers into, but I just filled it with water and arranged the flowers. I used pale blue hydrangeas, white roses and sweet little miniature roses (I’m pretty sure that’s not their scientific name…!) and grouped them in little bunches, with the shorter stemmed flowers around the rim of the teapot, and the longer stemmed in the center, to build a dome shape for the arrangement. Remember to cut the stems at an angle, so the flowers can drink up as much water as possible, and they’ll stay fresh for longer.

Teapot Flower Arrangement 7

If you’re looking for more ideas, check out my other flower arrangements here! I hope you all have a good rest of your week, thanks so much for stopping by A Homemade Living today, see you again soon!

I will be linking to these awesome blogs!

DIY 2015 Memory Jar

Posted on January 15, 2015

Hi Everyone! Welcome to A Homemade Living! I’m so excited to finally let you see my new site that I’ve been working on for the past couple of weeks! You can still find all my old posts with my recipes, crafts and tutorials on here, and I’m looking forward to sharing lots of new ideas with you this year! I hope that 2015 has been off to a good start for you, and that if you made any new year’s resolutions, they are going even better than you expected! As much as I love Christmas and the whole holiday season, once it’s over and the Christmas tree and all the festive decorations are put away, I’m ready for the new year and for a clean start (and warmer weather. But that clearly isn’t happening anytime soon). I wanted to share a fun DIY project with you that’s a great way to start the year with the right mindset. I remember a couple of years ago, lots of my friends were writing “grateful journals”, writing down things they were thankful for every day. I loved the idea but never got around to doing it myself, so I thought I would do something similar with this 2015 Memory Jar idea. What you do is fill the jar with pieces of paper containing good memories and things you are thankful for over the course of the year, then look back at them when the year is over. Sometimes, simply focusing on the good and remembering to be thankful even for the little things, does more for the soul than we realize!

IMG_8437

YOU WILL NEED

Glass jar

Glitter

Mod Podge

Paintbrush

Clear tape

“2015” stencil on paper (hand-drawn or printed)

IMG_8445

DIRECTIONS

1. First, choose your jar (big enough to fill with lots of pieces of paper over the course of the year!) and make sure it’s clean, since you’ll be applying glitter onto its surface. (I used a clean candle jar, you can find my tutorial for how to remove wax from candle jars here!) Next, create your “2015” stencil. Either print the numbers on a piece of paper or hand-draw them. Place the piece of paper inside the jar (with the letters facing the glass so you can trace them) and position it where you want it, then secure it with some tape.

2. Using a paintbrush, fill in the numbers with mod podge one at a time, sprinkling each with glitter after you paint it with the mod podge. Carefully shake off the excess glitter, and let the glitter dry completely. Once dry, do another coat. Paint over each glittery number with mod podge again, and sprinkle each with glitter again. Shake off the excess glitter again, and let the jar dry. Then, paint each glittery number with a layer of mod podge one last time, to make sure all the glitter is stuck on well, and to give the numbers a smooth finish. Let the jar dry completely and clean off any excess glitter with a piece of soft fabric or a cotton ball. And once you’re done, it’s time to start filling the jar!

I hope that 2015 brings you lots of new adventures, things to celebrate and happy memories! Have a great week, Everyone!

I will be linking to these awesome blogs!

Colorful Kale Salad with Almonds & Pomegranate

Posted on January 2, 2015
Happy New Year, Everyone! I hope you all had a great Christmas and a wonderful holiday season! As always, it flew by too quickly… and now the task of taking down the tree and putting away all the decorations is waiting for me. As sad as that makes me, I’m ready for this new year, for a fresh start and for a little bit of a detox after all the holiday eating! Whilst for some that may mean looking into a Hyaluronic Acid Serum Manufacturer or two to help improve their skin, or deciding to take some supplements, I like to go down the food route. Is it too much of a cliche to start the new year off with a salad recipe?? I figured that a lot of people’s new year’s resolutions probably include something about healthy eating, so I thought some salad inspiration might be a good way to start 2015 off! I love good salads, and this one is filled with so many good (and good for you) ingredients; lots of greens that contain iron, hearty chicken and tabbouleh, creamy avocado, juicy pomegranate and crunchy almonds – a perfectly satisfying salad, and a most delicious way to kick off those new year’s resolutions!

.
COLORFUL KALE SALAD
YOU WILL NEED
Salad greens (I used a mix of baby kale, arugula & baby Swiss chard)
Shredded chicken (leave out to keep salad vegetarian)
Quinoa, Tabbouleh or Long Grain Wild Rice
Pomegranate seeds
Almonds
Avocado
Vinaigrette
.
DIRECTIONS
Toss your salad greens with your vinaigrette (I usually make a vinaigrette using olive oil, balsamic vinegar, salt, pepper and honey). Cook the tabbouleh (or quinoa/wild rice) according to package directions (either serve warm or cold in the salad) then add it to the salad, along with the rest of the ingredients!
.
Happy Cooking, Everyone!

2014 Favorites

Posted on December 27, 2014
Hi Everyone! I hope you all had a great Christmas! Today I wanted to share some of my favorite things from this past year with you. One of my favorite things about writing this blog, is that it’s sort of like a journal that I keep and share with you all. Setting up my own website is definitely one of the best decisions that I have ever made. As much as the design of my website has changed over the past year or so, I have learned so much about web design and running a blog that I never would have accomplished otherwise. So, if I have inspired you in any way to start a website of your own, then please feel free to read more about web design and the importance of using a virtual private server to host your website on makeawebsitehub.com. Ultimately, I’ve loved looking over all the posts from last year, because each one brings back a memory and reminds of something from this past year. As most years, 2014 was filled with some glorious highs and some pretty low lows, but looking back over the year, I’m so grateful for all the wonderful things I got to do, see and experience! I’ve loved sharing my ideas and recipes with you all this year, thank you so much for stopping by my blog and reading along! It’s so hard to pick just a couple favorites from the whole year, but here are a few…
.
Let’s start with the sweet tooth department. Because that’s always the best place to start!
.
.
It’s hard to narrow this down to just a couple sweet favorites, but THESE Three Ingredient Pecan Turtles are definitely near the top! The best thing about them, as the name suggests, is that you only need three ingredients! No need to make homemade caramel (something that seriously intimidates me. But I will conquer it in 2015. Maybe.) since these use soft caramel candies. They are so simple and easy to make and really, what could be better than chocolate, caramel and pecans all in one bite! Another favorite this year have been THESE Cinnamon Monkey Bread Muffins! There is just something about a “mini” anything, and these are no exception. Soft balls of dough rolled in melted butter and coated with cinnamon sugar – a winner in my book!
.
As for cookies, let’s talk about THESE Oatmeal Cookie Sandwiches with Cinnamon Cream Cheese Filling first. If you don’t like oatmeal cookies, these little sandwiches may just change your mind. Trust me. And as if a good old chocolate chip cookie isn’t enough, try THESE Caramel Stuffed Chocolate Chip Cookies!
.

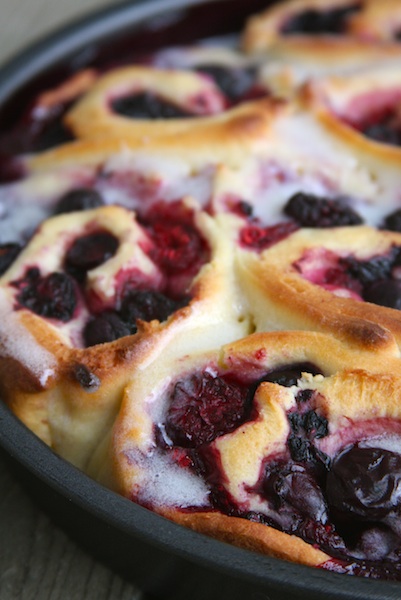
And as for healthy fruit desserts (just kidding about the “healthy” part…), I made THIS Strawberry Layer Cake for Valentine’s Day. For two people. And it was gone in two days (I hate to admit that, but it’s true!) It’s such an easy cake to whip up and looks like it took a lot more work than it really did! Another great berry dessert are THESE Cherry and Mixed Berry Sweet Rolls. I love making sweet rolls, and have made so many different variations of them; and these are one of my favorites!
.
There was also lots of bread baking this year…
.

After I tried THIS famous NY Times No-Knead Bread recipe, I literally couldn’t stop making this bread. I tried so many different flavor combinations and shared some of my favorites with you over the past year. I still love the original (left), but also love THIS Pesto No-Knead Bread version that I came up with – perfect alongside a salad, soup or pasta!
.
And here are two recipes I created using the no-knead bread recipe I mentioned above. THIS Chicken & Pesto Croque Monsieur and THESE No-Knead Bread Bowls.
.
There was also some cooking that happened.
.
THIS Venison Stew is one of my favorite things to cook (when there is venison in the freezer!) and this recipe remains one of my most popular recipes I’ve shared! I’ve found that no stew I make ever turns out the same, so it’s almost sort of hard to write down a precise stew recipe. Sometimes I add a little more of this and a little less of that… but that’s the good thing about stews, you can tailor it to your taste! I’ve also been on a serious salad kick this year, particularly this fall. I love big, hearty salads, and THIS Kale Salad with Quinoa, Pomegranate Seeds and Roasted Butternut Squash is one I’ve made over and over!
.
As for crafty things…
.

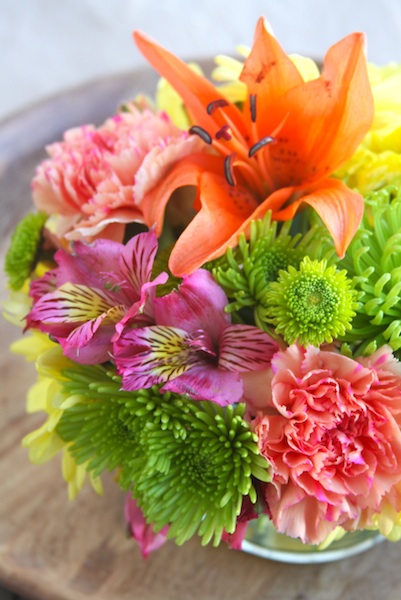
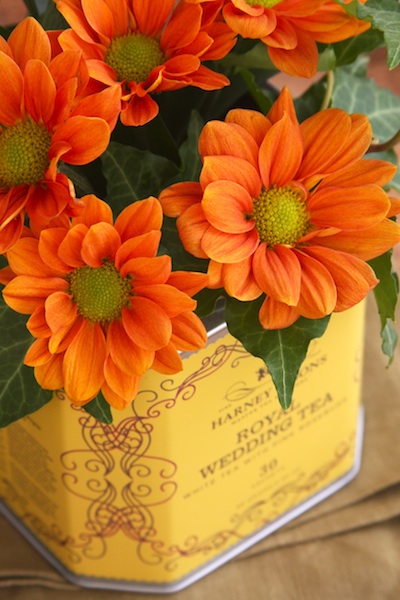
I love fresh cut flowers, and I shared some of my favorite little arrangements with you this year. I love using ordinary grocery store flowers and turn them into flower arrangements to brighten up the house, like I did in THIS post. It’s also fun to re-purpose old tea tins or other containers to keep flowers in, like I did HERE.
.

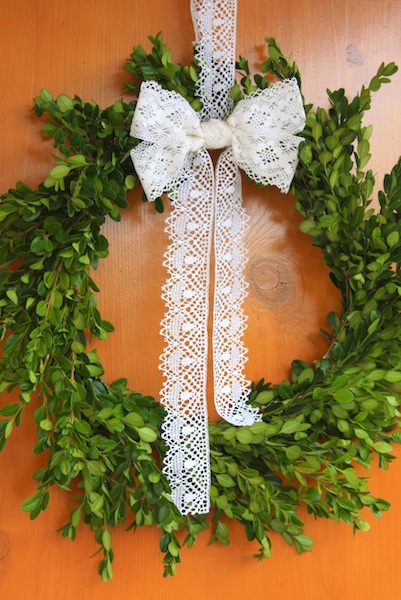
There were also several lace projects. I love lace, I just think it’s one of the prettiest materials! I used it to make THESE Lace Gift Wrap Bows, and to embellish THIS Summer Boxwood Wreath.
.

I love paper crafts too, and these two were some of my favorites this year. I made a couple different Valentine’s Day Garlands that you can check out HERE (since Valentine’s Day is around the corner again, and most stores are already selling Valentine’s candy… crazy!) I also love making personalized gift tags, and THESE Glittered Monogram Gift Tags were one of my favorites this year.
.
And the year ended with lots of Christmas fun…
.
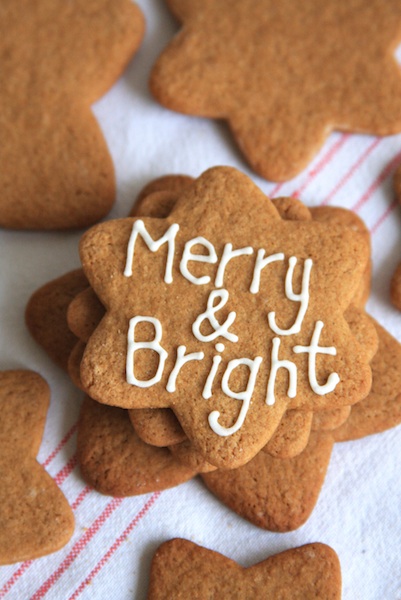
This Christmas season has flown by so quickly yet again, perhaps even faster than other years… but I did manage to share some of my favorite Christmas projects with you! If you’ve been reading my blog for a while, you will know how much I love gingerbread at Christmastime, so here are two of my favorite gingerbread creations this year. My Colonial Williamsburg inspired 2014 Gingerbread House that you can find HERE, and my Gingerbread Cookie Christmas Ornaments that you can find a tutorial for HERE!
.
I love love love wrapping Christmas presents, and I made THESE little Felt Gingerbread Man Gift Tags & Ornaments to embellish gifts this year. They are so easy to make, and add a cute little touch to a wrapped present. And for my last Christmas favorite… THESE Linzer Cookie Stars. My all-time favorite cookie to bake!Each of these posts brings back lots of memories, and I’ve loved sharing them all with you! Thank you so much for following along, for leaving comments and connecting with me! I appreciate each and every one of you! I hope that 2014 has been a good year for you, and that the coming year will be even better; filled with lots of new memories and experiences, fun times and happy days!
.
Enjoy the rest of your holidays, Everyone!

Merry Christmas!

Posted on December 24, 2014
Merry Christmas, Everyone! I hope you all have the most wonderful Christmas this year, whether it’s a busy travel-filled one, or a quiet one at home. May it be filled with special moments you’ll remember forever, and may you make new memories that will last a lifetime. And if you’ve spent many hours (even days!) cooking up a storm and baking lots of delicious treats, I hope you get to enjoy a couple relaxing days now! Thank you so much for stopping by my blog not just today, but throughout the year, for leaving comments and giving me lots of new ideas and inspiration, I appreciate every one of my readers! Have a wonderful Christmas!
.
.
“And there were shepherds living out in the fields nearby, keeping watch over their flocks at night. An angel of the Lord appeared to them, and the glory of the Lord shone around them, and they were terrified. But the angel said to them, “Do not be afraid. I bring you good news that will cause great joy for all the people. Today in the town of David a Savior has been born to you; he is the Messiah, the Lord. This will be a sign to you: You will find a baby wrapped in cloths and lying in a manger.” Suddenly, a great company of the heavenly host appeared with the angel, praising God and saying,
“Glory to God in the highest heaven,
and on earth peace to those on whom his favor rests.” (Luke 2: 8-14)
Back to top